
If your Ford F-150 clunks over bumps, wanders on the highway, or sags in the front, worn radius arm bushings are likely the culprit. These critical suspension components control front axle movement and maintain alignment. On 1992–1996 F-150 models with Twin I-Beam suspension, degraded bushings lead to poor handling, uneven tire wear, and accelerated damage to steering parts. This guide delivers a complete, step-by-step walkthrough for replacing radius arm bushings, covering bolted and riveted setups, correct installation techniques, and pro tips for success.
Identify Failed Radius Arm Bushings
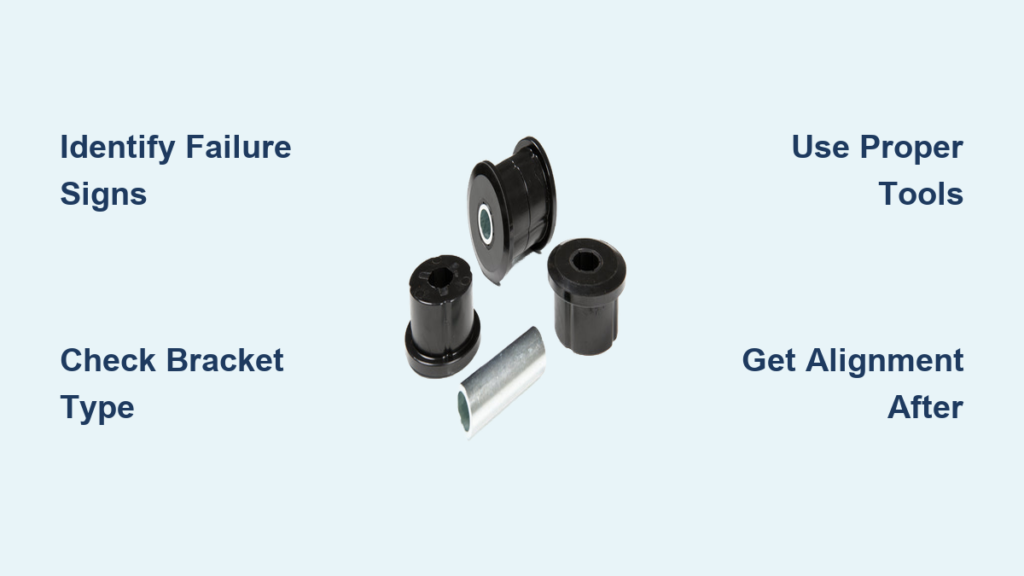
Recognize Common Failure Signs
Worn bushings show clear symptoms long before complete failure. Listen and feel for loud clunking or popping when accelerating, braking, or hitting bumps. Front-end sag occurs when the rubber collapses, lowering ride height. Steering becomes vague or wanders, especially on uneven roads. Uneven front tire wear develops from misalignment. Visually inspect for cracked, split, or missing rubber. Excessive play appears when rocking the radius arm at the frame mount.
Pro Tip: Even if only one side appears damaged, replace both. Aging affects both sides equally, and mismatched bushings cause imbalance.
Inspect for Hidden Wear
Remove the front wheels and visually examine the bushing stack at the frame end. Look for missing plastic spacers, which are common even if rubber seems intact. Metal-on-metal contact indicates total bushing failure. Check for worn cup washers or deformed retainers. Inspect for rust buildup inside the bracket or around the outer sleeve.
Expert Note: Failed bushings often mask wear in tie rods and idler arms. After replacement, previously unnoticed looseness may appear. Plan for a full front-end inspection.
Confirm Your F-150’s Suspension Type
Verify Twin I-Beam Compatibility
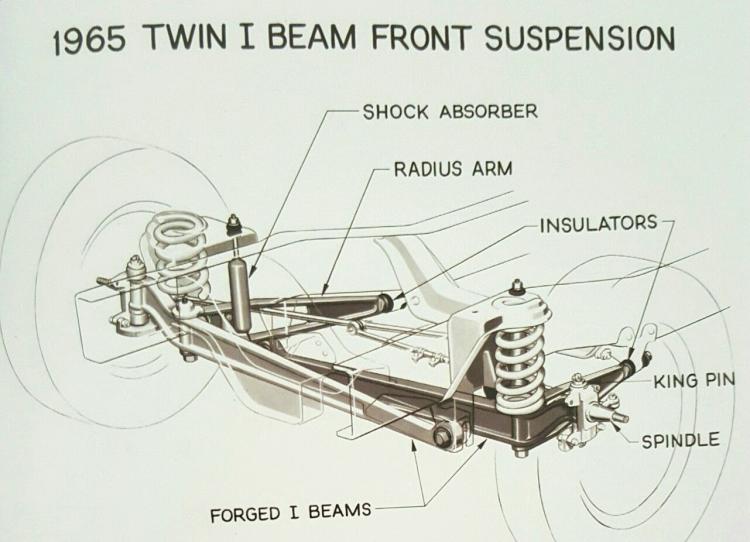
This procedure applies only to 1992–1996 Ford F-150s with Twin I-Beam front suspension, solid front axle such as Dana 44, and radius arms connecting the axle to the frame. If your truck has independent front suspension, this guide does not apply.
Check Bracket Mounting Style
Two frame-end bracket types exist. Bolted brackets use nuts and bolts, making removal easier. Riveted brackets are common on 1995–1996 models and require drilling or grinding for removal.
User Insight: Riveted setups take two to three times longer due to disassembly complexity. Plan accordingly.
Gather Required Tools and Parts

Essential Hand Tools
You will need several critical hand tools for this job. A 1-1/8 inch or 28mm socket is essential for the radius arm retaining nut. Sockets in 16mm, 17mm, and 18mm fit shock, stabilizer link, and bracket bolts. A 19mm socket fits wheel lug nuts. A breaker bar with cheater pipe helps with seized nuts. A torque wrench ensures proper final bolt tightening. Ratchet straps or a come-along with 2,000 to 4,000 pound capacity aligns components. A pry bar and rubber mallet position and seat parts.
Power and Specialty Tools
A high-torque impact gun delivering 1,400 to 2,100 ft-lbs breaks loose stubborn nuts. An angle grinder with cutoff wheel removes rivets or cuts seized sleeves. An air chisel breaks apart bonded rubber and metal bushings. A hammer and punch drives out rivets. Alignment punches help line up bracket holes.
Replacement Parts Checklist
| Component | Recommendation |
|---|---|
| Bushings | Prothane polyurethane or Moog OEM-style rubber |
| Hardware | Moog kit includes metal sleeve; Prothane does not |
| Fasteners | Grade-8 bolts, lock washers, nuts. Do not reuse old hardware |
| Lubricant | White lithium grease for poly or clear silicone paste for rubber |
Pro Tip: Many mechanics use Prothane bushings plus Moog hardware for full coverage and durability.
Prepare the Vehicle Safely
Secure and Lift the Truck
Park on level ground and engage the parking brake. Chock the rear wheels to prevent rolling. Loosen front lug nuts slightly. Lift the front end with a floor jack. Support with jack stands under reinforced frame points. Remove the front wheels.
Support the Suspension
Place a floor jack under the radius arm or hub before removing any bolts. This prevents the axle from dropping suddenly and damaging brake lines or steering components.
Address Side-Specific Obstacles
The driver side may have the fuel filter bracket blocking access. Remove the bracket bolt nut for clearance. The passenger side is generally easier with fewer obstructions.
Safety Warning: Never hang the brake caliper by its hose. Remove and suspend it with a wire or bungee cord.
Remove the Old Bushing Assembly
Relieve Suspension Tension
Support the radius arm with a floor jack. Remove the shock absorber upper bolt and stabilizer bar link bolt to increase suspension travel. Optionally remove coil spring top bolts to allow more droop, which keeps the spring in place.
Remove the Retaining Nut
Use a 1-1/8 inch socket and high-torque impact gun to remove the large retaining nut. If the nut is seized, soak it with PB Blaster for 15 to 30 minutes. Use a breaker bar with extension for leverage. Fully charged impact tools can deliver up to 2,100 ft-lbs, which is enough to break most stuck nuts.
Warning: Support the arm before nut removal. Sudden drop can damage components.
Disconnect the Axle-End Bolt
Remove the pivot bolt and nut connecting the radius arm to the front axle. The brake caliper does not need to be removed. Carefully lower the arm for access.
Extract the Old Bushing and Sleeve
The metal outer sleeve is bonded to the rubber and must be removed. Use an angle grinder to cut the sleeve lengthwise, then peel it out. For stubborn cases, use an air chisel to break it apart. Apply brief heat with a propane torch to soften the bond, but avoid overheating the frame. Remove all rubber fragments and clean the bracket with a wire brush or die grinder.
Inspect for Missing Components
Check if the plastic spacer or cup washers are cracked or missing. Some users report only the spacer remained while the rubber had fully degraded.
Install New Radius Arm Bushings

Prepare the New Kit
Compare old and new bushings. Aftermarket poly bushings may be thicker. Lubricate all contact points including inside the bushing bore, the frame lip where the plastic sleeve sits, and the bracket surfaces. Use white lithium grease for polyurethane such as Prothane or Energy Suspension. Use silicone paste for rubber.
Critical: Rotate the bushing so the flat spot faces the lubricated area to reduce friction and water ingress.
Assemble the Bushing Stack
Install in this order from inside the frame outward. First install the metal outer sleeve. Then add the plastic bushing or wear sleeve. Next install the rubber or polyurethane bushing. Add the cup washer or washers. Finally install the retaining nut.
Critical: Reversing the order causes premature failure. Match the wear pattern of the old bushing for correct orientation.
Reinstall the Radius Arm
Jack up the front suspension slightly to align the radius arm with the frame mounting point. Insert the arm into the frame bracket. Temporarily install the axle-end bolt to hold position.
Tip: If the new bushing is thick or tight, use a come-along or ratchet strap to pull the front axle rearward. Attach from front differential to rear frame point. This creates clearance to insert the metal sleeve and start the nut.
Seat the Assembly
Once the nut is started, continue pulling the axle back with the come-along. Hand-tighten the nut to pull components into place. Tap the ball joint lightly with a hammer to help seat the arm fully. Ensure the bushing sits flush against the frame with no binding or twisting.
Reassembly and Final Tightening
Torque the Retaining Nut
Tighten the retaining nut until it bottoms out. You will feel the threads stop advancing and may experience slight bounce. There is no official torque specification for the radius arm retaining nut. Target approximately 1,800 ft-lbs using a high-torque impact gun. Ensure the nut is fully seated and the assembly feels solid with no play. Do not overtighten to the point of deforming the rubber or polyurethane.
Reconnect Suspension Components
Reinstall the shock absorber upper bolt. Torque to 51 ft-lbs using an 18mm socket and 17mm wrench. Reconnect the stabilizer bar link. Reinstall the top coil spring mount bolts. Tighten all fasteners securely.
Final Torque Sequence
Lower the vehicle slightly so the suspension bears weight while the wheels remain off ground. Fully torque all suspension bolts to manufacturer specifications. Lower the vehicle completely. Reinstall wheels and tighten lug nuts in a star pattern to 100 ft-lbs.
Perform Post-Replacement Checks
Double-check all fasteners for tightness. Verify bushing seating with no gaps, twisting, or binding. Inspect brake lines and hoses for kinks or stress. Test drive at low speed over bumps to check for noises or vibrations.
Critical Reminder: Always get a wheel alignment after replacing radius arm bushings. Misalignment leads to rapid tire wear, poor handling, reduced steering precision, and premature wear on other suspension components.
Frequently Asked Questions About Ford F-150 Radius Arm Bushing Replacement
How do I know if my radius arm bushings are bad?
Common signs include loud clunking over bumps, front-end sag, steering wander, uneven tire wear, and excessive play when rocking the radius arm. Visually inspect for cracked, missing, or disintegrated rubber.
Can I replace just one radius arm bushing?
It is recommended to replace both sides even if only one appears damaged. Aging affects both sides equally, and mismatched bushings cause imbalance and handling issues.
How long does it take to replace radius arm bushings?
Bolted brackets take approximately 1.5 to 2 hours per side. Riveted brackets on 1995 to 1996 models take 3 to 6 hours per side due to additional disassembly time.
Do I need a wheel alignment after replacing radius arm bushings?
Yes, a wheel alignment is mandatory after any suspension work. Misalignment causes rapid tire wear, poor handling, and premature wear on steering components.
What brand radius arm bushings are best?
Prothane and Energy Suspension offer durable polyurethane bushings. Moog provides OEM-style rubber with included hardware. Many mechanics combine Prothane bushings with Moog hardware for complete coverage.
Can I reuse the old hardware?
Replacement is strongly recommended for all bolts, washers, and nuts. Reuse old hardware only if free of cracks, deformation, or stretched threads.
Key Takeaways for Replacing F-150 Radius Arm Bushings
Replacing radius arm bushings on your 1992–1996 Ford F-150 restores ride quality, eliminates clunking, and improves steering precision. The job requires proper tools including a high-torque impact gun, 1-1/8 inch socket, and a come-along for pulling the axle into alignment. Choose quality bushings such as Prothane or Moog, and always replace hardware rather than reusing old fasteners.
Whether you have bolted or riveted brackets affects your timeline significantly, so identify your bracket type before starting. Thoroughly clean all mounting surfaces and apply appropriate lubricant to prevent squeaking and ensure proper fit. Finally, schedule a professional wheel alignment after completion to preserve tire life and maintain safe handling.


