
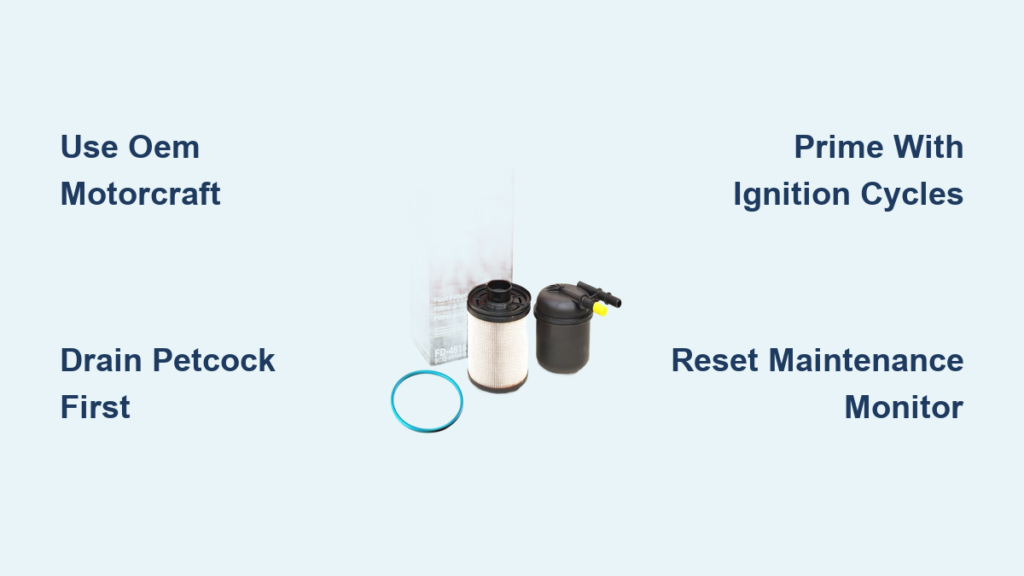
A clogged fuel system can destroy the expensive CP4 pump in your Ford F350 diesel engine within minutes. Changing the fuel filter on Ford F350 diesel trucks regularly prevents catastrophic failure and saves you thousands in repair bills.
This guide details the exact steps to replace both primary and secondary filters on 2011 through 2025 models using OEM parts. You will learn proper draining techniques, priming procedures, and how to reset your maintenance monitor safely.
Locate Both Fuel Filters on Your 6.7L Power Stroke
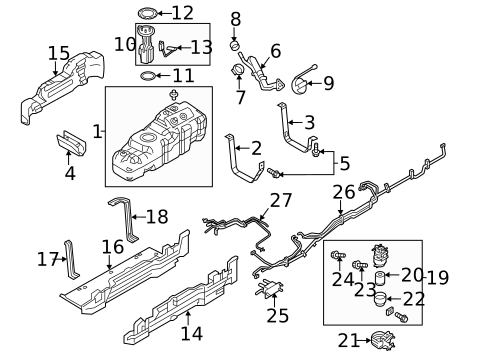
The 6.7L Power Stroke utilizes a dual-filter system to ensure maximum protection for the high-pressure fuel injection components. You must replace both the primary and secondary filters to maintain optimal engine performance and longevity.
Find the Lower Frame Rail Primary Filter
The primary filter sits on the driver’s side frame rail just behind the cab near the transfer case area. This cylindrical housing features a drain valve at the bottom and an electrical connector for the water-in-fuel sensor on top. It handles coarse filtration and separates water before fuel reaches the high-pressure pump.
Identify Upper Filter Configuration by Year
The secondary filter location changes based on your specific model year production date.
* 2011–2016 models: Integrated into the in-tank lift pump assembly accessible from above or below.
* 2017 and newer models: Relocated under the hood near the front of the engine block.
Always verify your truck configuration before purchasing parts or starting work. Using the wrong procedure can damage electrical connectors or leave air trapped in the system.
Gather Essential Tools and OEM Motorcraft Parts
Using correct tools and genuine parts ensures a safe job that protects your CP4 pump from contamination. Cheap alternatives often fail to meet strict micron filtration requirements.
Required OEM Motorcraft Filters
Always use Motorcraft fuel filter kits designed specifically for your model year.
* FS-4616 or FS-4618: Common for 2011–2016 model years.
* FS-4620 or model-specific kit: Required for 2017 and newer trucks.
Aftermarket filters may have incorrect micron ratings or weak gaskets that shed debris into the system. This risk is not worth taking when CP4 pump replacement exceeds two thousand dollars.
Essential Tools List
Gather these items before starting to ensure a smooth process without interruptions.
* 8mm socket and ratchet for housing bolts
* 7mm socket for clamps or secondary housing components
* 32mm socket to remove bowl on 2011–2016 lower filter
* 6-inch extension for tight frame rail access
* Flathead screwdriver and pick tool for electrical connectors
* Torque wrench targeting 84 Nm or roughly 7 ft-lbs
* Drain pan with 1-gallon capacity to catch diesel
* Brake cleaner and clean rags for surface preparation
* Diesel fuel or light oil to lubricate new O-rings
Remove Upper Fuel Filter Based on Model Year
Procedure depends entirely on whether your F350 has the under-hood or in-tank secondary filter configuration. Identify your setup using the location guide above before proceeding.
Under-Hood Filter Removal for 2017+ Models
Place paper towels under the housing to catch any drips during removal. Locate the three quick-connect fuel lines at the rear of the filter housing assembly.
- Pinch the locking tabs on each connector firmly.
- Pull lines straight off while expecting minor fuel seepage.
- Grasp the old filter unit and twist counterclockwise until it stops.
- Lift straight up and out as one complete unit carefully.
Work slowly to avoid damaging connectors since high-pressure leaks can occur from cracked plastic.
In-Tank Filter Removal for 2011–2016 Models
Lay rags around the lift pump housing area to absorb dripping diesel fuel. Find the electrical plug on the lift pump housing and squeeze both bottom tabs.
- Gently pull the connector straight out without yanking wires.
- Press the release collar on each hose and slide them off barbed fittings.
- Rotate the center housing counterclockwise until it feels loose.
- Wiggle gently and lift straight up to remove the old filter.
Install New Upper Filter Correctly

Ensure a secure fit and leak-free seal during reassembly to prevent air intrusion. Proper installation protects the high-pressure fuel system from contamination.
Installation Steps for Under-Hood Models
Angle the new filter to avoid interference with surrounding hoses during insertion. Push down until fully seated then twist clockwise until alignment eyelets match.
- Push each line onto its nozzle until you hear a distinct snap.
- Confirm the locking clip is fully engaged on every connection.
- Perform a tug test on each connection to ensure no movement occurs.
Installation Steps for In-Tank Models
Insert the new filter at an angle away from hoses to prevent pinching. Push down fully then pull hoses slightly back before rotating housing clockwise.
- Ensure plastic locking clips extend past the visible guide line.
- Press down firmly on the entire assembly to seat it.
- Perform a tug test to verify it does not lift out easily.
Drain and Remove Lower Frame Rail Filter

The frame rail filter holds water and contaminants so you must drain it first before removal. Skipping this step creates a large mess and potential safety hazard.
Open Petcock Valve Safely
Position your drain pan directly beneath the housing to catch flowing diesel. Turn the drain valve one-quarter turn clockwise to open the petcock fully.
- Allow 0.25 to 0.5 gallons of fuel and water to drain completely.
- Wait until flow stops entirely before closing the valve tightly.
- Keep sparks and flames away since diesel is flammable.
Disconnect Sensor and Loosen Housing Bolts
Locate the water-in-fuel sensor connector on top of the housing. Press the release tab or use a pick tool to disconnect it straight without pulling wires.
- Use an 8mm socket with extension to loosen all housing bolts.
- Loosen bolts in a star pattern to release pressure evenly.
- Leave bolts in place until the end to control fuel spill amount.
- Remove final bolt while supporting housing then slide out old filter.
Note the orientation carefully as the orange nozzle must face right when facing the filter.
Clean Housing and Inspect for Contaminants
Contaminants left behind can clog the new filter immediately or damage injectors. Thorough cleaning is critical for long-term reliability.
Check for Metal Shavings and Debris
Inspect the old filter and housing interior for signs of system wear. Sand or rust indicates poor fuel quality while metal flakes suggest CP4 pump wear. Seek professional diagnosis immediately if you find metal particles.
Clean Gasket Groove Thoroughly
Spray the housing tray with brake cleaner to dissolve any remaining diesel residue. Use a flathead screwdriver to scrape out old gasket material from the groove.
- Wipe dry with clean paper towels ensuring no residue remains.
- Verify the groove is completely smooth before installing new parts.
- Skip cleaning at your own risk as it causes immediate clogging.
Install New Lower Filter with Proper Torque
Proper alignment and sealing prevent leaks and potential engine damage. Follow these steps precisely to ensure a successful installation.
Lubricate and Insert New O-Ring
Retrieve the new gasket from your Motorcraft kit immediately. Apply a light coat of diesel or oil to the O-ring to prevent pinching.
- Press into the groove ensuring full contact with no twists.
- Empty residual fuel from tray into your drain pan.
- Align new filter with arrow pointing forward and ribbed side up.
- Slide in and push left until it clicks and locks securely.
Reinstall and Torque Housing Bolts
Position housing back over the frame rail carefully. Start all bolts by hand to prevent cross-threading damage.
- Tighten in a crisscross pattern using a ratchet.
- Torque to 84 Nm if using a torque wrench for accuracy.
- Apply hand-tight plus one-quarter turn if no torque tool exists.
- Avoid over-tightening as it cracks plastic housings easily.
Prime Fuel System and Perform Final Checks
Air in the lines prevents starting and can destroy the CP4 pump quickly. Proper priming is mandatory before attempting to start the engine.
Perform Ignition Cycling Procedure
Turn key to ON position without starting the engine to engage the lift pump. Listen for fuel pump whirring for approximately 30 seconds.
- Turn key OFF after pump stops running.
- Repeat this cycle exactly six times for maximum air purging.
- Attempt to start engine after final cycle completion.
- Expect rough idle for 30 to 60 seconds as air exits.
Verify No Leaks and Reset Monitor
Inspect upper filter connections and lower housing bolts while engine idles. Look for drips at petcock or sensor areas before driving.
- Wipe down housing and frame with brake cleaner to remove residue.
- Navigate to Settings then Vehicle then Maintenance on dashboard.
- Select Fuel Filter and hold OK button until reset confirmation appears.
- Shut down immediately if leaks appear and re-tighten connections.
Frequently Asked Questions About Changing Fuel Filter on Ford F350 Diesel
How often should I change the fuel filter on my Ford F350 diesel?
Ford recommends replacing both filters every 15,000 to 22,500 miles depending on your model year. Many owners align this maintenance with oil changes for consistency and reliability.
Can I use aftermarket fuel filters instead of Motorcraft OEM parts?
You should strictly use OEM Motorcraft filters to protect your CP4 pump. Aftermarket units may shed debris or fail to meet micron ratings required by the high-pressure fuel system.
What happens if I skip priming the fuel system after filter change?
Skipping priming leaves air in the lines which prevents starting and can destroy the CP4 pump. Always perform six ignition cycles to purge air before attempting to start.
Why is my water-in-fuel light still on after changing the filter?
The sensor may be disconnected or wet with residual water. Re-seat the connector securely and drain the system again if the light persists after replacement.
How much diesel fuel will drain out when changing the lower filter?
Expect approximately 0.25 to 0.5 gallons of diesel and water to drain from the frame rail housing. Always have a drain pan ready before opening the petcock valve.
Key Takeaways for Changing Fuel Filter on Ford F350 Diesel
Changing the fuel filter on your Ford F350 diesel protects the expensive CP4 pump and ensures long engine life. Always use OEM Motorcraft parts, clean the housing thoroughly, and prime the system with six ignition cycles.
Perform this maintenance every 15,000 to 22,500 miles to avoid catastrophic fuel system failure. Gather your tools and OEM filters today to keep your 6.7L Power Stroke running reliably for years.


