

Changing a brake rotor on your Ford F-150 is a practical DIY job that saves you hundreds in labor costs while restoring your truck’s stopping power. If you’re hearing grinding noises, feeling pulsation through the brake pedal, or noticing your F-150 takes longer to stop, worn rotors are likely the culprit. This guide walks you through replacing front or rear rotors on 2005 through 2020 F-150 models, covering every tool, torque spec, and expert technique you need to get the job done right.
You’ll learn how to identify failing rotors, gather the proper tools, safely lift your truck, remove stuck rotors, and reinstall everything with correct torque specifications. We’ll also cover the critical bedding-in procedure that ensures your new brakes perform optimally and last thousands of miles.
Signs Your Ford F-150 Rotor Needs Replacement
Your F-150 will tell you when rotors need attention. Watch for these common symptoms that indicate it’s time for replacement.
Brake Pedal Pulsation and Steering Wheel Vibration
A warped rotor causes a rhythmic vibration that you feel through the brake pedal and steering wheel, especially at highway speeds. This happens when the rotor surface becomes uneven from heat stress, inconsistent wear, or dirt buildup on the hub face. If your truck shakes when slowing down, inspect the rotors immediately.
Unusual Brake Noises
High-pitched squealing usually means glazed pads or worn shims. Grinding sounds indicate metal-on-metal contact, which means your pads are completely worn and the rotor surface is being damaged. When you hear grinding, replace both rotors and pads on that axle immediately.
Visible Rotor Damage
Inspect your rotors for these issues. Deep grooves or scoring marks indicate excessive wear. Cracks near the hub are dangerous and require immediate replacement. Blue discoloration signals overheating from sustained heavy braking or a stuck caliper. Check the minimum thickness stamped on the rotor face, such as “MIN THK 24.4 mm,” and measure with a micrometer. Replace if within 0.015 inches of the minimum spec.
Tools and Parts Required for the Job
Having the right tools makes this job manageable for any DIY mechanic. Here’s what you need to gather before starting.
Essential Tools
Gather these tools before beginning your rotor replacement. A floor jack and three-ton jack stands are mandatory for safety. You’ll need a 21-22 mm socket for lug nuts and a 13 mm socket for caliper bolts. The caliper bracket bolts require either 18 mm for 2005 models or 21 mm for 2009-2020 trucks. A torque wrench with 1/2 inch drive and 20-200 ft-lbs range is critical for proper reassembly. A breaker bar or impact gun helps loosen stubborn nuts, and a C-clamp or piston compressor tool retracts the caliper piston. You’ll also need a dead-blow hammer, 2×4 block, bungee cord, and brake parts cleaner.
Required Parts and Supplies
Stock up on these items before starting. New rotors and brake pads must be replaced in axle pairs for even wear. High-temp silicone-based brake grease lubricates contact points without melting. Copper anti-seize compound prevents future rust bonding between rotor and hub. Have PB Blaster or penetrating oil ready for stuck components. For 2015-2020 models, Loctite 242 thread locker is required on bracket bolts.
Preparing Your F-150 Safely
Safety is non-negotiable when working under a vehicle. Follow these steps to secure your truck properly.
Park and Secure the Vehicle
Park on a level concrete surface and engage the parking brake. Chock the rear wheels if you’re working on the front rotors, or chock the front wheels if replacing rear rotors. This prevents the truck from rolling during the entire job.
Loosen Lug Nuts Before Lifting
Use a 21-22 mm socket and breaker bar to break the lug nuts loose while the wheel still touches the ground. F-150 lug nuts are torqued to approximately 150 ft-lbs, and breaking them loose while the wheel spins can be dangerous. Doing this now prevents spinning issues later.
Lift and Support the Truck
Position the floor jack under the factory lift point, which is usually marked by an arrow on the frame rail. Raise the truck until the wheel clears the ground, then place jack stands under solid frame rails. Never work under a vehicle supported only by a floor jack. Remove the wheel and set it aside.
Turn the steering wheel fully left for driver-side work or fully right for passenger-side access. This gives you better visibility and reach for the caliper.
Removing the Old Rotor Step by Step
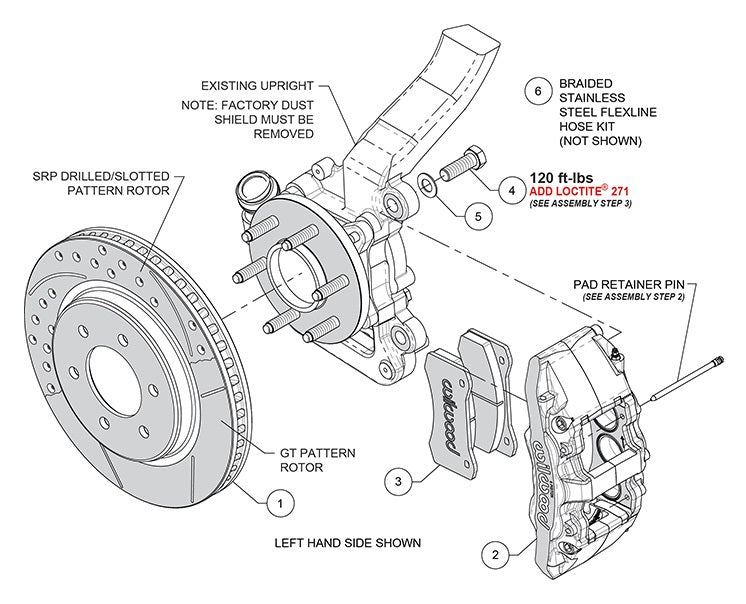
With the truck safely supported, follow this sequence to remove the old rotor without damaging other components.
Remove the Brake Caliper
Locate the two 13 mm bolts securing the caliper to its bracket, one on top and one on bottom. Remove both bolts using a ratchet or impact gun. Gently wiggle the caliper free from the bracket and hang it using a bungee cord or caliper hanger. Never let the caliper dangle by its brake hose, as this can crack the line and cause dangerous fluid leaks.
Retract the Caliper Piston
Open the brake fluid reservoir cap to prevent overflow when pushing the piston inward. Place an old brake pad against the piston face and slowly tighten a C-clamp to retract the piston into its bore. Stop when the piston sits flush with the caliper housing. If the piston won’t move, loosen the 11 mm bleeder screw slightly, push the piston in with a pry bar between the pads, then retighten the bleeder.
Remove the Caliper Bracket
Use an 18 mm socket for 2005 models or 21 mm for 2009-2020 trucks to remove the bracket bolts. The torque specifications differ by year. The 2005 F-150 requires 95 ft-lbs. The 2009-2014 models use torque-to-yield bolts spec’d at 184 ft-lbs, which must be replaced after removal. The 2015-2020 trucks use 125-184 ft-lbs and require Loctite 242 on the threads.
If bolts are corroded, soak them with PB Blaster overnight before attempting removal. Tap the bracket lightly with a rubber mallet if it’s seized.
Free a Stuck Rotor
In most cases, the rotor slides off by hand after bracket removal. If it’s rusted stuck, try these methods. Thread one lug nut backward onto the stud to protect the threads, then place a cut 2×4 block against the rotor edge and strike it with a dead-blow hammer. Rotate and repeat around the perimeter.
Some rotors, particularly OEM and Bosch units, have two 3/8 inch threaded holes. Insert 3/8 inch x 2 inch bolts into these holes and tighten evenly with an impact gun. The rotor will pop off cleanly.
For rear rotors with parking brake shoes, apply penetrating oil around the hub and tap from behind while rotating. You may need partial parking brake disassembly if the shoes are seized.
Installing the New Rotor Correctly
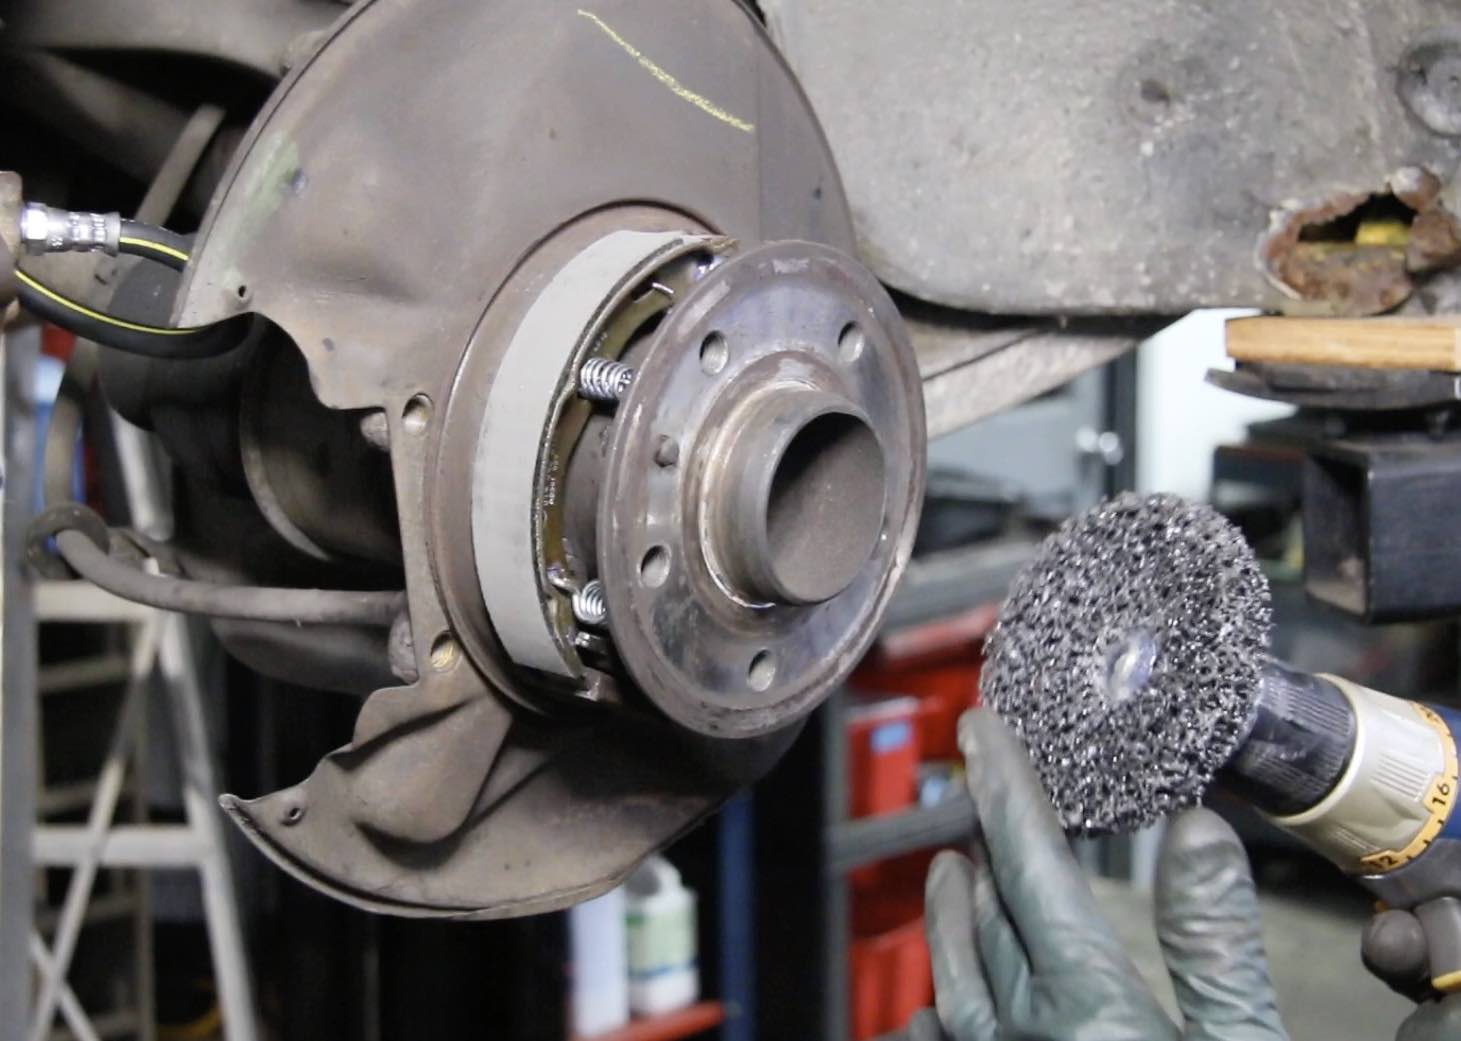
Proper installation prevents future problems like pulsating brakes and premature wear.
Clean and Inspect the Hub
Remove all rust, pitting, and old anti-seize from the hub face using a wire brush or emery cloth. An uneven hub surface causes rotor runout and pedal pulsation. Spray the cleaned hub with brake parts cleaner, then apply a thin layer of copper anti-seize to prevent future rust bonding. Do not apply any lubricant to the lug studs or friction surfaces.
Prep and Mount the New Rotor
Wipe the new rotor with brake cleaner to remove manufacturing preservatives and any oils from handling. For drilled or slotted rotors, ensure the directional arrow faces clockwise toward the rear of the vehicle. Slide the rotor onto the hub by hand. If you feel resistance, re-clean the hub. Temporarily secure with one lug nut to prevent shifting during reassembly.
Reassembling the Brake System
Reinstall components in the reverse order of removal, paying close attention to torque specifications and lubrication points.
Reinstall the Caliper Bracket
Position the bracket over the rotor and insert the bolts by hand. Apply Loctite 242 to the threads for 2015-2020 models. Torque to the appropriate specification. The 2005 requires 95 ft-lbs. The 2009-2014 needs 184 ft-lbs with new bolts. The 2015-2020 uses 125-184 ft-lbs.
Lubricate and Install Brake Pads
Remove the slide pin rubber boots and inspect them for cracks or swelling. Clean the pins with a dry rag, never using brake cleaner on rubber. Apply synthetic brake grease inside each boot cavity and reinstall the pins, twisting to distribute the lubricant. Check that the pins move smoothly.
Apply brake grease to the back of each pad, the caliper bracket contact points, and the shims. Avoid getting grease on the friction surfaces. Install the inner pad with tabs facing the piston and the outer pad facing the caliper body. Replace any bent or missing anti-rattle clips.
Reattach the Caliper
Slide the caliper over the pads and rotor. Insert the 13 mm mounting bolts and hand-tighten. Front calipers on 2015-2020 models torque to 27-30 ft-lbs. Rear calipers vary from 20-40 ft-lbs depending on year. Hold the slide pins with pliers if they try to spin during tightening, but avoid crushing the rubber boots.
Mount the Wheel and Final Torque
Place the wheel on the hub and hand-tighten lug nuts in a star pattern. Lower the truck completely, then use a torque wrench to tighten lug nuts to 88-100 ft-lbs. Recheck the torque after driving 50-100 miles to account for settling.
Testing and Bedding In New Brakes
Proper break-in procedure transfers friction material evenly and prevents glazing.
Pressurize the Brake System
Pump the brake pedal 5-10 times until it feels firm. Do not drive until the pedal has solid resistance. Check the fluid level and top off with DOT 3 or DOT 4 as needed.
Perform the Bed-In Procedure
New rotors and pads need careful break-in for optimal performance. Perform 3-5 moderate stops from 40 mph to 0 mph with steady pressure. Follow with 3-5 stops from 20-25 mph to 0 mph. Allow 30 seconds between stops for cooling. Avoid hard braking for the first 500 miles.
Expect mild odor, light smoke, or slight squeaking during break-in. This is normal. Persistent burning smell, dragging, or pulling indicates a problem that requires inspection.
Troubleshooting Common Issues
Even with careful installation, problems can occur. Here’s how to address them.
Pulsating Brake Pedal After Installation
This usually stems from a dirty hub or the rotor not seating properly. Re-remove the rotor, clean the hub thoroughly with brake cleaner, reapply copper anti-seize, and reinstall. Measure rotor runout with a dial indicator if the problem persists.
Squealing or Rattling After Replacement
Squealing indicates lack of lubrication. Apply brake grease to the pad backs, shims, and contact points, avoiding the friction surface. Rattling comes from loose or damaged anti-rattle clips. Replace them and ensure correct orientation.
Rotor Won’t Spin Freely
Check that the caliper piston is fully retracted and the pads are properly seated. A stuck piston or misaligned pad can cause drag that overheats the brakes.
Model-Specific Torque Specifications
Knowing your model’s specific requirements prevents damage and ensures proper reassembly.
2005 F-150
This model uses 18 mm bracket bolts torqued to 95 ft-lbs. No Loctite is required. Replace the pad clips, as they are common wear items.
2009-2014 F-150
These years use torque-to-yield bracket bolts at 184 ft-lbs. Always replace these bolts after removal. Jack bolt holes are common on OEM and Bosch rotors.
2015-2020 F-150
The 21 mm bracket bolts require 125-184 ft-lbs with Loctite 242 applied. Front caliper bolts torque to 27-30 ft-lbs. Anti-seize is highly recommended due to aluminum hub material.
Final Safety Checks
Before driving, verify your work prevents future issues.
Visual and Functional Inspection
Confirm all bolts are properly tightened and brake lines have no kinks or leaks. Spin the rotor by hand to ensure it turns freely with no pad drag. Check that the wheel sits flush on the hub.
Low-Speed Test Drive
Drive in a safe area at 5-10 mph and apply the brakes gently. Listen for grinding, squealing, or pulling. The brakes should feel smooth and responsive with no pulsation.
Follow-Up Torque Check
After 50 miles, recheck lug nut torque and critical fasteners. This accounts for material settling and ensures long-term reliability.
Frequently Asked Questions About Changing Ford F-150 Rotors
How long does it take to replace rotors on an F-150?
For a first-time DIY mechanic, plan for 2-3 hours per axle. Experienced mechanics can complete the job in 1-2 hours. Factor in extra time if you’re dealing with rusted or stuck components.
Do I need to replace brakes pads when changing rotors?
Yes, always replace pads and rotors in axle pairs. Worn pads can damage new rotors, and new pads need the fresh rotor surface for proper bedding. This ensures even wear and optimal braking performance.
Can I replace just one rotor or do I need to do both?
Replace rotors on both sides of the same axle. Mixing new and worn rotors causes uneven braking force, leading to pull, vibration, and premature wear. This maintains balanced stopping power and safety.
What happens if I don’t bed in new brakes properly?
Without proper break-in, the friction material doesn’t transfer evenly to the rotor surface. This causes glazing, reduced stopping power, noise, and shorter component life. Follow the bed-in procedure for best results.
Why do my new rotors already seem warped?
This usually stems from improper hub surface preparation, not from the rotor itself. Clean the hub thoroughly, ensure it’s perfectly flat, and apply anti-seize. Also verify the caliper is functioning properly and the piston is fully retracted.
Key Takeaways for Changing Your F-150 Rotor
Replacing rotors on your Ford F-150 is a rewarding DIY project that saves money and restores safe braking. Always replace rotors and pads in axle pairs, use quality parts, and never skip lubrication at contact points. Follow the specific torque specifications for your model year, particularly for the caliper bracket bolts which vary significantly. The critical bedding-in procedure ensures your new brakes perform optimally and last thousands of miles. With proper tools, attention to detail, and this guide, you can complete this job confidently and keep your F-150 stopping strong for years to come.


