

Stuck with a factory radio that still plays cassettes? You are not alone. Many Ford F-250 owners drive trucks built before Bluetooth, Apple CarPlay, or USB ports became standard, and replacing the stock unit is one of the most popular upgrades for good reason. A modern head unit transforms daily driving with better sound, hands-free calling, and real navigation.
This guide walks you through the entire process of replacing the radio in a Ford F-250, covering model years 1999 through 2016. You will learn which tools to gather, how to safely remove dash panels without cracking plastic, how to wire a new unit correctly, and how to test everything before finishing the job. Whether you own a classic 7.3L Powerstroke or a 2015 Super Duty, the steps below will help you get a clean, professional install.
Match Your Ford F-250 Model Year First
Before picking up a screwdriver, confirm your truck’s exact model year. The dash design, wiring harness, and removal steps differ significantly between generations, and using the wrong approach can crack trim or fry electrical circuits.
1999 to 2003: Double DIN Simplicity
These early Super Duties used a standard double DIN radio size, which makes aftermarket upgrades straightforward. The factory unit often included a built-in CD player and a 6-disc changer, but it lacks Bluetooth, USB, and smartphone integration.
Key points for this generation:
- Direct Fit: Aftermarket double DIN units fit directly into the dash without major modification.
- Steering Wheel Controls: Retaining them requires a CAN-bus interface or a brand-specific adapter.
- Factory Amplifier: Some Lariat trims include an external amp. You may need a line-output converter if your new radio does not support high-level inputs.
2010 to 2016: Trim Panel Removal Required
This generation uses a more complex center stack design. You cannot access the radio without first removing the entire face frame, a step many DIYers overlook until it is too late.
Key points for this generation:
- No Direct Access: The radio sits behind a large plastic panel secured by hidden screws under the cigarette lighter bezel.
- Critical Disconnection: Failing to unplug the AC control connectors before pulling the face frame can snap wiring harnesses.
- Tesla-Style Upgrades: Large vertical touchscreens are popular but require custom mounting kits and proper grounding to avoid vibration issues.
Gather Tools Before You Start
Having the right tools on hand prevents scratches, broken clips, and electrical mishaps. Do not improvise with a flathead screwdriver; this job demands proper equipment.
Essential Tools for the Job
- Plastic Trim Removal Tool: A non-marring pry tool prevents scratches when popping off dash panels.
- Phillips Screwdriver: Needed for removing mounting screws on the radio and face frame.
- Camera or Smartphone: Take photos before and during disassembly. They are invaluable during reassembly.
- Order Number and Manuals: Keep your new head unit’s manual and order confirmation accessible for tech support.
Prep Work You Cannot Skip
- Document the Dashboard: Snap clear photos from multiple angles, including close-ups of the wiring behind the factory radio.
- Check Compatibility: Verify that your new head unit works with your F-250’s electrical system using retailer fitment tools.
- Note Pre-Existing Issues: If any buttons or AC controls are already glitchy, document them so you do not blame the new install later.
Remove Lower Panels Safely on 2010 to 2016 Models

Start at the bottom of the center console. On 2010 to 2016 Super Duties, the cigarette lighter and AUX panel must come off first to expose hidden screws.
Pry Off the Cigarette Lighter Bezel
- Insert the trim tool into the gap below the lighter.
- Gently twist and lift upward rather than pulling straight out.
- The panel pops off with three or four plastic clips. Handle it carefully because older plastic becomes brittle.
Detach the AUX Input Panel
- Use the same technique: slide the tool into the seam and apply even pressure.
- Set both panels aside on a soft surface to avoid scratches.
Pro Tip: If clips break during removal, replacements are inexpensive and widely available online. Prevention is better, so use steady pressure instead of force.
Unscrew and Free the Face Frame
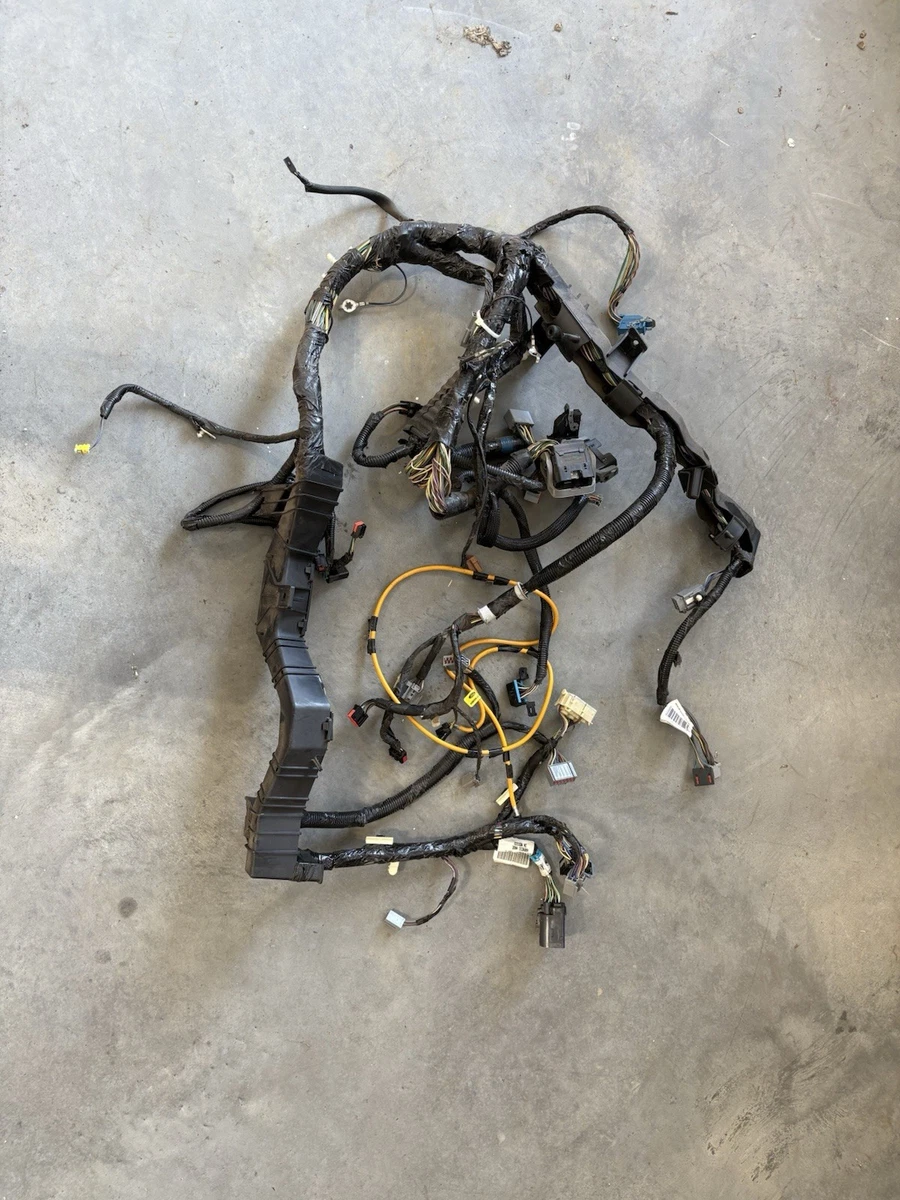
With the lower panels removed, two screws now hold the main center stack in place.
Locate and Remove Mounting Screws
- Find the screws in the cavity where the cigarette lighter was, often marked with red circles in installation diagrams.
- Remove both completely and store them in a magnetic tray or small container.
Pull the Face Frame Carefully
- Grip the top edge of the face frame and pull outward gently.
- Stop when you feel resistance; this is the wiring harnesses catching.
Disconnect AC and Button Plugs
- Reach behind the frame and unplug the HVAC control connector and the dashboard button cluster.
- Press the release tab on each connector before pulling.
Warning: This is the most common mistake. Pulling the frame too far without disconnecting can rip wires. Always disconnect first, then remove.
Uninstall the Stock Radio

With the face frame out of the way, you can finally access the factory head unit.
Remove Radio Mounting Screws
- Four screws hold the radio in place, typically two on top and two on the bottom.
- Remove all four and set them aside.
Slide Out the Old Unit
- Grasp the radio and pull it straight out.
- Avoid wiggling or twisting, which can damage the connectors.
Unplug All Wiring Harnesses
Behind the radio, disconnect the following:
- Main power and ground harness
- Antenna cable (twist counter-clockwise to release)
- Steering wheel control interface (if equipped)
- Amplifier or satellite radio lines on higher trims
Visual Cue: Take a photo of every plug before disconnecting. Label them with tape if needed for easier reassembly.
Wire the New Head Unit Correctly
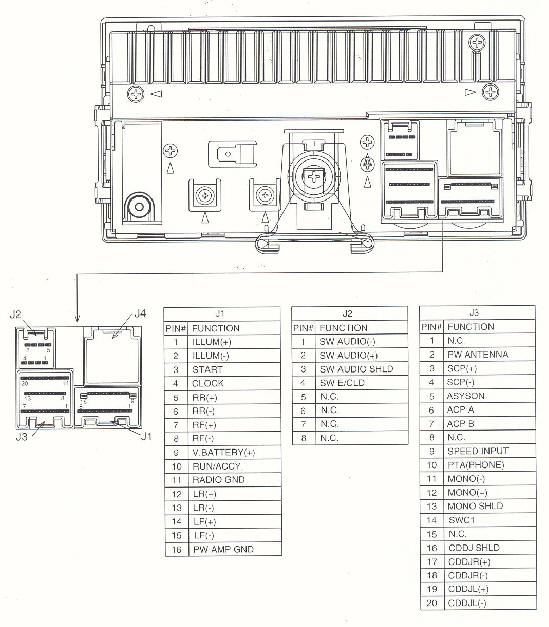
This is where most electrical problems happen. Take your time and do it right the first time.
Use a Wiring Harness Adapter
- Buy a vehicle-specific harness designed for your F-250 model year.
- Plug the adapter into the factory harness without cutting any wires.
- Match wire colors to the new head unit using the standard color code:
- Red: 12V accessory power
- Yellow: Constant power for memory
- Black: Ground
- Speaker Wires: Front and rear, left and right
Connect Labeled Plugs for Modern Units
Large-screen aftermarket units often include additional connectors for:
- OBD2 connection for vehicle data
- CAN-bus interface for steering wheel controls
- Backup camera input
- Microphone and GPS antenna
Follow the manual exactly and plug each labeled cable into its matching port.
Pro Tip: Test-fit the unit before final connection. Make sure cables are not pinched when sliding it into the dash cavity.
Mount and Secure the New Unit
Do not just shove the radio in. Proper alignment ensures a clean, factory-looking finish.
Install the Mounting Bracket
- Attach the included bracket to the sides of the new head unit.
- Align it with the factory dash mounting points.
- Use the original screws or the hardware provided with your kit.
Slide In and Lock Down
- Feed power and antenna cables through the dash opening first.
- Gently insert the unit until it seats fully.
- Tighten the four mounting screws without overtightening.
Check Flush Fit: The unit should sit level with the dashboard. Visible gaps mean the alignment is off and needs adjustment.
Reassemble the Dashboard
Reverse the removal steps, but double-check every connection before snapping panels back into place.
Reconnect AC and Button Plugs
- Plug the HVAC and button harnesses back into the face frame.
- Ensure each connector clicks securely into place.
Snap In the Face Frame
- Align the frame with the dash openings.
- Push evenly around the edges until all clips engage.
- Reinstall the two hidden screws under the cigarette lighter area.
Reattach Lower Panels
- Click the cigarette lighter and AUX bezels back into position.
- Press firmly on all sides until they snap.
Final Check: Turn on the ignition. If the AC controls do not respond, a plug is likely loose. Remove the frame and reconnect.
Test Everything Thoroughly
Power up the truck and verify every function before considering the job complete.
Power and Display Check
- Turn on the ignition. The new unit should boot without flickering.
- If it does not power up, check the interior fuse panel (usually a 10A fuse) and verify that the yellow and red wires are connected properly.
Audio and Feature Testing
Run through each system to confirm full functionality:
- Speakers: Play audio and check all channels for clarity.
- Bluetooth: Pair your phone and make a test call.
- USB Audio: Stream music from a flash drive or your device.
- Steering Wheel Controls: Adjust volume and skip tracks.
- Backup Camera: Shift into reverse to test the video feed.
Static or No Sound? Check the ground wire. Attach a dedicated ground to a clean, unpainted metal bolt on the chassis if needed.
Avoid Common Installation Mistakes
Even experienced DIYers make these errors. Do not let them derail your project.
Never Force Plastic Panels
Ford F-250 trim becomes brittle with age. Always use a trim tool and steady pressure rather than brute force.
Do Not Skip the Harness Adapter
Cutting factory wires traps you with the current radio. A plug-and-play adapter keeps your options open for future upgrades.
Do Not Ignore Grounding
A poor ground connection causes audio static, touchscreen lag, and random reboots. Attach a dedicated ground wire from the head unit’s ground terminal to a clean metal bolt near the dash.
Keep Your Order Number Handy
Store it in your phone. If the unit fails, tech support will ask for it along with photos of your installation.
Frequently Asked Questions About Replacing a Ford F-250 Radio
What tools do I need to replace the radio in a Ford F-250?
You need a plastic trim removal tool, a Phillips screwdriver, and a camera or smartphone to document the disassembly. A vehicle-specific wiring harness adapter is also essential for connecting the new head unit without cutting factory wires.
Can I install an aftermarket radio in a 1999 to 2003 Ford F-250?
Yes. These models use a standard double DIN radio size, which allows most aftermarket head units to fit directly into the dash without modification. You may need an adapter to retain steering wheel controls or integrate with a factory amplifier.
Why will my new radio not turn on after installation?
The most common causes are a blown fuse, loose wiring connections, or swapped power wires. Check the interior fuse panel first, then verify that the yellow (constant power) and red (accessory power) wires are connected to the correct terminals.
Do I need to disconnect the battery before replacing the radio?
While not always required, disconnecting the negative battery terminal is a smart safety precaution. It prevents accidental short circuits that can damage the new head unit or the truck’s electrical system.
How long does it take to replace a Ford F-250 radio?
For someone with basic DIY experience, the process typically takes 1.5 to 3 hours. First-time installers may need 3 to 4 hours, especially on 2010 to 2016 models that require face frame removal.
Will replacing the radio void my truck’s warranty?
Replacing the radio does not void the entire vehicle warranty, but improper installation that damages electrical components could create issues. Keep all receipts, manuals, and the original radio in case you need to restore the truck to stock condition.
Key Takeaways for a Successful Ford F-250 Radio Replacement
Replacing the radio in your Ford F-250 is a rewarding project that modernizes your driving experience with better sound, connectivity, and navigation. The most important steps are confirming your model year, gathering the right tools, and taking photos before any disassembly begins. On 2010 to 2016 Super Duties, always disconnect the AC control plugs before pulling the face frame to avoid the most common and costly mistake.
Use a vehicle-specific wiring harness adapter, secure a solid ground connection, and test every feature before snapping the dash back together. With careful preparation and patience, you can complete this upgrade in a single afternoon and enjoy a factory-looking installation that lasts for years. If you ever feel unsure about CAN-bus coding or factory amplifier integration, professional installation is a worthwhile investment.


