Few things are more frustrating than walking out to your truck and finding the brake lights glowing like a beacon in the driveway. If your 2015 F250 brake lights stay on even after you’ve shut off the engine, you’re dealing with a common but solvable problem. This issue can drain your battery overnight, trigger dashboard warnings like “Check Advanced Track,” and even let you shift out of Park without touching the brake pedal. The good news is that most causes are mechanical or electrical issues you can diagnose at home with basic tools. This guide breaks down every known cause, how to test for each one, and the exact steps to get your lights working correctly again.
Verify Brake Pedal Return Before Anything Else
A brake pedal that fails to fully retract is the number one reason lights stay illuminated. Even a slight hang-up keeps the brake light switch engaged and the circuit closed.
Confirm the Pedal Springs Back Fully
Turn off the engine and press the brake pedal hard, then release it. Watch closely: does it snap all the way back to its highest position, or does it linger slightly down? If it lags, the switch stays compressed. Try lifting the pedal manually with your foot. If the lights go out the moment you lift it, your pedal isn’t returning on its own.
Rule Out Master Cylinder Problems
A weak master cylinder can prevent proper pedal return because internal pistons don’t fully retract. Check your brake fluid level and look for dark or contaminated fluid in the reservoir. If the pedal feels spongy or requires a toe-lift to reset, bleed the brake system first. If bleeding doesn’t restore firm return, the master cylinder itself likely needs replacement.
Check for a Missing Return Spring
Some 2015 F250 models rely on a small return spring tucked under the dash, attached to the brake pedal arm. Crawl into the driver’s footwell and look for this spring. If it’s missing, broken, or detached, the pedal loses critical return force. Reinstalling or replacing this spring is a five-minute fix that solves the problem entirely.
Inspect the Pedal Stop Bumper

The small rubber or plastic pad on the brake pedal arm is a frequent failure point, especially in humid or coastal climates. When it crumbles away, the brake light switch plunger extends too far and mimics a depressed pedal.
Identify a Degraded Bumper
Look at the top of the brake pedal arm where it contacts the switch. You should see a small rubber bumper about the size of a pencil eraser. If it’s cracked, crumbling, or missing entirely, that’s your culprit. This is particularly common in trucks registered in Texas, Florida, Louisiana, Mississippi, Alabama, Georgia, the Carolinas, Virginia, or Hawaii, where salt air and humidity accelerate rubber decay.
Understand the Recall Connection
Ford’s Recall 22S02 officially covers 2014–2015 Fusion, MKZ, and Mustang models for this exact bumper failure. However, the same pedal design was used across the Super Duty line, and the repair procedure is identical. Even if your VIN isn’t on the recall list, replacing the bumper solves the problem. As of late 2021, Ford had received over 615 warranty claims related to this issue.
Replace the Bumper Properly
Clean the mounting surface on the pedal arm with isopropyl alcohol to remove any residue. Press a new OEM-spec bumper firmly into place until it’s fully seated. This restores the physical stop, allowing the switch plunger to retract and the lights to turn off.
Diagnose a Faulty Brake Light Switch
The brake light switch is the most common failure point on the 2015 F250. It has two distinct design flaws that cause persistent illumination.
Detect Switch Slippage
Early 2015 models use a plastic sleeve to hold the brake light switch in position. Over time, vibration causes this sleeve to let the switch slide outward. When the switch drifts out of position, it can’t disengage when the pedal returns. If you can temporarily fix the issue by pushing the switch deeper into its bracket, slippage is confirmed.
Upgrade to the Jam Nut Design
When you replace the switch, always choose the updated version with dual jam nuts. This design locks the switch in place permanently and prevents recurrence. After installing, adjust the switch by pressing and releasing the pedal, then threading the switch in until the lights illuminate, and backing it off slightly until they turn off when the pedal is up. Tighten both jam nuts securely.
Test for Internal Sticking
Remove the switch from the bracket and test it with a multimeter. With no pressure on the plunger, the circuit should show no continuity. If you get continuity, the internal contacts are stuck closed and the switch must be replaced regardless of its outward appearance.
Examine Wiring for Hidden Damage
Because the brake light switch moves with every pedal press, its wiring harness takes constant abuse. Fatigue and chafing can break wires inside the insulation even when everything looks fine on the surface.
Spot Frayed or Broken Wires
Inspect the harness from the switch down toward the firewall. Look for cracked insulation, kinks, or spots where the harness rubs against metal brackets. Gently wiggle the wires while an assistant watches the brake lights. If the lights flicker or turn off during wiggling, you’ve found an intermittent break.
Repair with Solder and Heat-Shrink
Cut out any damaged wire sections. Splice in new 16-gauge wire using solder and heat-shrink tubing for a connection that withstands vibration and moisture. Avoid crimp connectors in this area because they fail quickly under constant movement. Secure the repaired section with zip ties and leave a small service loop so the wires aren’t under tension when the pedal moves.
Reroute Away from Heat Sources
Check the harness path near the exhaust manifold and engine block. Heat can melt insulation over time. If you find melted spots, reroute the harness away from heat sources and wrap it in flexible loom or conduit for protection.
Test for Electrical Shorts and Ground Faults
If the pedal and switch check out, the problem may be in the wiring harness or grounding system. These faults can keep the lights on even when the switch is completely disconnected.
Find Short Circuits
Unplug the brake light switch connector. If the brake lights stay on with the switch disconnected, a short is feeding power directly to the lights. Use a multimeter to check for voltage at the tail light harness with the switch unplugged. Any voltage reading confirms a short to power. Trace the harness from the firewall to the rear lights and inspect every inch for exposed copper or melted insulation.
Clean and Verify Ground Connections
Faulty grounds cause electrical feedback that mimics switch failure. Locate the ground points near the rear light assemblies and near the brake switch under the dash. Remove each ground bolt, scrape the contact surface to bare metal, and reinstall. Coat the connections with dielectric grease to prevent future corrosion, especially if you live in a coastal or snowy region where road salt is common.
Scan for Module and Sensor Faults
Modern F250s rely on electronic modules to interpret brake pedal position. When these modules receive bad data, they can keep the lights on and disable safety features.
Read Trouble Codes with a Scanner
Use a FORScan-compatible OBD2 scanner or a professional diagnostic tool to pull codes from your truck. Watch for these specific codes:
- B2610: Brake Switch Circuit Malfunction
- C1234: ABS or Advanced Track System Fault
- U2105: Lost Communication with Brake Module
Any of these codes confirms the system has detected an incorrect brake state.
Check Pedal Position Sensors
The brake pedal assembly includes sensors for cruise control, shift interlock, and stability control. A faulty sensor can report the pedal as pressed even when your foot is nowhere near it. This often disables shift interlock, meaning you can shift out of Park without pressing the brake. Replace the brake light switch first, as most cases resolve at this step.
Perform Bulb and Socket Checks
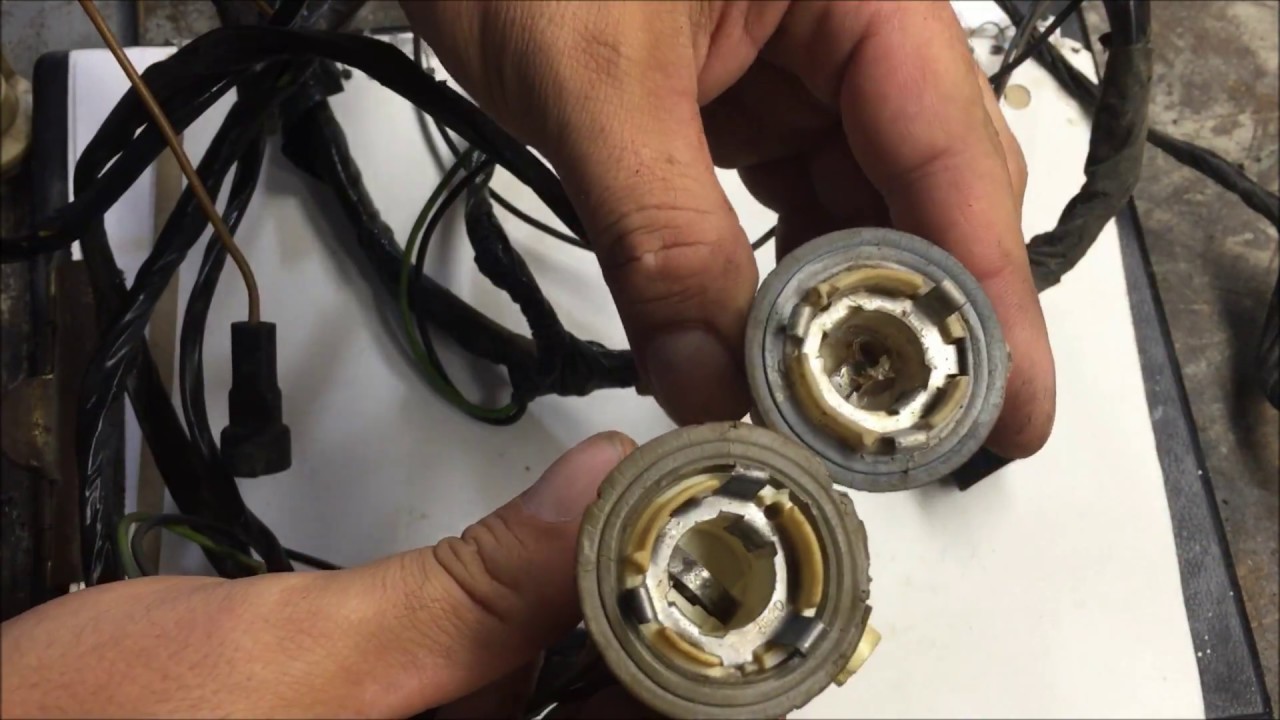
Though less common, bulb and socket issues can create electrical feedback that keeps the circuit active.
Isolate Problem Bulbs
Remove the tail light bulbs one at a time while watching the brake lights. If removing a specific bulb causes the others to turn off, that socket is creating a backfeed or short. Inspect the socket for corrosion, moisture intrusion, or bent contacts that might be touching each other.
Clean and Protect Sockets
Spray corroded sockets with electrical contact cleaner and let them dry completely. Apply a thin layer of dielectric grease before reinstalling the bulbs. This prevents moisture from causing future corrosion and ensures a solid ground connection through the socket.
Follow Proven Repair Steps
Once you’ve identified the cause, these repair procedures will get your lights working correctly.
Replace the Brake Light Switch
- Disconnect the negative battery terminal.
- Unclip the old switch and disconnect the harness.
- Install the updated switch with dual jam nuts.
- Adjust the switch so lights turn on at the start of pedal travel and off when released.
- Tighten both jam nuts securely.
Pro Tip: Mark the original switch position with a paint pen before removal. This gives you a reference point that speeds up adjustment.
Fix Pedal Return Problems
- Replace any missing or broken return springs under the dash.
- Bleed the brakes if the pedal feels spongy.
- Replace the master cylinder if the pedal still hangs up after bleeding.
Repair Wiring Defects
- Splice damaged wires using solder and heat-shrink tubing.
- Reroute the harness away from heat sources and sharp edges.
- Secure the harness with flexible loom and zip ties.
Prevent Future Brake Light Failures
A few simple habits will keep this problem from coming back.
Schedule Visual Inspections
During every oil change, press the brake pedal and confirm the lights turn off completely. Check the pedal bumper and switch position every six months, especially if you live in a humid or coastal area.
Always Use Upgraded Parts
When replacing the brake light switch, never reinstall the old sleeve-style design. The dual jam nut version prevents 90% of recurrence and costs the same as the original part.
Apply Corrosion Protection
Coat every electrical connector in the brake light circuit with dielectric grease. This includes the switch connector, tail light sockets, and ground points. Moisture and salt are the enemies of truck electrical systems, and a five-minute application of grease can save you hours of diagnosis later.
Never Ignore Dashboard Warnings
If “Check Advanced Track” or “Check Brake System” appears on your dash, address it immediately. These warnings often appear before complete brake light failure and indicate deeper electrical issues that compromise your stability control and ABS systems.
Frequently Asked Questions About 2015 F250 Brake Lights Staying On
Why do my 2015 F250 brake lights stay on even when the truck is off?
The most common cause is a failed brake light switch or a degraded pedal stop bumper. Both keep the circuit closed even when the pedal is released. A short in the wiring harness can also feed power to the lights when the truck is off.
Can a bad brake light switch drain my battery?
Yes. If the switch is stuck closed, the brake lights draw continuous power. A typical brake light bulb pulls around 2 amps per side, so four bulbs can drain a healthy battery in less than 24 hours. If your battery keeps dying overnight, check the brake lights first.
Is there a recall for 2015 F250 brake light problems?
Recall 22S02 officially covers 2014–2015 Fusion, MKZ, and Mustang models for pedal bumper failure. The 2015 F250 uses the same bumper design, but it’s not always included on the official recall list. However, the repair procedure is identical, and Ford has historically offered Customer Satisfaction Programs for affected vehicles outside the original recall zones.
How do I know if my brake light switch is bad?
Test the switch with a multimeter. With the pedal released, there should be no continuity across the switch terminals. If you get continuity, the switch is stuck closed. You can also try adjusting the switch position; if the lights flicker or turn off during adjustment, the switch is slipping and needs replacement.
Can I drive with my brake lights stuck on?
You can drive the truck, but it’s not recommended. The continuous draw will eventually kill your battery, leaving you stranded. Additionally, other drivers may be confused by your illuminated brake lights, and the underlying issue may disable your ABS or stability control systems.
What tools do I need to fix this myself?
At minimum, you’ll need a multimeter, basic socket and wrench set, wire strippers, solder and heat-shrink tubing, and dielectric grease. If you want to scan for trouble codes, a FORScan-compatible OBD2 adapter is invaluable for diagnosing module and sensor faults.
Key Takeaways for Fixing Your 2015 F250 Brake Lights
Start your diagnosis with the simplest checks: verify the pedal returns fully, inspect the rubber bumper on the pedal arm, and test the brake light switch. These three components cause the vast majority of cases. If those check out, move to wiring inspection, ground verification, and finally module scanning. Always replace the brake light switch with the upgraded dual jam nut version to prevent recurrence, and protect every connection with dielectric grease. Most repairs take under an hour and require only basic hand tools. If you’ve worked through this guide and the lights are still glowing, the next step is a professional diagnostic scan to identify module-level faults that require specialized equipment.