
If your Ford F-150 is making squealing noises, the brake pedal feels spongy, or you have noticed reduced stopping power, it is likely time to change your brake pads. For 2010-2020 F-150 models, replacing brake pads is a straightforward DIY job if you know the critical steps and avoid common pitfalls. This guide covers everything from tool selection to electronic parking brake protocols, ensuring a safe, professional-quality brake job.
Prepare Your F-150 for Service
Before beginning any brake work, proper vehicle preparation is essential for safety and efficiency. Always loosen the 21 mm lug nuts while the truck is on the ground and the wheels are chocked. Use a breaker bar or impact wrench to break them free, but do not remove them yet. This prevents the wheel from spinning and ensures safety during lifting.
Position your floor jack at the factory lift points, which are indicated by molded arrows on the frame rails. Lift the front or rear axle, then place rated jack stands behind the wheels for stability. Never work under a vehicle supported only by a jack. On 2015-2020 F-150s, turning the steering wheel fully to the right gives better access to the driver-side caliper bolts, and turning it fully left helps on the passenger side.
Essential Tools and Equipment
You will need several key tools to complete this job safely. A 1/2-inch breaker bar handles high-torque applications like lug nuts and caliper bracket bolts. A 3/8-inch ratchet works for most caliper mounting bolts. A C-clamp or brake caliper piston compression tool is necessary for retracting pistons. Have bungee cords or wire available to suspend the caliper safely without hanging it by the brake hose.
Gather these items before starting. Brake parts cleaner, high-temperature brake grease, and a torque wrench are also critical. For 2015-2020 models with electronic parking brake, a scan tool capable of EPB service mode activation is mandatory.
Handle Electronic Parking Brake First
If your 2015-2020 F-150 has an electronic parking brake, you must enter service mode before starting rear brake work. Failure to do so can permanently damage the rear caliper actuator, resulting in costly repairs.
Activate EPB Service Mode With Scan Tool
Connect a scan tool to the OBD-II port and turn the ignition to Run with the engine off. Navigate to Brake System, then Electric Parking Brake, and select Service Mode. Choose Activate Service Mode and listen for a confirmation tone. The system is now disengaged and safe for piston retraction.
Manual Maintenance Mode Alternative
Some 2018-2020 models allow a manual override, but this is not guaranteed to work on all vehicles. Turn the ignition to Run, press the parking brake button once, slightly press the accelerator, then turn the ignition off. Turn the ignition back to Run and listen for a beep confirming maintenance mode. For 2015-2017 models, a scan tool is required.
Remove the Front Caliper
Use a 13 mm socket and 3/8-inch ratchet to remove the two caliper mounting bolts, one on top and one on the bottom, located on the back of the caliper. Optionally, loosen the 11 mm bleeder screw slightly before removing bolts to allow fluid movement and easier piston retraction.
Once the lower bolt is out, support the caliper immediately. Never let it hang by the brake hose. Use a bungee cord, tie wire, or bent coat hanger to hang it from the upper control arm or sway bar. Hanging by the brake line can crack internal hoses and cause leaks.
Extract and Inspect Old Brake Pads
Gently pry or push the old pads outward. They are held by spring tension and anti-rattle clips. Label them as inner and outer for reference during installation.
Inspect the old pads carefully. Look for glazing, which appears as a shiny surface on the friction material. Check for cracking or uneven wear patterns. Look for contamination from oil or grease. If pads are below 3 mm thickness, replacement is urgent.
Service the Caliper Bracket and Slide Pins
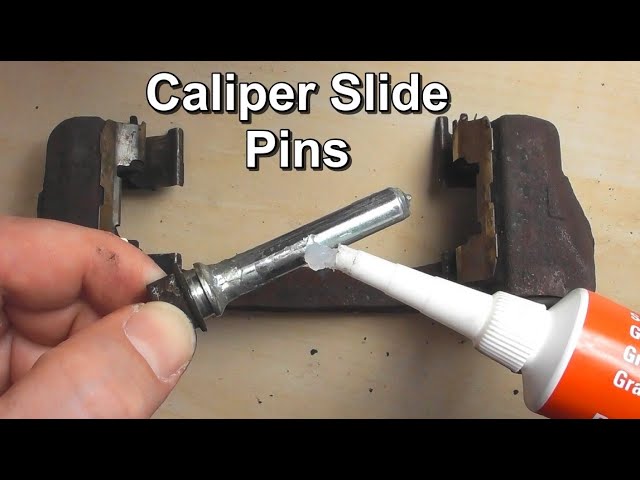
Use a 21 mm socket and breaker bar to remove the two caliper bracket bolts. Clean the bracket with brake cleaner and a wire brush to remove rust and debris.
Pull out the slide pins from the bracket and remove old grease and corrosion with a rag or wire wheel. Inspect the rubber boots for cracks or hardening, and replace if damaged. Apply high-temperature brake grease or silicone paste to the pin shaft, but avoid the tip. Reinsert pins fully, noting that slight boot swelling is normal. Pins must slide freely, as seized pins cause brake drag, noise, and uneven wear.
Replace the Rotor
Pull the rotor straight off. If it is stuck, tap it gently with a dead-blow hammer or apply penetrating oil to the hub center.
Clean the hub face with a wire brush before installing the new rotor. Wipe the new rotor with brake cleaner to remove protective oil. Optionally, slide the rotor on backward to clean the hub, then flip into position. Secure temporarily with a lug nut and rubber axle nut spacer if needed. Apply a thin coat of brake grease to the hub face, but avoid the studs, to prevent future corrosion.
Install New Brake Pads
Pad placement is critical for proper function. The outer pad has tabs or flanges that lock into bracket slots. The inner pad is usually smooth or rounded and fits into the caliper piston side. Use pads clearly labeled inner and outer for correct orientation.
Always install new anti-rattle clips and shims. Use a pocket screwdriver to ensure they are fully seated. Reusing old clips causes squealing and vibration. Apply brake grease to pad contact points on the bracket, backing plate edges, shims, and mounting surfaces. Never grease friction surfaces, as this causes brake failure.
Retract Caliper Pistons
Before reinstalling the caliper, remove the master cylinder cap to allow fluid return. Place the old brake pad between the piston and clamp, then slowly compress pistons using a C-clamp or piston tool. For dual-piston calipers, compress both pistons individually, as one may lag behind the other. Do not open bleeder screws, as simply removing the cap allows safe fluid return in most cases.
Reinstall the Caliper
Slide the caliper over the pads and rotor, then insert both 13 mm mounting bolts. Hold slide pins with pliers to prevent spinning during tightening. Torque to 27-30 ft-lbs, using 30 ft-lbs for newer models. If the pin rotates, use a wrench on the relief cut to hold it steady.
Torque Specifications
Reinstall the caliper bracket with 21 mm bolts, applying Loctite 242 or 243 to threads. Torque to 136-184 ft-lbs, using 184 ft-lbs for 2015+ models. Hand-tighten all six lug nuts, then lower the truck slightly so tires bear light load. Torque in a criss-cross pattern to 150 ft-lbs for front wheels or 148-150 ft-lbs for rear wheels. Re-torque after a 10-15 mile drive.
Rear Brake Replacement
Standard Rear Brakes
Follow the same steps as front brakes. Remove the 13 mm caliper bolts, hang the caliper, and replace pads and hardware. Retract pistons manually, then torque caliper bolts to 27-30 ft-lbs. Replace rotors if over 60,000 miles or showing deep scoring.
EPB Rear Brakes
Never compress EPB rear pistons manually, as this damages the actuator. Enter EPB service mode with a scan tool first. Remove the single 13 mm caliper bracket bolt, which requires a thin-walled wrench due to tight clearance. Hang the caliper and replace pads, then reinstall everything. Use the scan tool to exit service mode and reapply the parking brake. The system will automatically calibrate.
Manage Brake Fluid Safely
Before compressing any pistons, remove the master cylinder cap and place a clean rag around the reservoir. If fluid is near MAX, siphon off about 1/4 inch to prevent overflow. After reassembly, top off fluid to the MAX line and replace the cap securely. Most users complete the job without opening bleeder screws.
Bed-In New Brake Pads
New pads need friction transfer to the rotor for optimal performance. With ignition ON and engine off, press the brake pedal 5-6 times to rebuild pressure. Perform 15-20 moderate stops from 50 mph to 30 mph, allowing 30-60 seconds of cooling between stops. Avoid heavy loads for the first 200-300 miles. Do not perform panic stops, as this can glaze pads and reduce effectiveness.
Final Inspection and Test Drive
Before driving, press the brake pedal 5-6 times with ignition ON to seat pistons against new pads. Never drive without this step, as a soft pedal can cause accidents.
Inspect all brake lines and hoses for leaks, check all bolts for correct torque, and verify EPB engagement and release. Conduct a low-speed test drive at 15-20 mph and perform several stops. Check for firm pedal feel, no pulling to one side, no grinding or squealing, and proper EPB function.
Avoid These Common Mistakes
Several mistakes can compromise your brake job. Hanging the caliper by the brake hose damages internal lines. Skipping slide pin service causes noise and uneven wear. Forgetting the master cylinder cap spills fluid and risks reservoir damage. Not pumping brakes before driving creates a soft pedal and loss of control. Ignoring EPB protocol destroys the actuator and leads to $500+ repairs. Wrong pad orientation causes noise, poor contact, and rapid wear. Over-greasing contaminates pads and reduces braking. Reusing old hardware increases vibration and noise.
Save Money With DIY
A dealership charges $550-$600 for front pads and rotors. DIY parts cost $120-$140, and labor takes 1.5-2.5 hours per axle. Total savings reach $400-$450, making the investment in tools worthwhile.
Frequently Asked Questions About Changing Brake Pads on a Ford F-150
How long does it take to change brake pads on an F-150?
Expect to spend 1.5-2.5 hours per axle if you have moderate mechanical experience. Front brakes typically take longer due to dual-piston calipers. Rear brakes on EPB models may go faster once you account for scan tool setup time.
Do I need a scan tool for rear brake replacement?
For 2015-2020 models with electronic parking brake, a scan tool is mandatory. Attempting to manually compress EPB rear pistons damages the actuator permanently. For pre-2015 models or those without EPB, no scan tool is required.
When should I replace rotors along with pads?
Replace rotors if they show deep scoring, are warped, or have exceeded 60,000-90,000 miles. Also replace if thickness falls below the minimum stamped specification or if runout exceeds 0.015 inches.
What happens if I skip bedding-in new brake pads?
Without proper bedding, pads may squeal, vibrate, or wear unevenly. The friction material does not transfer correctly to the rotor surface, reducing stopping power and pad life. Follow the 15-20 moderate stop procedure for best results.
Can I reuse the old brake hardware?
Never reuse anti-rattle clips and shims. These components wear out and cause noise, vibration, and uneven pad wear. Always install new hardware included with your brake pad set.
Key Takeaways for Changing Brake Pads on Your Ford F-150
Changing brake pads on your Ford F-150 is a cost-effective DIY project that saves $400 or more compared to dealership service. The most critical steps are entering EPB service mode before working on 2015-2020 rear brakes, properly servicing slide pins to prevent uneven wear, and following correct torque specifications. Always bed in new pads with 15-20 moderate stops, and re-torque lug nuts after your first drive. With attention to detail, your new brakes will deliver 30,000-70,000 miles of reliable performance.


