

If your Alpharex headlights on the F150 are blinding oncoming traffic or leaving dark spots on the road, improper aim is likely the culprit. Properly adjusting Alpharex headlights ensures maximum visibility at night while staying compliant with safety standards and avoiding glare. These aftermarket LED projectors offer superior brightness but require careful mechanical alignment due to their dual-beam adjustment system.
This guide walks you through every step, from preparation to final testing, using proven techniques from real F150 owners. You’ll learn how to achieve a safe, legal, and effective stair-step beam pattern while avoiding common mistakes.
Prepare Your F150 for Headlight Adjustment
Before touching any adjusters, proper setup ensures accurate and repeatable results. Misalignment often stems from poor calibration conditions rather than faulty hardware.
Park on Level Ground
Always position your F150 on a flat, level surface. Sloped driveways or uneven pavement distort beam angles and lead to incorrect adjustments. Engage the parking brake and ensure the fuel tank is at least half full to simulate normal weight distribution.
Position at Correct Distance
Place the vehicle 25 feet (7.6 meters) from a vertical wall like a garage door. This distance provides a realistic projection of how beams will land on the road. Avoid adjusting too close under 10 feet, as small errors get magnified over distance.
Inflate Tires and Account for Load
Check that all tires are inflated to the manufacturer’s recommended PSI, typically listed on the driver door jamb. If you regularly carry heavy loads or install aftermarket bumpers, perform the adjustment with that added weight in place. Suspension squat alters headlight angle significantly.
Mark Reference Points with Tape
Turn on the low beams in a dark environment. Use masking tape to mark the horizontal cutoff line of each beam’s top edge and the vertical centerline of each headlight’s hotspot. These reference lines let you track changes after each adjustment.
Pro Tip: Some users adjust Alpharex headlights before full installation since access to the rear adjusters is extremely limited once mounted.
Adjust Low Beam Aim on Your Alpharex Headlights
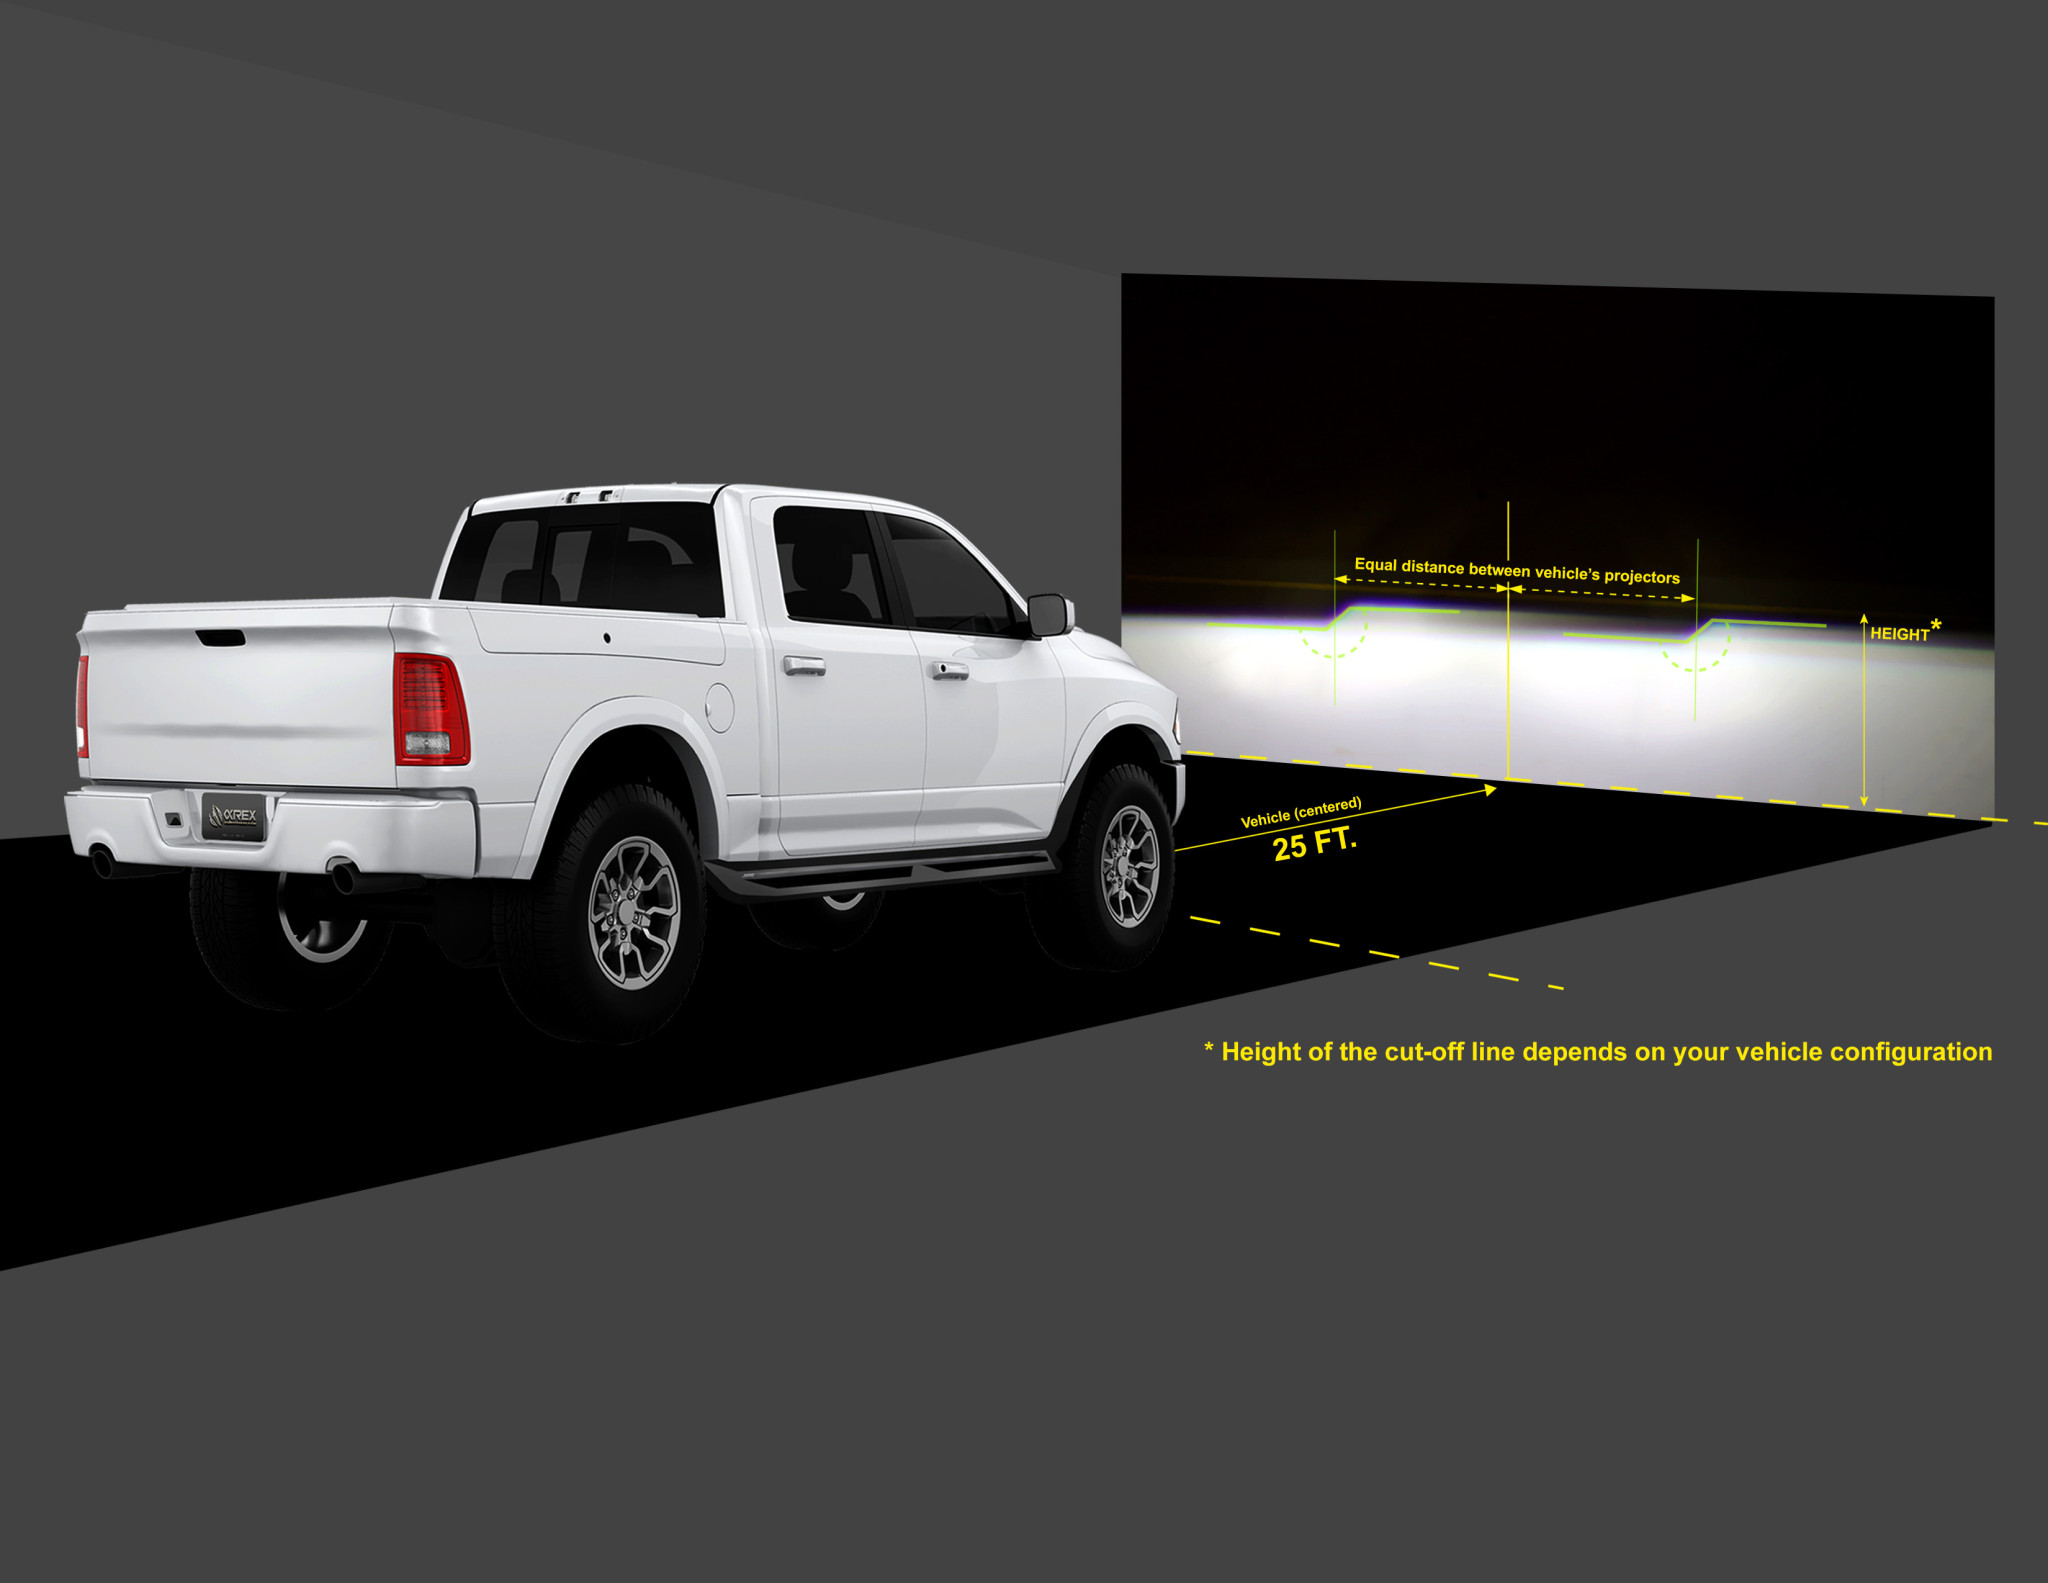
Low beams must be precisely aimed to illuminate the road without dazzling other drivers. Alpharex units typically use a top-mounted 8mm bolt for this task.
Locate the Top Adjustment Bolt
On most Alpharex models including the Nova series, the low beam adjuster is an 8mm bolt head on the upper rear of the headlight housing. It controls both vertical and horizontal aim depending on the internal mechanism design.
Use the Right Tool
Grab either an 8mm socket with a ratchet and extension or a precision flat-head screwdriver if the adjuster has a slotted design. While both work, the socket offers more control and lets you count turns for consistency between sides.
Follow the Stair-Step Beam Pattern
Ford and many DOT regulations recommend a stair-step alignment where the driver’s side (left) is slightly lower than centerline and the passenger side (right) is slightly higher. This compensates for road crown and reduces glare for oncoming drivers in left-hand-drive vehicles.
Adjustment Logic
Turn the driver’s side adjuster toward the passenger side to raise the beam. Turn the passenger side adjuster toward the driver side to lower the beam. Make quarter-turn adjustments, then recheck the beam on the wall. Over-adjusting leads to glare and requires backtracking.
User Insight: One owner reported adjusting the driver side first and continuing the stair step pattern. It is acceptable for the passenger beam to be higher since it does not point into oncoming traffic.
Confirm Symmetry Between Both Headlights
Both headlights should produce even horizontal cutoff lines with no noticeable skew. The hotspots, the brightest part of the beam, should align vertically and match in height. Use your taped reference marks to verify alignment.
Warning: Never aim low beams above the horizontal tape line. This increases glare and may violate state laws.
Adjust High Beams Independently on Alpharex Units
In Alpharex Nova and similar dual-projector models, high beams have a separate adjuster usually located near the bottom of the housing.
Find the Lower Adjustment Bolt
The high beam adjuster is another 8mm bolt positioned on the lower rear section of the headlight assembly. It is often harder to reach due to proximity to the radiator support and air ducting.
Adjust Before Final Installation
Due to extremely limited rear access, many F150 owners find it nearly impossible to reach the lower bolt once the headlight is installed. Instead, follow this iterative method:
- Temporarily mount the headlight
- Turn on high beams and project onto the wall
- Remove the headlight
- Make a small adjustment with an 8mm tool
- Reinstall and retest
- Repeat until centered
Each cycle takes 5 to 10 minutes but ensures precision.
Center the High Beam Hotspot
The high beam should project straight ahead, aligned with the vehicle’s center axis and symmetrically between left and right. The hotspot should be centered in the beam pattern. Avoid tilting high beams upward, as this reduces usable light on the road and increases glare.
Tool Tip: Use a swivel-head ratchet or flexible extension if attempting in-situ adjustments. Even then, success varies by model year and engine bay layout.
Overcome Access Challenges in the Engine Bay
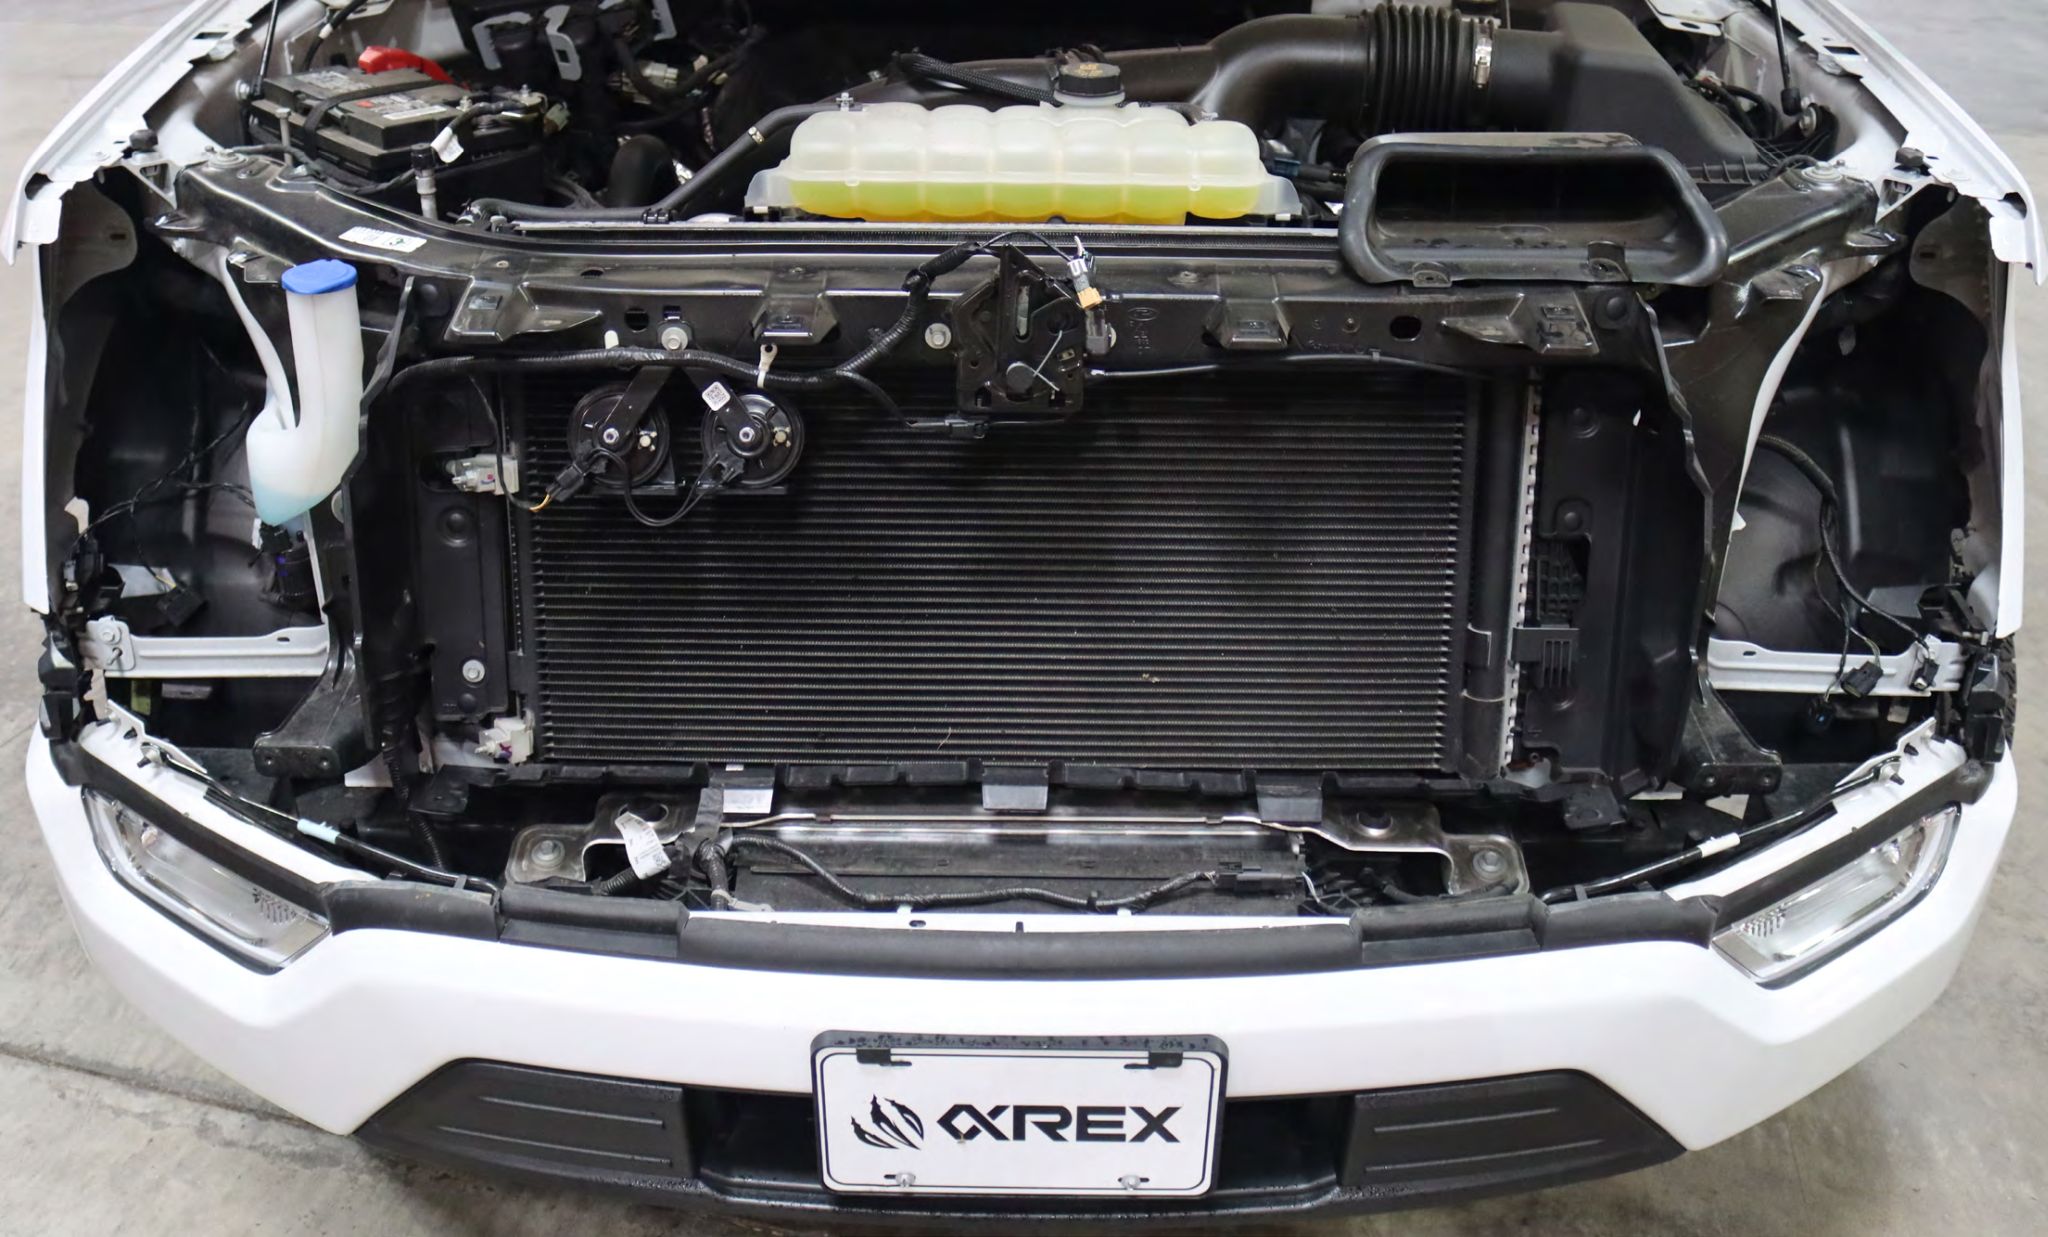
Tight engine bay clearance is the biggest obstacle when adjusting Alpharex headlights on the F150.
Remove Headlights for Precision Adjustment
One user noted that the adjusters are on the back of the unit, requiring removal for access. Pull the headlight out, make a small adjustment, aim at a garage door, put it in, and hold it by hand to check the result.
Removal Steps
Open the hood and disconnect the battery ground for safety. Unplug the headlight connector. Remove the three retaining bolts (usually 10mm) securing the headlight to the grille. Gently pull the assembly forward and out. Work on a clean mat to avoid scratches.
Reinstall and Test Frequently
After each adjustment, reinstall the headlight by hand without fully tightening bolts until final alignment is confirmed. Hold it in place and have someone turn on the lights while you observe the beam pattern on your reference wall.
Efficiency Hack: Mark your current adjuster position with a marker before tweaking. If the beam goes off target, return to the mark and try smaller increments.
Use the Right Tools for Alpharex Headlight Adjustment

Having the correct tools saves time and prevents damage to adjuster heads.
Recommended Tool List
| Adjustment Type | Best Tool |
|---|---|
| Low Beam | 8mm socket + 3-inch extension + ratchet |
| High Beam | 8mm swivel socket or flexible extension |
| Alternative | Precision flat-head screwdriver for slotted types |
A universal joint adapter or wobble extension helps reach the lower high beam adjuster without full removal. Avoid using worn sockets or pliers, which can strip the 8mm bolt heads.
Apply Best Practices for Optimal Results
Follow these expert tips to ensure long-lasting, safe, and legal headlight performance.
Adjust Low Beams First
Always start with low beams before touching high beams. They are used more frequently and form the foundation of your lighting pattern. High beam adjustment builds upon the low beam setup.
Work in Darkness
Perform adjustments at night or in a dark garage. Ambient light washes out beam cutoff lines and hotspots, making accurate aiming difficult. A controlled dark environment is essential for precision.
Recheck After Modifications
Any changes to tire size, suspension height, or front-end alignment can shift headlight aim. Always recheck and readjust after such modifications. A user who upgraded to 34-inch tires from stock 32-inch found that recalibrating vehicle settings improved overall lighting accuracy.
Confirm Both Sides Match
Mismatched beams create uneven illumination and visual fatigue. Use your taped wall references to ensure both headlights project identical patterns. Symmetry is critical for safe nighttime driving.
Frequently Asked Questions About Alpharex Headlight Adjustment
Do Alpharex Headlights Adjust High and Low Beams Separately?
Yes, in models like the Nova series, high and low beams are adjusted independently. The top bolt controls the low beam, and the bottom bolt controls the high beam. However, some OEM-style Alpharex units may adjust both beams together. Contact Alpharex support or test by covering one projector and adjusting to confirm your specific model.
Can You Adjust Alpharex Headlights Without Removing Them?
Low beams can be adjusted with an 8mm socket and extension while installed. High beam adjustment is nearly impossible on most F150s due to obstructed rear access. If you must avoid removal, use a flexible magnetic extension or right-angle driver, but expect frustration and limited success.
Is There Software Control for Alpharex Headlight Aim?
No, Alpharex headlights use purely mechanical adjustment. Vehicle software does not control physical beam direction. However, FORSCAN can enable useful features like Bambi Mode (activating low beams, high beams, and fogs simultaneously), DRL settings for continuous illumination, and tire size calibration for accurate speedometer readings after tire changes.
What Tools Are Needed to Adjust Alpharex Headlights?
You need an 8mm socket with extension and ratchet for most adjustments. A swivel-head ratchet or flexible extension helps reach the high beam adjuster. A precision flat-head screwdriver works for slotted adjuster types but offers less control than a socket.
Why Is Access So Difficult on the F150?
The F150 engine bay has limited rear clearance for headlight adjusters. The adjusters face the engine bay, and components like the radiator support and air ducting obstruct access. This is why most owners recommend the iterative remove-adjust-reinstall method for high beams.
What Is the Stair-Step Beam Pattern?
The stair-step pattern means the driver’s side (left) low beam is slightly lower than the passenger side (right). This compensates for road crown in left-hand-drive vehicles and reduces glare for oncoming traffic while still illuminating the roadside effectively.
Key Takeaways for Adjusting Alpharex Headlights on F150
Adjusting Alpharex headlights on your F150 demands patience, but the payoff is exceptional nighttime visibility and safety. Start with low beams using the top 8mm adjuster and achieve the stair-step pattern where the driver side sits lower than the passenger side.
For high beams, expect to remove the headlight multiple times due to limited rear access. Use an 8mm socket with extension and work in quarter-turn increments. Mark your starting position before each adjustment to avoid losing your place.
Always verify alignment in darkness against a wall placed 25 feet away. Recheck your beam pattern after any suspension modifications, tire changes, or front-end impacts. With the right tools and method, you will achieve a factory-sharp beam pattern that illuminates the road effectively without blinding other drivers.


