

If your F-350 horn is not working, you face more than just an annoyance. A silent horn creates a serious safety risk on busy highways or tight job sites where you need to alert other drivers instantly.
Most failures stem from a dead horn unit in newer trucks or a faulty control module in older models. This guide helps you diagnose the specific issue for your model year and restore your safety system quickly.
Check Horn Fuse and Relay First
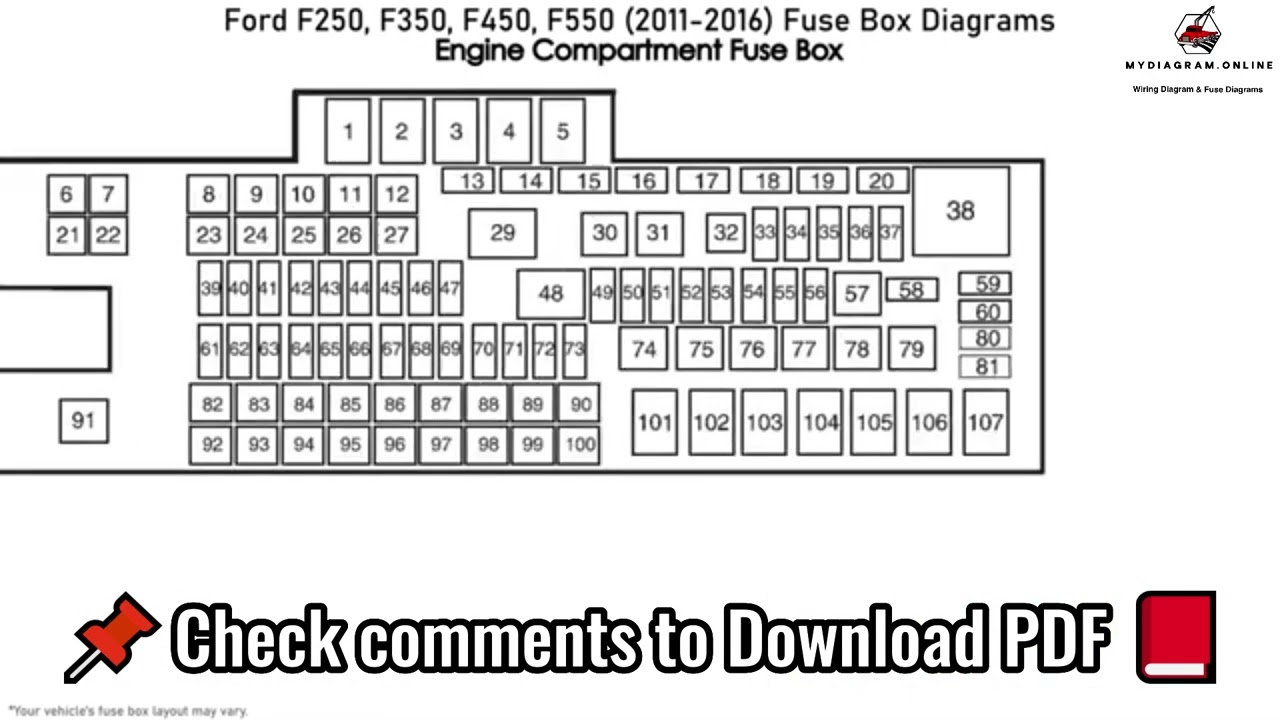
Always rule out simple electrical interruptions before removing any components. The fuse and relay are the most common points of failure and the easiest to check.
Locate Fuse Panel and Test F22
Open your hood and find the fuse panel located behind the air intake. Release the two thumb clips on the cover and lift it upward to access the fuses. Identify Fuse F22, which is a 20-amp fuse dedicated to the horn circuit. Use a multimeter to test for continuity across the fuse links. If the fuse is blown, replace it immediately but investigate why it failed to prevent recurrence.
Swap Horn Relay to Isolate Fault
The horn relay sits on the left side of the fuse panel box. Swap this relay with the identical AC compressor relay located nearby. Turn your key to the ON position and press the horn button. If the horn sounds, your original relay was faulty. If silence persists, the relay is likely functional, and you must move downstream to test the horn unit itself.
Pro Tip: Relay failure is rare in 2017 and newer models. Focus your efforts on the horn unit if the swap yields no results.
Test the Horn Directly

If power reaches the engine bay but no sound occurs, the horn assembly itself may be dead. You must access the unit behind the grille to perform a definitive test.
Remove Engine Cover Safely
A large plastic tray blocks access to the horn assembly in the engine bay. Use a plastic trim tool to gently pry up all 16 plastic tabs securing the tray. Work slowly around the perimeter because these tabs break easily. Snapped tabs require OEM replacements to prevent vibration damage or water ingress later.
Access and Disconnect Horn Unit
The horn mounts behind the grille using a 10 mm bolt and a hook-style bracket. Use a slim or stubby ratchet to remove the bolt, release the hook, and pull the horn free. Disconnect the tight electrical pigtail carefully to avoid damaging the wires. Inspect the connector for corrosion, which is a common cause of intermittent failure.
Power Test with 12V Battery
Connect the horn directly to a 12V battery using insulated alligator clips to verify functionality. Attach the positive clip to the horn terminal and the negative clip to the metal casing. If the horn remains silent, the unit is dead and requires replacement. If it sounds loudly, the issue lies upstream in the wiring or control modules.
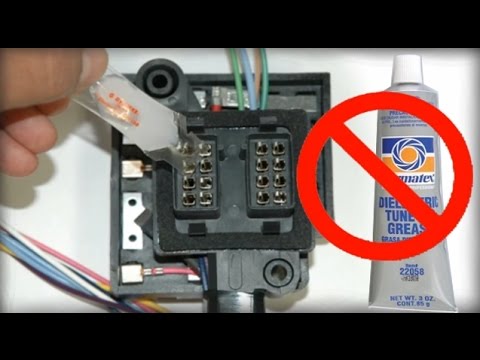
Expert Note: Apply dielectric grease to the connector when installing a new horn to prevent future corrosion issues.
Diagnose Steering Wheel Switch and Clock Spring

No power at the horn suggests a break in the signal path starting at the steering wheel. You must test the switch and the ground path through the clock spring.
Safety First Before Disassembly
Disconnect the negative battery terminal before touching any steering column components. Wait at least 15 minutes to allow the airbag system capacitors to discharge fully. Never probe the yellow airbag connector during this process to avoid accidental deployment.
Test Horn Switch Continuity
Carefully remove the steering wheel airbag using proper fastener tools. Behind the airbag, locate the red 4-pin connector for the horn switch. Set your multimeter to continuity mode and probe the two horn switch terminals while pressing the horn pad. A beep confirms the switch mechanism works, while silence indicates a faulty switch or horn pad.
Check Ground Path Voltage
Set the multimeter to voltage mode to verify the ground path. Probe the Green/Orange wire at the switch connector and reference the negative lead to a known ground like the cigarette lighter. You should read approximately 12.4V. This reading confirms the clock spring is passing the ground signal properly to the rest of the system.
Warning: A failed clock spring can interrupt the horn signal and sometimes trigger the airbag light. Suspect the clock spring if both switch and ground tests fail.
Test SCCM Signal Output for 2011–2013 Models

Owners of 2011 to 2013 F-350s often face issues with the Steering Column Control Module (SCCM). This module frequently fails, especially if cruise control and audio buttons also stop working.
Locate SCCM Connector and Pin 8
Find the SCCM mounted on the steering column. Identify Pin 8 on the connector, which carries the Violet/Green wire. This specific wire sends the horn request signal from the SCCM to the Body Control Module (BCM).
Monitor Voltage at Pin 8
With the key in the ON position, measure the voltage at Pin 8. It should read approximately 10.5V at rest. Press the horn button and watch the meter. The voltage should drop to 0V (ground) when pressed. If the voltage does not drop, the SCCM is not processing the signal from the switch.
Perform Bypass Test with Jumper
Use a jumper wire to manually ground Pin 8 while the key is ON. If the horn sounds immediately during this test, the downstream circuit including the BCM and horn is functional. This result confirms the SCCM is the culprit and needs replacement.
Real-World Insight: Many owners replace the horn first only to find it still does not work. This happens because the SCCM never sends the signal to activate it.
Verify BCM and Internal Relay Function
The Body Control Module (BCM) controls the horn relay in modern F-350s. While not user-serviceable, you can test its operation using diagnostic tools.
Use a Scan Tool for Active Test
Connect an OBD2 scanner capable of accessing Ford modules such as Ford IDS or FDRS. Run the BCM Active Test for Horn function. If the horn sounds during this digital test, the BCM, relay, and horn are working correctly. If it remains silent, check power and ground at the horn again before condemning the module.
Monitor Inductive Kick Voltage
Probe the Violet/Green wire during the BCM horn test. When the horn deactivates, you should see a voltage spike over 45V. This “inductive kick” confirms the BCM internal relay is energizing and de-energizing properly.
Key Fact: No voltage spike indicates the BCM internal relay or driver circuit has failed. Module replacement and programming are required in this scenario.
Replace Failed Horn Assembly for 2017–2022 Models
Replace the horn assembly if direct testing confirms it is dead. This is the most common fix for 2017 through 2022 Super Duty trucks.
Remove Old Horn and Install New Unit
Unbolt the old horn with a 10 mm socket and release the hook bracket. Disconnect the pigtail and remove the unit. Connect the new horn to a 12V battery to verify it works before installation. Apply dielectric grease to the connector, mount the horn, engage the hook, and secure the bolt tightly.
Reinstall Engine Cover Correctly
Snap the plastic tray back into place and ensure all 16 tabs click securely. Replace any broken tabs with OEM parts to maintain engine bay integrity. This entire process typically takes 20 to 30 minutes and requires no programming.
Replace and Program SCCM for 2011–2013 Models
Replace the SCCM if diagnostics point to module failure. This component requires professional programming to function with your specific truck.
Remove Faulty SCCM and Install New Module
Disconnect the battery and wait for the airbag system to discharge. Remove the airbag and steering wheel if necessary to access the module. Unclip and remove the faulty SCCM. Install the new module ensuring it matches your truck’s VIN and trim level to avoid configuration issues.
Reprogram with Scan Tool
The SCCM is a programmed module and will not work as a plug-and-play part. Use a professional-grade scan tool to initialize the module, configure it to your vehicle, and clear all diagnostic trouble codes.
Critical: Never bypass the SCCM with a hardwired horn. This can disable the airbag system or cause electrical fires.
Common Horn Failure Patterns by Year
Identify your likely issue based on your truck’s model year to save diagnostic time.
2017–2022 Horn or Fuse Failure
- Symptoms: No sound occurs, but other steering wheel controls function normally.
- Fix: Replace the horn unit or the 20-amp fuse.
- Prevention: Use dielectric grease on connectors to fight corrosion.
2011–2013 SCCM Module Failure
- Symptoms: Horn, cruise control, and audio buttons all fail simultaneously.
- Fix: Replace and program the SCCM.
- Pro Tip: Suspect the SCCM immediately if a new horn does not solve the problem.
Quick Diagnostic Flowchart
Follow this decision tree to isolate your F-350 horn not working issue quickly.
-
Does the horn work during BCM active test?
- No: Check fuse, relay, horn power, and ground.
- Yes: Problem is upstream in the switch, clock spring, or SCCM.
-
Does the horn switch show continuity?
- No: Replace horn switch or pad.
- Yes: Proceed to next step.
-
Does grounding Pin 8 activate the horn?
- No: Check wiring to BCM or BCM internal failure.
- Yes: Replace and program SCCM.
Prevent Future Horn Failures
Take proactive steps to ensure your horn remains functional for years to come. Regular maintenance prevents costly repairs and safety hazards.
- Apply dielectric grease to all horn connectors during maintenance to block moisture.
- Replace broken engine cover tabs immediately to prevent water damage.
- Avoid aftermarket horns that draw excessive current and stick to OEM-spec units.
- Test horn monthly especially in winter when corrosion is most aggressive.
Frequently Asked Questions About F-350 Horn Issues
Why does my F-350 horn work sometimes and not others?
Intermittent failure usually points to a corroded connector at the horn or a failing clock spring. Check the pigtail connector for green corrosion and apply dielectric grease to restore connection.
Can I drive my F-350 if the horn is not working?
While legal in some areas for short distances, it is highly unsafe to drive without a functional horn. You cannot alert other drivers to dangers, increasing your risk of an accident significantly.
How much does it cost to fix an F-350 horn?
A simple fuse or relay fix costs under $20. Replacing a horn assembly ranges from $50 to $150. SCCM replacement with programming can cost between $300 and $600 depending on labor rates.
Do I need to program a new horn assembly?
No, physical horn assemblies do not require programming. You only need to program the SCCM on 2011–2013 models if that specific module is replaced.
What causes the horn fuse to blow repeatedly?
A recurring blown fuse indicates a short circuit in the wiring or a failing horn drawing too much current. Inspect the wiring harness for fraying and test the horn current draw before replacing the fuse again.
Key Takeaways for Fixing Your F-350 Horn
Restoring your F-350 horn requires identifying whether your truck has a physical component failure or a module signal issue. Newer models typically need a simple horn replacement, while older models often require SCCM diagnosis and programming. Always test components directly before purchasing parts to avoid unnecessary expenses.
Start with the fuse and relay, then move to direct horn testing. If those components function, investigate the steering column modules using the voltage tests outlined above. Addressing the root cause ensures your safety system works reliably when you need it most.


