
Your Ford F-250’s AC quits on the hottest day of the year, and the cab turns into a sauna. You twist the dial, hear the blower working, but warm air keeps pouring through the vents. This frustrating experience is common among 2011–2016 F-250 owners with the 6.7L Powerstroke, where F250 AC not blowing cold ranks as one of the top climate complaints.
The good news is that most cooling failures trace back to a handful of fixable issues. Refrigerant leaks cause roughly 37% of cases, electrical faults account for 21%, and compressor failure makes up about 12%. Before paying for a shop visit, you can diagnose and often repair the problem yourself. This guide covers every likely cause, how to test each one, and which repairs actually restore cold air.
You will learn how to inspect cabin filters, test refrigerant pressure, verify compressor clutch engagement, and read HVAC trouble codes. Whether you face weak airflow, warm output, or a system that cycles on and off, this step-by-step approach gets your truck cooling again.
Start With Simple Airflow Blockers
Before touching refrigerant or electrical parts, rule out airflow restrictions. These fixes are fast, cheap, and often mistaken for major AC failure.
Replace the Cabin Air Filter
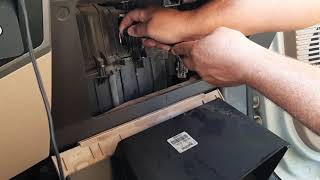
A clogged cabin air filter chokes airflow and mimics total cooling failure. On F-250 models, the filter sits behind the glove box or under the cowl. If it is packed with dust or debris, swap it out right away.
- Symptoms: Weak airflow, musty smell, reduced cooling
- Fix: Install a compatible OEM or high-efficiency replacement
- Schedule: Replace every 12,000 to 15,000 miles or once a year in dusty regions
Clean the Condenser Coils
The condenser sits in front of the radiator and releases heat from the refrigerant. Bugs, dirt, and road grime clog the fins and reduce cooling efficiency.
- What to look for: Blocked airflow through the fins, visible debris buildup
- How to clean: Use compressed air or a soft brush, and avoid high-pressure water
- Pro tip: Inspect after off-road trips or towing in dusty conditions
Diagnose Refrigerant System Issues
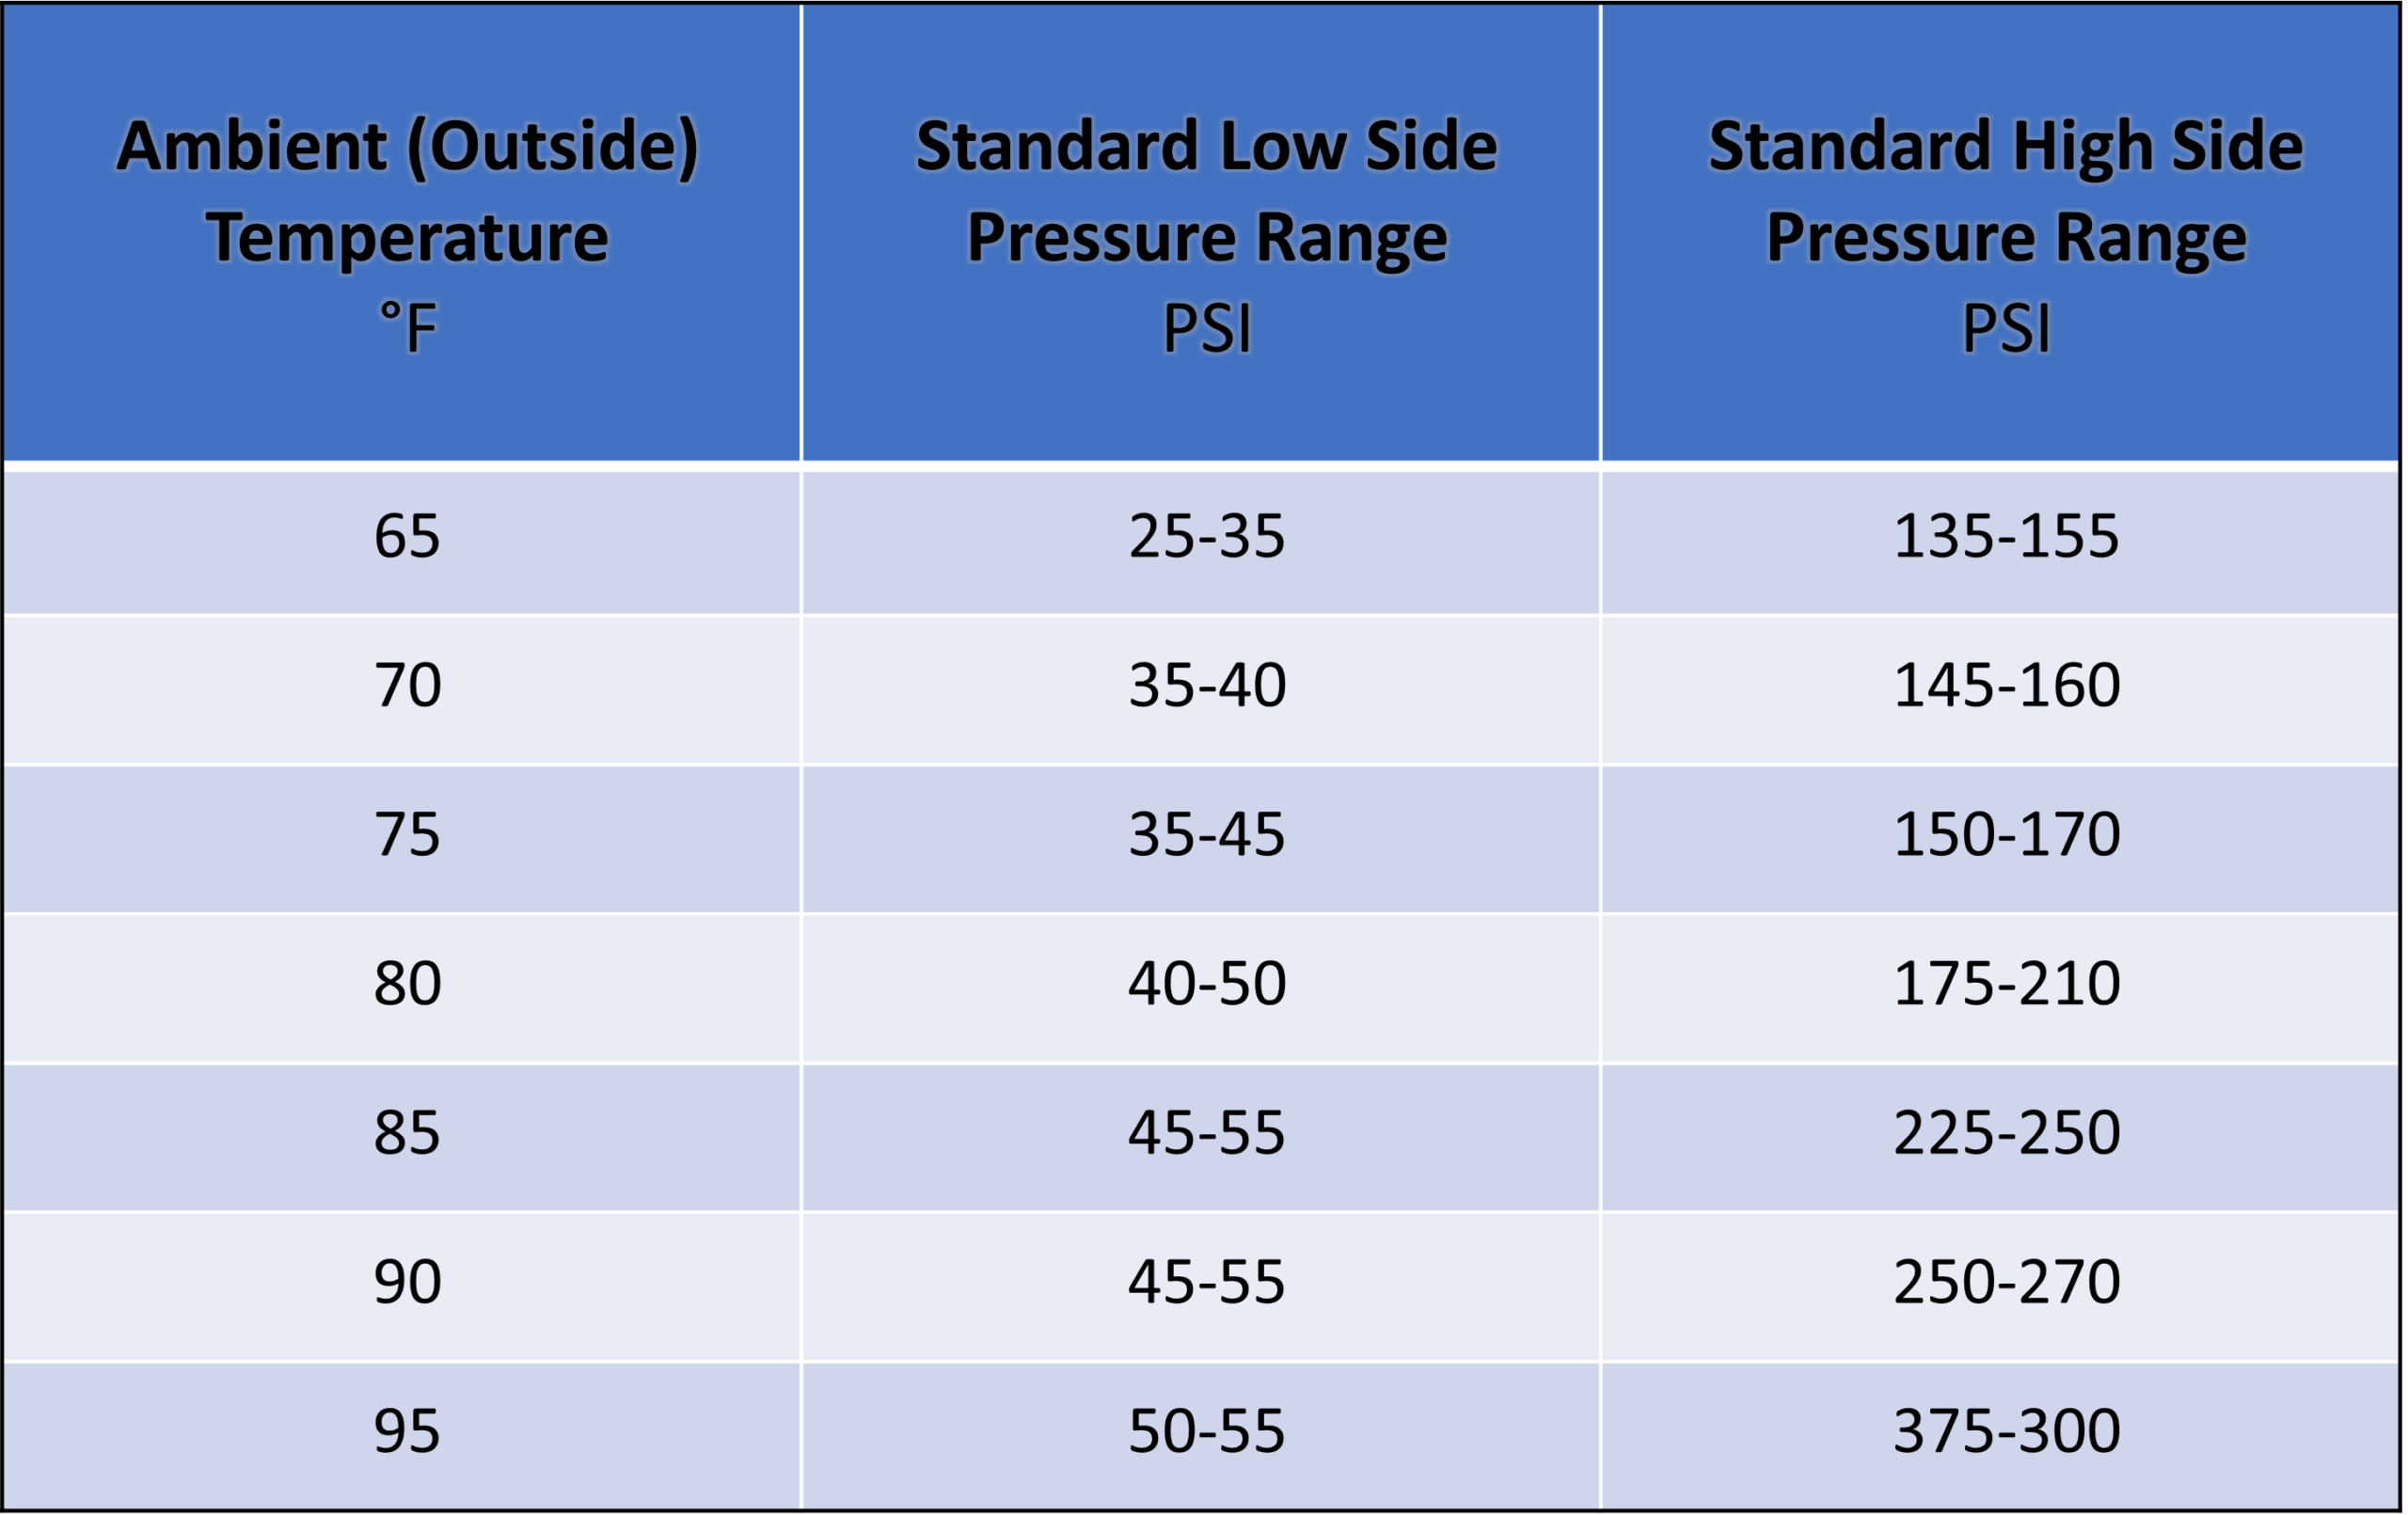
Low refrigerant is the leading cause of F250 AC not blowing cold. Refrigerant does not wear out over time, so a low reading always points to a leak.
Test Pressure With a Manifold Gauge Set
Connect a manifold gauge to the low-side service port on the larger AC line near the firewall. Compare your readings to ambient temperature charts.
- Low pressure on both sides: Likely refrigerant leak
- High pressure on high side, low on low side: Possible blockage or failing compressor
- Normal pressures but no cooling: Check blend door or sensor issues
Never guess the charge amount. Overcharging causes high head pressure and triggers compressor shutdown.
Find and Fix AC Leaks
Two reliable methods help locate leaks in the system.
Use UV Dye and a Black Light
- Inject UV dye into the system using a recharge kit
- Run the AC for 10 to 15 minutes
- Shine a UV light on hoses, seals, the evaporator, and the condenser
- Look for glowing green oil residue, which marks the leak point
Use an Electronic Leak Detector
- Move the probe slowly around connections, the compressor shaft seal, and the condenser
- Most detectors work with R-134a and R-1234yf
- This method is fast and accurate, though you should avoid false alarms near recently spilled refrigerant
Common leak points:
– Evaporator core inside the dash
– Condenser hoses at the front of the engine bay
– O-rings and service port seals
– Compressor shaft seal
Verify Compressor Operation
The compressor circulates refrigerant throughout the system. If it stops running, no cooling happens regardless of charge level.
Check if the Clutch Engages
Start the engine, turn the AC to maximum, and watch the front of the compressor pulley.
- Clutch engages: The center hub spins with the pulley, confirming the system receives command
- Clutch does not engage: No spin means no refrigerant flow
If the clutch fails to engage:
– Check for power at the compressor connector
– Test the relay and fuse in the electrical system
– Listen for a faint click. If you hear nothing, suspect an electrical fault
Listen for Unusual Noises
Grinding, clunking, or squealing from the compressor area signals internal damage.
- Possible causes: Worn bearings, seized internals, or low oil
- Consequence: Metal shavings circulate and contaminate the entire system
- Action: Replace the compressor and flush the lines or install a filter kit
Inspect Heat Exchange Components
Even with proper refrigerant and a working compressor, blocked heat exchangers ruin cooling performance.
Clear Evaporator Coil Buildup
The evaporator inside the HVAC box absorbs heat from the cabin. When clogged with mold or debris, airflow drops and cooling fails.
- Symptoms: Musty smell, low airflow, frost buildup
- Fix: Apply HVAC foaming cleaner through the cabin intake
- For severe cases: Remove the evaporator and clean or replace it
Replace a Damaged Condenser
If the condenser leaks or shows physical damage from off-road impact or corrosion, replacement is necessary.
- Upgrade tip: Install a high-efficiency or dual-pass condenser for better cooling in hot climates
- Pair with: A new receiver or drier to prevent moisture contamination
Test Electrical and Sensor Systems
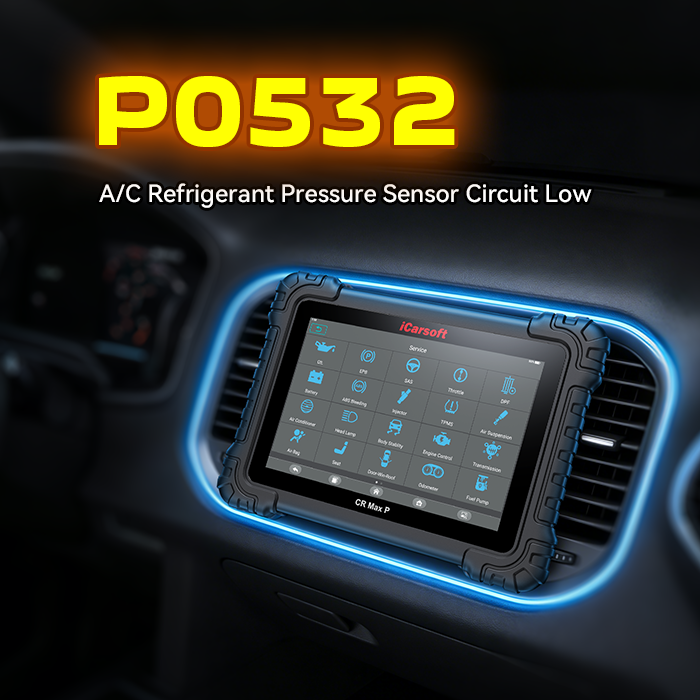
Modern F-250 trucks rely on sensors and modules to manage AC operation. A single faulty signal can shut down the entire cooling cycle.
Scan for HVAC Trouble Codes
Use an OBD2 scanner that reads enhanced HVAC codes, since basic scanners often miss these signals.
Key codes to watch for:
– P0530: AC Refrigerant Pressure Sensor Circuit Malfunction
– P0531: Circuit Range or Performance Issue
– P0532: Low Input from Pressure Sensor
These codes do not always mean the sensor itself is bad. Check wiring and connections first.
Check the Ambient Temperature Sensor
Mounted near the grille or front bumper, this sensor tells the climate control module whether outside air is hot enough to engage AC.
- Failure mode: Reads too cold, so the system refuses to activate
- Test: Compare the sensor reading through a scan tool to the actual temperature
- Fix: Replace the sensor if it reads out of spec. Most are plug-and-play
Inspect Pressure Switches
These safety switches monitor refrigerant pressure and disable the compressor when levels become unsafe.
- Low-pressure lockout: Prevents operation if refrigerant is too low
- High-pressure cutoff: Triggers if the condenser is blocked or overcharged
- Test: Bypass the switch temporarily with caution to see if the compressor kicks on
Diagnose Blower Motor and Resistor Problems
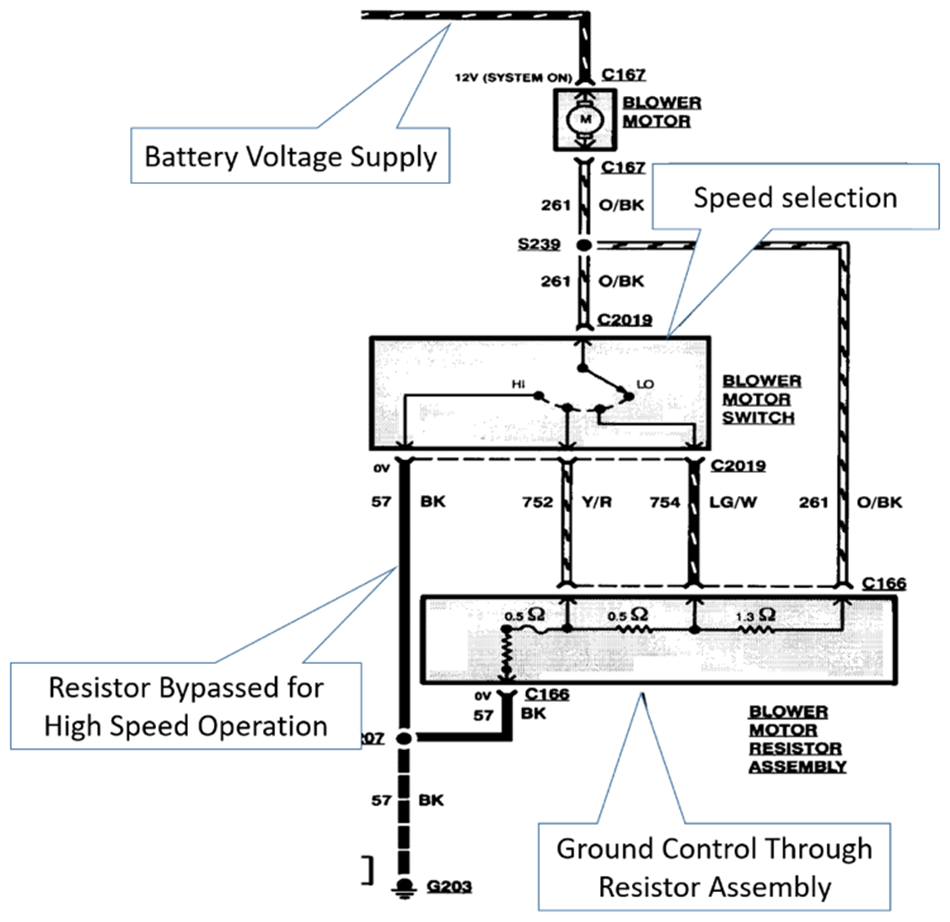
Cold air cannot reach you if the blower motor fails to deliver it.
Fix Blower Motor Resistor Issues
When the fan only works on high speed, the blower motor resistor is likely dead.
- Location: Mounted near the HVAC case under the dash
- Symptoms: No low or medium speeds, but high speed still works
- Fix: Replace the resistor pack, often available for under $30
Test the Blower Motor
If no speeds work at all:
– Check power and ground at the motor connector
– Listen for humming, which signals a seized motor, or silence, which means no power
– Replace the motor if faulty and confirm the correct amperage rating
Prevent Future AC Failures
Avoid repeat breakdowns with simple seasonal maintenance.
Flush and Recharge After Compressor Failure
If the compressor failed and shed metal into the system, flush the lines or install an in-line filter.
- Replace the receiver or drier, which absorbs moisture
- Use the correct PAG oil type and amount listed in compressor specifications
- Evacuate the system for at least 30 minutes before recharging
Use OEM-Grade Refrigerant
Avoid cheap refrigerant blends and stick with R-134a or R-1234yf as specified on your underhood label.
- Non-OEM refrigerants can damage seals and reduce efficiency
- Always add UV dye during recharge for future leak detection
Schedule Seasonal AC Checks
Before summer heat arrives:
– Test compressor engagement
– Inspect the condenser for debris
– Replace the cabin filter
– Verify all fan speeds work properly
When to See a Professional
Some repairs require specialty tools and expertise beyond a typical home garage.
Seek Expert Help If:
- You cannot find a leak after UV dye and electronic testing
- The evaporator core needs replacement, which requires dash removal
- Electrical faults persist after checking fuses, relays, and sensors
- You lack a vacuum pump for proper system evacuation
A certified Ford technician with HVAC experience can diagnose complex blend door actuator issues, module communication errors, or CAN bus faults that DIY tools often miss.
Frequently Asked Questions About F250 AC Not Blowing Cold
Why is my F250 AC not blowing cold but the compressor is running?
If the compressor runs but air stays warm, the system may be low on refrigerant due to a leak. A clogged condenser or evaporator can also block heat exchange even with normal pressures. Check for ice on the evaporator or restricted airflow through the condenser.
How do I know if my F250 AC compressor is bad?
Common signs include loud grinding or clunking noises, a clutch that fails to engage, and no cold air despite proper refrigerant levels. Metal shavings in the oil or visible clutch wear confirm internal damage. A scan tool showing no compressor command may also point to failure.
Can a cabin air filter cause AC to stop blowing cold?
Yes. A clogged cabin filter restricts airflow so severely that the AC feels like it stopped working. Replacing the filter often restores full cooling without any other repairs. Check the filter first before exploring more complex causes.
What does the P0530 code mean on a Ford F250?
P0530 indicates a malfunction in the AC refrigerant pressure sensor circuit. The sensor may be faulty, or wiring and connectors could be damaged. Clear the code after repairs and retest the system to confirm the fix.
How much does it cost to fix F250 AC not blowing cold?
Repair costs vary widely. Replacing a cabin filter or resistor costs under $50, while recharging refrigerant runs $150 to $300. Compressor replacement can exceed $1,000 depending on parts and labor. Diagnose first to avoid unnecessary expenses.
Is R-134a or R-1234yf used in the 2011–2016 F250?
Most 2011–2016 F-250 models use R-134a, though some later production years may specify R-1234yf. Always check the underhood label before recharging. Using the wrong refrigerant can damage seals and reduce cooling efficiency.
Final Thoughts on Fixing Your F250 AC
The F250 AC not blowing cold issue rarely requires a major expense when you follow a structured diagnostic path. Start with the cabin filter and condenser cleanliness, then move to refrigerant pressure testing and compressor clutch verification. Use OBD2 codes to guide electrical diagnosis and address sensor faults promptly.
Most owners can restore full cooling by identifying the root cause early and replacing only what is necessary. Keep the system clean, properly charged, and electronically sound, and your F-250 will deliver reliable cold air for years. Begin your diagnosis today with a cabin filter inspection and a visual check of the condenser.


