

If your F150 front caliper is not releasing, you’re likely dealing with brake drag, overheating rotors, and a burning smell after short drives. This issue doesn’t just wear out pads and rotors. It can reduce fuel economy, cause dangerous pulling, and even lead to brake failure. Despite replacing calipers, master cylinders, or pads, many F-150 owners still face the same problem because the real culprits are often hidden.
In this guide, you’ll learn how to diagnose and fix the true cause, saving time, money, and avoiding unnecessary part swaps. We’ll cover proven diagnostic steps, model-specific fixes including 3.5L EcoBoost solutions, and real-world solutions from verified mechanic reports and owner success stories.
Replace Faulty Brake Hoses First
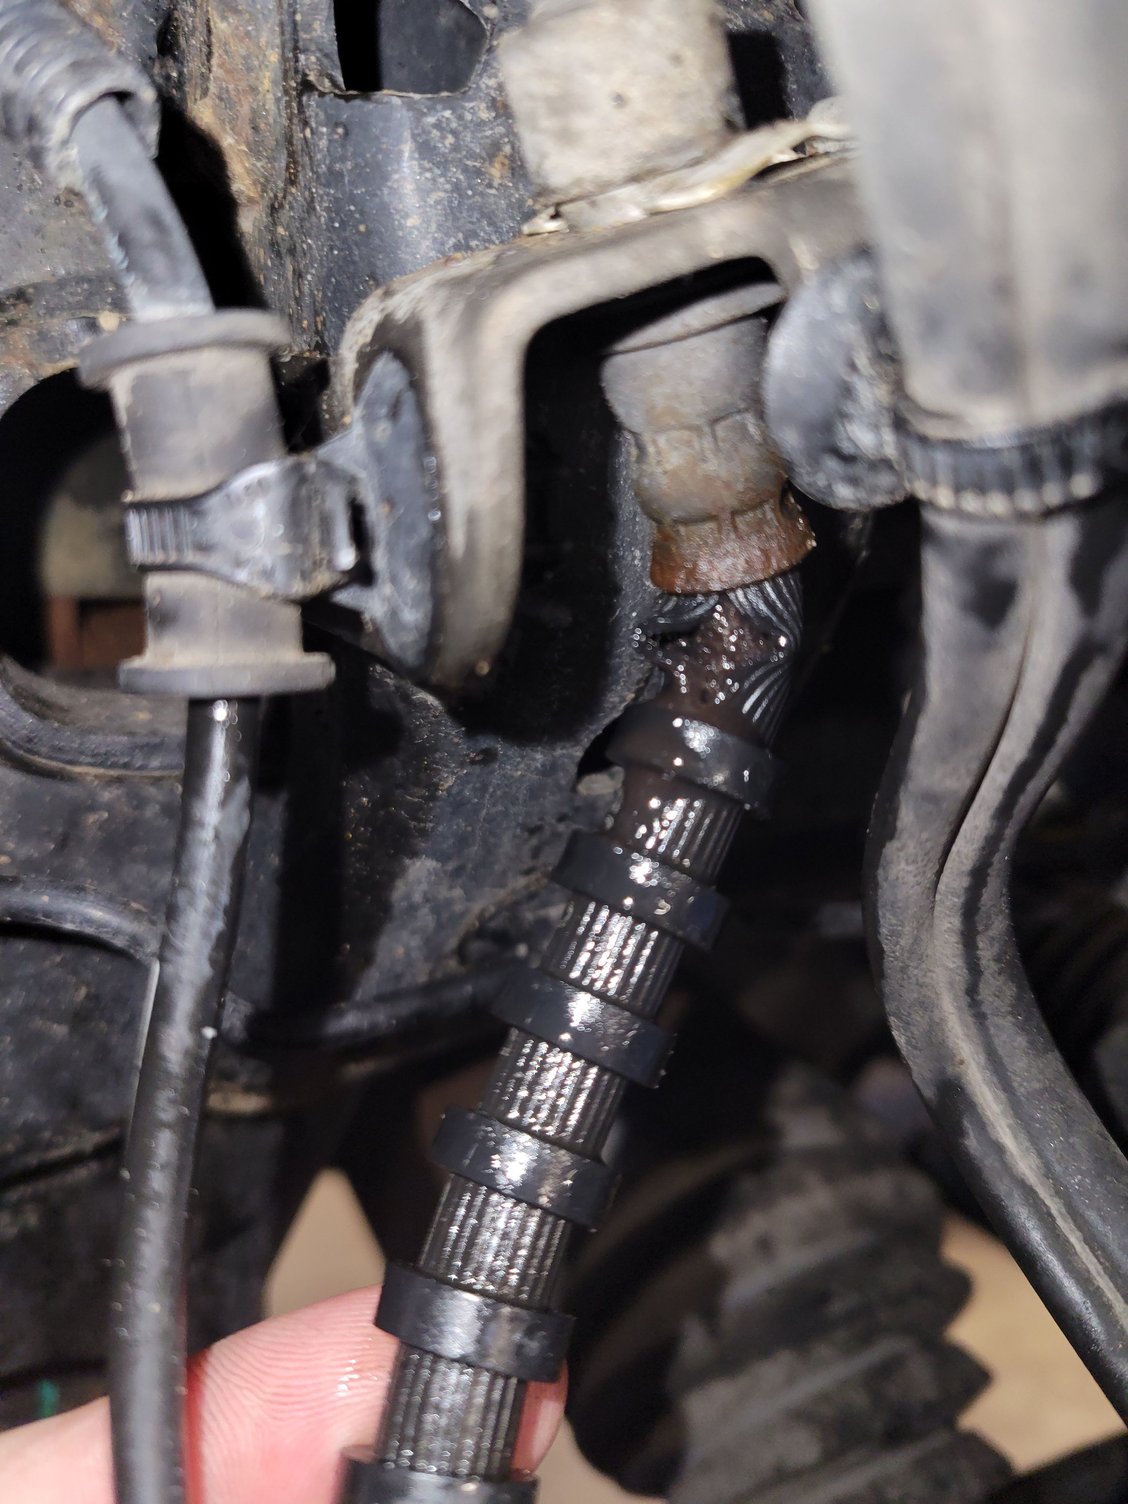
The most common cause of a front caliper not releasing is a collapsed or internally degraded brake hose, not a bad caliper. These rubber lines look fine from the outside, but inside, the lining can delaminate and act like a one-way valve, allowing fluid in but not letting it return.
Why Hoses Fail Internally
Over time, brake fluid absorbs moisture, causing internal corrosion. Heat cycles degrade rubber linings. This creates a check valve effect that traps pressure in the caliper, keeping pads pressed against the rotor. You might see smoke, smell burning, or notice the wheel won’t spin freely, even with a new caliper.
Test for Hose Restriction
- Drive until brakes heat up and drag occurs.
- Jack up the front end.
- Crack open the bleeder screw on the stuck caliper.
- If the wheel spins freely, pressure was trapped, meaning the restriction is upstream, likely the hose, steel line, or master cylinder.
This test alone can save you from replacing a perfectly good caliper.
Fix: Replace Both Front Hoses
• Replace both front brake hoses even if only one side is affected.
• Use OEM or high-quality aftermarket hoses and avoid cheap auto parts store versions.
• Consider replacement every 80,000 to 100,000 miles as preventive maintenance.
Fix Sticking Slide Pins and Mounting Issues
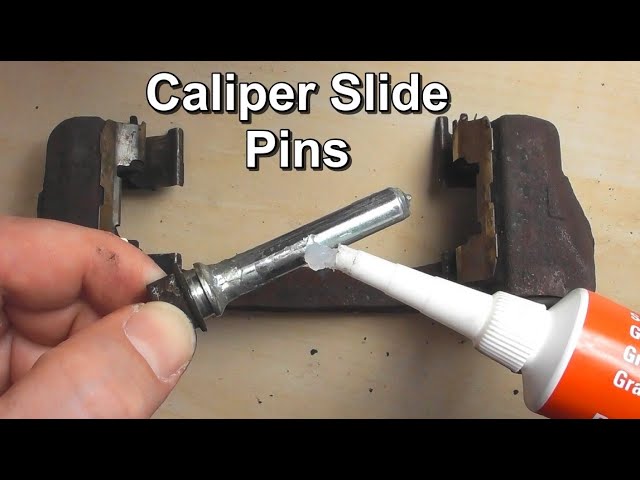
Even with good hydraulic flow, mechanical binding can keep the caliper engaged. Slide pins and brackets are often overlooked but are critical for proper release.
Clean and Lubricate Slide Pins
Slide pins let the caliper float and retract evenly. When corroded or dry, they bind, especially in wet or salty climates.
Step-by-Step Pin Service
- Remove the caliper and extract the pins.
- Clean with brake cleaner and fine sandpaper if pitted.
- Inspect the bore for rust or damage.
- Lubricate with high-temperature silicone brake grease, never regular grease.
- Reinstall and verify smooth movement.
Replace pins if they’re seized or the bores are damaged.
Check Caliper Mounting Bracket
A warped or corroded bracket can pinch brake pads, preventing release. Even if the caliper moves, the pad may bind in the channel.
Diagnose Bracket Warping
- Remove pads and slide them by hand.
- Look for tight spots, scraping, or resistance.
- Compare to a new bracket if possible.
Fix: Replace or Modify
• Replace the bracket for $25 to $50.
• For minor deformation, use a Dremel to widen tight areas.
• Recheck pad movement after repair.
Verify Correct Pad Installation
F-150 brake pads are not symmetrical, and installing them backward causes binding.
Identify Inner vs. Outer Pads
The inner pad (engine side) has two raised humps at the top. The outer pad (wheel side) has a smooth, rounded top.
Consequence of Wrong Installation
Wrong orientation prevents proper retraction. The caliper may appear to release, but the outer pad stays pressed against the rotor.
Fix
Remove pads and confirm correct position. Mark pads during future services to avoid mistakes.
Adjust Master Cylinder Push Rod
If the push rod from the brake booster to the master cylinder is too long, it blocks fluid return, even when the pedal is released.
Symptoms of Push Rod Misadjustment
Brakes drag more when hot. The pedal feels high or hard. The problem persists after caliper and hose replacement.
Test for Proper Free Play
- Push the brake pedal down slowly.
- Release and feel for 0.005 to 0.015 inches of free play before resistance.
- If no free play exists, the rod is likely too long or the pedal isn’t returning fully.
Fix: Add Spacers or Modify Rod
• Install thin washers or spacers between the master cylinder and firewall.
• This pulls the master cylinder back, creating clearance.
• If it works, consider permanent adjustment or rod replacement.
Also check that the brake light switch isn’t holding the pedal down and that carpet or floor mat isn’t interfering with pedal return.
Inspect Brake Hose Clamps for Compression
Metal clamps that secure the brake hose can corrode or be over-tightened, squeezing the hose and restricting fluid return.
Signs of Clamp-Induced Restriction
The hose appears pinched or deformed at the mounting point. Drag improves after loosening or bending the clamps.
Real-World Fix
A 2014 F-150 owner replaced calipers, master cylinder, and hoses but still had drag. The final fix was prying the clamps outward with a pry bar. The metal had expanded due to rust, and prying the brackets open fixed it.
Preventive Action
During brake service, ensure hoses float freely in clamps. Replace old clamps with non-constricting types. Inspect every tire rotation.
Flush Old or Contaminated Brake Fluid
Moisture-contaminated brake fluid causes internal corrosion, leading to swollen seals, clogged valves, and degraded brake hoses.
Check Fluid Condition
Pull the cap and inspect the fluid. Dark, murky fluid means it’s bad. Clear or amber fluid is acceptable.
Recommended Maintenance
• Flush brake fluid every 2 years or 30,000 miles.
• Use DOT 3 or DOT 4 as specified by Ford.
• Bleed the entire system after any repair.
Diagnose Electric Vacuum Pump (EcoBoost Only)
If you drive a 2012-2014 F-150 with a 3.5L EcoBoost, the electric vacuum pump may be keeping your brakes applied.
How It Causes Brake Lockup
EcoBoost engines don’t create natural vacuum. An external electric pump supplies vacuum to the brake booster. If the pump fails, it can create excess or constant vacuum, keeping the booster engaged.
Symptoms
Front brake locks when the pump runs and frees when it stops. You may hear a humming sound near the radiator support. Drag improves after engine restart.
Test: Pull Relay #25
- Jack up the front end.
- Start the engine and press the brake.
- Pull Relay #25 (auxiliary vacuum pump) from the fuse box.
- If the brakes release and the wheel spins freely, the pump is the culprit.
Replace the Pump
• Kit cost is approximately $350 from RockAuto versus $600 or more at the dealer.
• The kit includes pump, grommets, hardware, and vacuum line.
• Access requires removing the inner fender liner (felt panel).
• Mounting uses two bolts, and the original bracket often breaks, so use the kit hardware.
Replace Clogged Steel Brake Lines
Internal corrosion in hard lines can block fluid return.
Case Example
A partially clogged steel line caused delayed release. Replacing it with a $24 aftermarket line solved the problem.
Fix
• Soak in kerosene or flush with solvent for minor blockages.
• Replace for a permanent fix.
• Bleed the system afterward.
Rule Out ABS and e-Brake Issues
While less common, electronic systems can mimic mechanical binding.
ABS Module (EBCM) Failure
Suspect this if brakes release only after the engine restart and no hydraulic or mechanical cause is found. A stuck solenoid valve in the ABS module may be the cause. There’s no definitive DIY test, so scan for codes or consult a shop with module testing.
Electronic Parking Brake Interference
e-Brake issues usually affect rear brakes, but system faults can confuse diagnostics. Check that the e-Brake fully disengages (listen for the motor) and scan for brake control module codes.
Diagnostic Flow: Find the Cause Fast
Use this step-by-step method to isolate the issue.
1. Confirm the Symptom
Drive 10 to 15 minutes. Use an infrared thermometer to compare rotor temperatures. Normal is 150 to 170°F. A problem shows 400 to 650°F.
2. Lift and Spin Wheels
Jack up the front. Try to spin each wheel. Identify which side drags.
3. Bleeder Screw Test
With the brake stuck, crack open the bleeder. If the wheel spins, there’s a hydraulic issue (hose, line, or master cylinder). If there’s no change, it’s mechanical binding (pins, bracket, or rotor).
4. Test Brake Hose
Disconnect the hose at the caliper. If the wheel spins freely, replace the hose.
5. Check Push Rod and Pedal
Verify the pedal returns fully. Measure push rod clearance. Add spacers if needed.
6. EcoBoost Test
Pull Relay #25. If brakes release, replace the vacuum pump.
7. Flush and Bleed
After any repair, flush and bleed the entire system. Use fresh DOT 3 or DOT 4 fluid. Ensure a firm pedal and free-spinning wheels.
Prevent Future Caliper Issues
Avoid repeat failures with these preventive steps.
Service Slide Pins Regularly
Clean and lubricate with high-temp brake grease every brake job. Inspect for pitting or corrosion.
Replace Hoses Proactively
Swap front hoses every 80,000 to 100,000 miles. Use quality parts and don’t cheap out.
Use OEM or Trusted Aftermarket Calipers
Avoid low-tier reman units. Preferred brands include Motorcraft, Bosch, and Akebono.
Bleed After Repairs
Air in lines causes a spongy pedal and delayed release. Bleed thoroughly using the proper sequence.
Monitor EcoBoost Vacuum Pump
Listen for unusual humming. Test the relay if drag occurs.
Frequently Asked Questions About F150 Front Caliper Not Releasing
Why does my F150 front caliper stick even after replacing it?
The caliper itself is rarely the root cause. Most issues stem from collapsed brake hoses, sticking slide pins, misadjusted push rods, or vacuum pump failures on EcoBoost models. Always test the hose and mechanical components before replacing the caliper.
How do I know if my brake hose is causing the problem?
Use the bleeder screw test. Jack up the front, crack open the bleeder on the stuck caliper, and try to spin the wheel. If it spins freely, pressure was trapped upstream, indicating a hose, steel line, or master cylinder restriction.
Can a bad vacuum pump cause brakes to lock on an EcoBoost F150?
Yes. The 2012-2014 3.5L EcoBoost models use an electric vacuum pump. If it fails, it can create excess vacuum that keeps the brake booster engaged. Pull Relay #25 to test. If brakes release normally, replace the pump.
What temperature indicates an overheating brake on my F150?
Normal rotor temperature is 150 to 170°F. Problem rotors reach 400 to 650°F. Use an infrared thermometer to compare all four corners.
How often should I replace brake hoses on my F150?
Replace front brake hoses every 80,000 to 100,000 miles as preventive maintenance. Inspect clamps during every tire rotation.
Can incorrect pad orientation cause the caliper to not release?
Yes. F-150 brake pads are not symmetrical. The inner pad has two raised humps at the top. The outer pad is smooth. Installing them backward prevents proper retraction and can lock the caliper onto the rotor.
Key Takeaways for Fixing Your F150 Front Caliper
The caliper itself is rarely the true problem. Collapsed brake hoses are the most common culprit, and the bleeder screw test is the fastest way to confirm whether you have a hydraulic or mechanical issue. Always test one fix at a time rather than shotgunning parts. EcoBoost owners should test Relay #25 before replacing anything. Flush brake fluid every 2 years to prevent internal corrosion. With the right diagnosis, a front caliper not releasing is often a $25 fix, not a $600 nightmare.


