

Is your F-150’s cabin suddenly silent? No airflow from vents, even when the A/C or heater is cranked up? If the dash controls light up but the blower motor isn’t working, you’re not alone. This is one of the most common electrical issues across F-150 model years 2000-2023. The good news: it’s usually a quick, affordable fix, once you know where to look.
The F150 blower motor not working problem typically stems from a failed relay, burnt resistor, bad ground, or wiring fault, not the motor itself. In this guide, we’ll walk you through a step-by-step diagnostic process used by technicians to pinpoint and repair the issue in under an hour.
Check F51 and F45 Fuses First
Before tearing into dash panels, verify power is reaching the system. Two fuses control the blower circuit: F51 (40A) and F45 (5A). A blown fuse, especially F45, can mimic motor failure.
Test F51: Main Power Fuse
F51 supplies high-current power to the blower motor via the relay. It’s located in the underhood battery junction box (BJB).
- Turn ignition to RUN (engine off).
- Use a multimeter or test light.
- Probe both sides of F51.
- You should read 12-14V on each terminal.
If one side reads zero, the fuse is blown, even if it looks fine. Replace with a 40A fuse.
Warning: Never assume a fuse is good by sight. Internal cracks can break continuity without visible damage.
Test F45: Control Circuit Fuse
F45 powers the HVAC control module and relay signal. Located in the interior CJB (central junction box), usually under the dash.
- Test both ends with ignition ON.
- Should show 12V on both sides.
- If dead, replace the 5A fuse.
Key Insight: If F45 is blown, the relay won’t engage, so no power reaches the motor, even if F51 is good.
Swap Relay #3 to Test
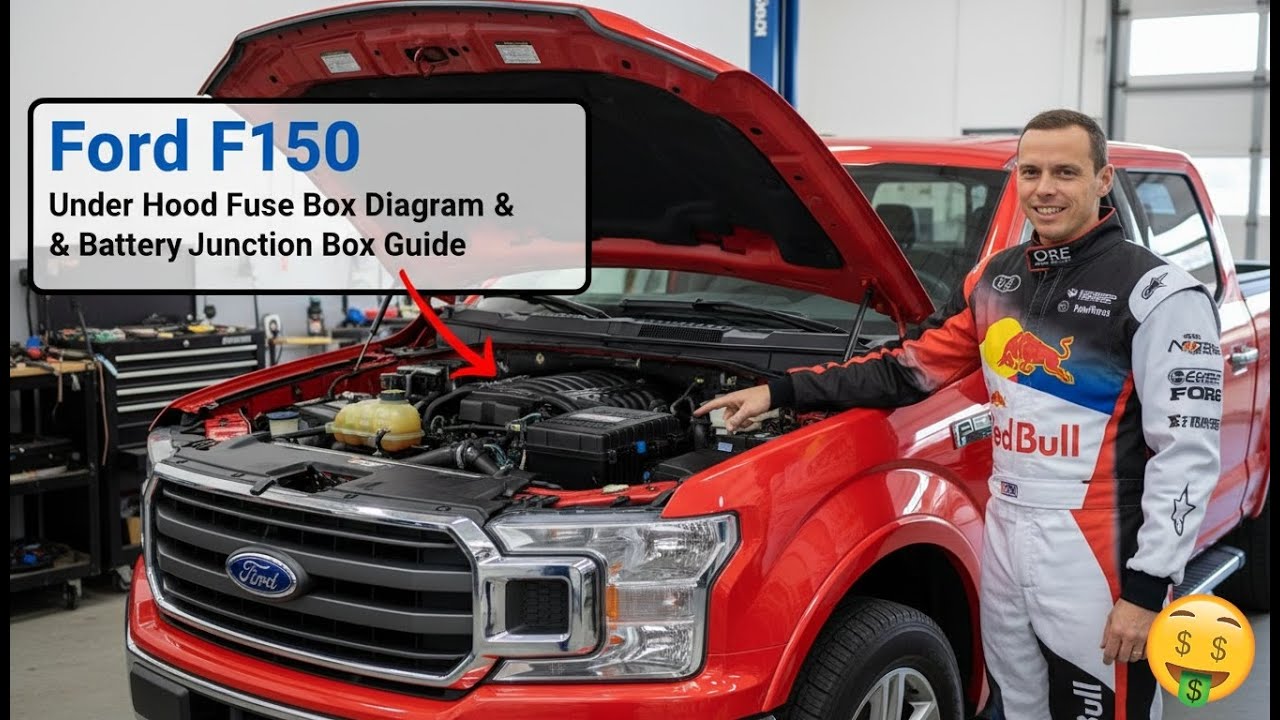
The blower motor relay (Relay #3) is a top failure point. It clicks when HVAC turns on, but internal contacts wear out over time, cutting power to the motor.
Locate Relay #3
2004 and newer models have the relay in the underhood BJB, labeled “Relay #3” in the owner’s manual. Earlier 2000-2004 models have it in the instrument panel block near the gas pedal.
Perform Swap Test
- Turn ignition OFF.
- Remove Relay #3.
- Swap it with Relay #4 (heated rear window), which is the same type but non-critical.
- Turn HVAC to high speed.
If the blower works, the original relay was faulty. If the rear defroster now fails but blower runs, that confirms the relay is bad.
Pro Tip: Always use OEM Ford relay for replacement. Aftermarket versions may fail prematurely. Current OEM part costs about $18 and is available at dealerships.
Test Voltage at Motor Connector
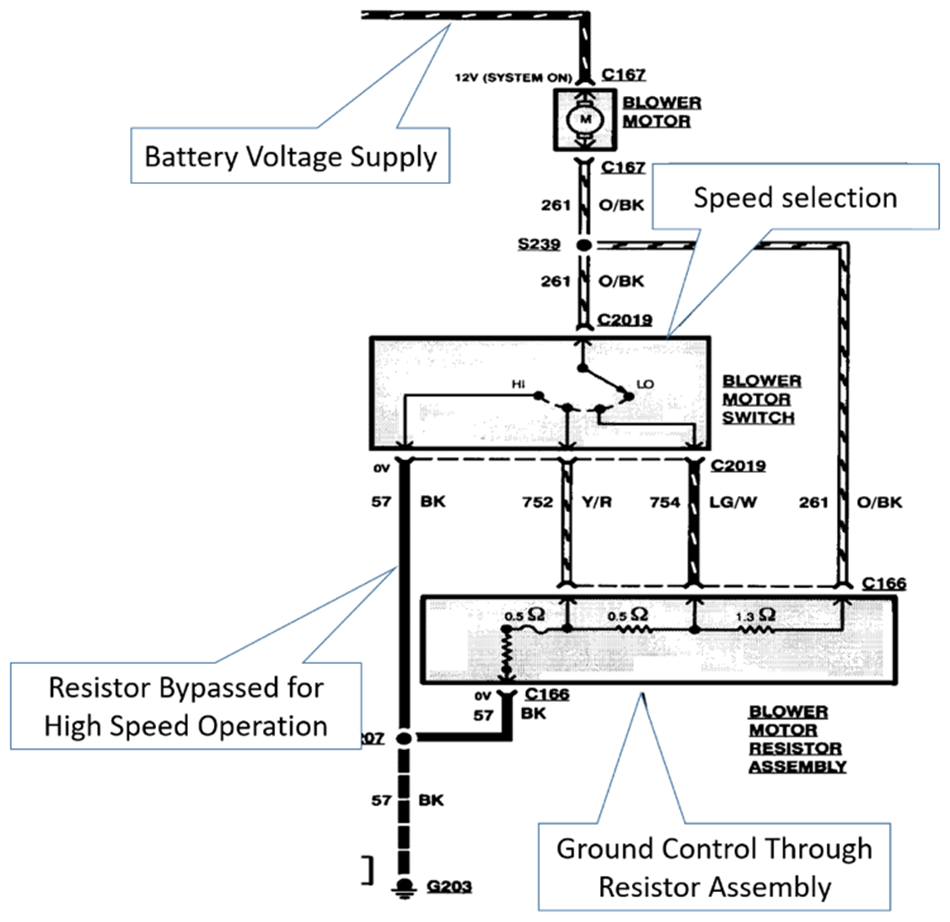
No power at the motor? The fault lies upstream. Let’s check if voltage reaches the blower.
Access the Motor Connector
- Open glovebox, squeeze side tabs, and lower it.
- Locate the 2-wire connector near the firewall (passenger side).
- Disconnect it from the blower motor.
Check for 12V
- Set HVAC to highest speed.
- Backprobe the power wire. 2000-2004 models use Brown/Yellow (BN/YE), while 2004+ uses Yellow/Green (Y/G).
- Use multimeter between this wire and chassis ground.
Expected reading is 12-14V. No voltage indicates problem is relay, fuse, or wiring. Low voltage below 10V means check for corrosion, loose connections, or damaged harness.
Critical Finding: One technician measured only 1.8V at the motor despite good fuses, traced to poor relay output and failing connector.
Inspect Blower Motor Resistor
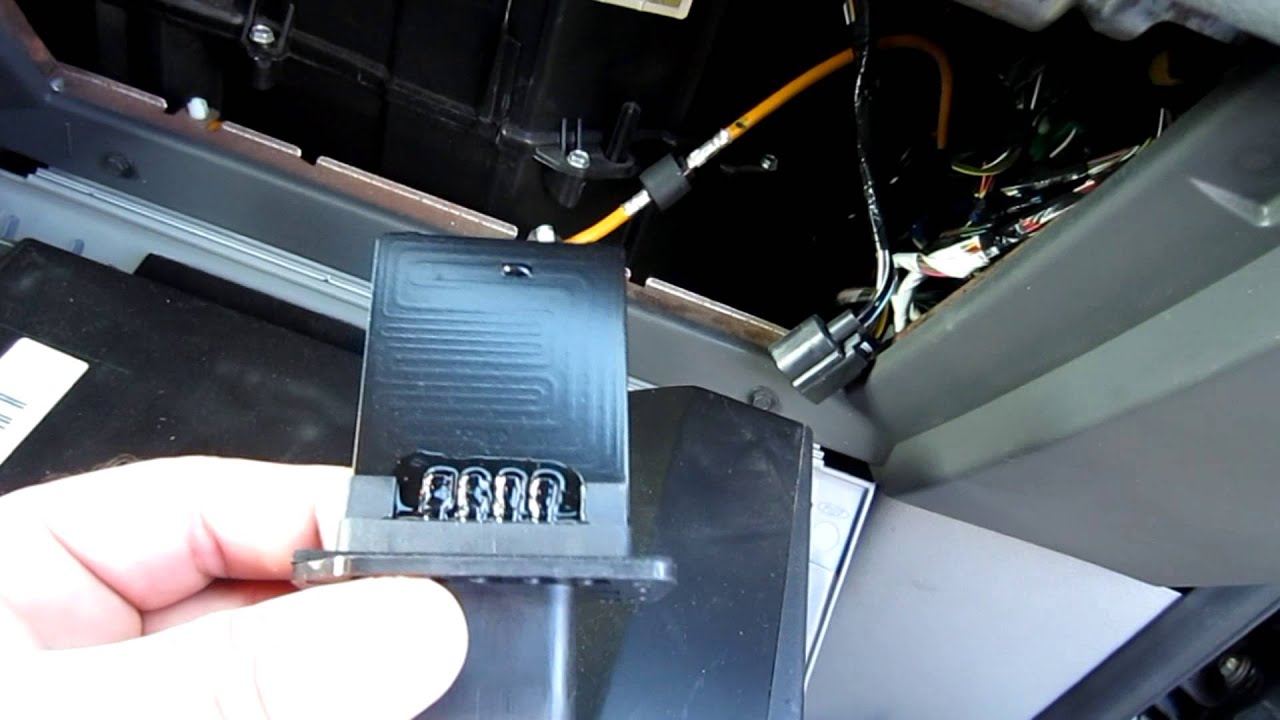
If the blower works only on high speed, the resistor is likely dead. But if no speeds work, the resistor may still be involved, especially if the ground path is broken.
Why It Fails
The resistor controls speeds 1-3 by varying ground resistance. High current causes overheating. Over time, terminals burn, wires melt, and the module fails.
Locate and Remove
- Lower glovebox.
- Find resistor mounted on HVAC housing.
- Remove two 8 mm screws.
- Disconnect the yellow harness plug.
Check for Damage
Look for these signs:
- Burnt, discolored, or warped plastic
- Melted or loose terminals
- Resistance when unplugging (indicates arcing)
Best Practice: If the connector shows heat damage, replace both resistor and pigtail. Reusing a damaged harness leads to repeat failures.
Replacement Parts
- Manual HVAC Resistor: about $25
- Automatic Climate Module: about $40
- Pigtail Harness: $10-15 (separate part numbers for manual/automatic)
Fix Ground Point G203
A dirty or loose G203 ground can kill the entire blower circuit. This shared ground connects near the HVAC housing and is often overlooked.
Symptoms of Bad Ground
- Intermittent blower operation
- Voltage drop at motor
- Burnt Black/White (BK/WH) wire terminal
Repair Steps
- Disconnect negative battery terminal.
- Find G203: grounding bolt near firewall or HVAC case.
- Remove wire, clean both lug and chassis surface with sandpaper.
- Reattach tightly.
- Apply anti-corrosion grease.
Verified Fix: One user restored full function after finding the G203 wire loose and burnt, despite good fuses, relay, and resistor.
Test the Blower Motor Directly
If power and ground are confirmed, test the motor itself.
External Power Test
- Remove blower motor (requires screw removal from firewall side).
- Connect +12V to Y/G or BN/YE wire, and ground to Y/B, Y/O, or OB/BK wire.
- Use battery or 12V jump pack.
If motor doesn’t spin, it’s dead.
Caution: One technician replaced the motor, but the new one didn’t work. Turns out the upstream circuit had no power. Always test power first.
Shortcut: Use a cordless drill battery (12-18V) for a quick spin test.
Diagnose Model-Specific Failures
Newer F-150s have electronic complexities that change the failure profile.
2013+ F-150: Internal BJB Failure
All parts test good but no power to motor? The cause may be cracked solder joints or corrosion inside the underhood fuse box. Diagnosis requires tracing voltage from relay output through the BJB. Fix may need full BJB replacement, which is rare but documented.
2021 PowerBoost: Control Module Failure
A/C stops blowing after extended idle. The cause is overheating in blower motor control module. Dealer fix replaces both motor and control module. After repair, run 30-minute idle with A/C on with no recurrence.
Why Restarting Helps: Cycling power resets the module temporarily.
Implication: If you have automatic climate control, suspect an electronic control unit, not just a relay.
Check Ambient Temperature Sensor
Not a primary cause, but a failed ambient temp sensor can disable auto HVAC systems.
Location
Mounted on right-side radiator support, upper area. Small black sensor with 2-wire plug.
Role
Feeds outside temp to climate control. If faulty, system may refuse to activate blower in auto mode.
Fix
Unplug old sensor and plug in new one (about $15 on Amazon). No calibration needed.
Low-Cost Test: Replace sensor early if other checks pass. It’s cheap and easy.
Repair Burnt Connectors and Wiring
High current plus poor contact equals heat damage. This is a known design weakness in F-150 HVAC circuits.
What to Look For
- Melting plastic on resistor or motor connectors
- Brown or black discoloration
- Wires that pull out easily
Repair Options
- Replace pigtail (recommended)
- Cut and solder new terminals
- Seal with heat-shrink tubing
Prevention: Use dielectric grease on all connections to prevent moisture and arcing.
Avoid: Crimp-only repairs. They fail under heat cycles.
Bypass Options (Emergency Use)
Need airflow now? Try a temporary bypass.
High-Speed Only Toggle Switch
- Tap into the Y/O (Yellow/Orange) ground wire.
- Connect to a 30A-rated toggle switch.
- Other side of switch grounded to chassis.
- Flip switch to run blower at full speed.
Warning: Bypasses all controls. Not for long-term use.
Relay-Based Override
More reliable method uses a relay where Pin 30 connects to Y/O (fan ground), Pin 87 to chassis ground, Pin 85 to Y/G (power source), and Pin 86 to toggle switch (switch grounded). Engaging the switch completes the ground path, running the fan at max.
Benefit: Shortens circuit and may increase fan speed slightly.
Prevent Future Failures
Avoid repeat repairs with these habits:
- Inspect resistor connector annually for heat signs
- Ensure full seating. If it’s hard to plug in, replace the harness
- Clean G203 ground during oil changes
- Use dielectric grease on all HVAC electrical connections
- Stick to OEM or high-rated aftermarket parts. Cheap resistors fail faster
For PowerBoost Owners: Monitor blower during long idles. If it cuts out, suspect the control module early.
Final Diagnostic Flowchart
Use this sequence to save time and money:
- Test F51 and F45 fuses (multimeter, both sides)
- Swap Relay #3 with another relay
- Check voltage at motor connector
- Inspect resistor and pigtail for burns
- Clean and secure G203 ground
- Test motor with external 12V
- Check ambient sensor (if auto climate)
- Suspect control module (2021+ hybrids)
- Trace BJB internal circuit if all else fails
Key Takeaways for F150 Blower Motor Repair
F150 blower motor not working is rarely the motor itself. Relay #3 and F45 fuse are the most common culprits. Burnt resistor connectors are a widespread design flaw, so replace pigtail too. G203 ground failure mimics power loss, so always check it. 2021 PowerBoost models may need control module replacement. Never skip voltage tests. Assume nothing is good without proof.
With this guide, you’ve got the exact diagnostic path used by pros. Most fixes cost under $50 and take less than an hour. No more sweltering summers or fogged-up windows. Get your F-150’s blower back on track.
Frequently Asked Questions About F150 Blower Motor Not Working
Why does my F-150 blower only work on high speed?
This is a classic symptom of a failed blower motor resistor. The resistor controls speeds 1-3 by varying resistance. When it fails, only high speed works because it bypasses the resistor entirely. Replace the resistor and inspect the connector for burn damage.
Can I drive my F-150 with a broken blower motor?
Yes, but with significant drawbacks. No airflow means no defrosting capability in cold weather, no cooling in summer, and potential visibility issues from window fogging. It’s a safety concern, especially in adverse weather.
How much does it cost to replace an F-150 blower motor resistor?
A replacement resistor costs about $25 for manual HVAC systems. Automatic climate control modules run around $40. Don’t forget to budget $10-15 for a new pigtail harness if the connector shows heat damage.
Why does my blower work sometimes but not others?
Intermittent operation usually points to a bad ground connection (G203), corroded connector, or failing relay. Wiggle the connector while HVAC is running to see if it cuts out. Check G203 ground point for corrosion or looseness.
Is the blower motor relay the same as other Ford relays?
Yes, the blower motor relay (Relay #3) is physically identical to other relays in the underhood fuse box, like the heated rear window relay. This makes swap testing easy. Just swap with another relay to test if the blower works.
Do I need to replace the motor if the resistor is bad?
Not necessarily. Test the motor with direct 12V power first. If it spins fine, only the resistor needs replacement. However, if the connector was badly burnt, replacing both prevents repeat failure.


