

Changing the oil on your Ford F-150 is one of the most effective ways to extend engine life, maintain performance, and save money over time. Whether you drive a 5.0L Coyote V8, 3.5L EcoBoost, or PowerBoost hybrid, regular oil changes are essential, especially if you tow, haul, or drive in extreme conditions. While Ford recommends oil changes every 10,000 miles, many owners and mechanics prefer intervals of 5,000 to 7,500 miles for better protection.
This comprehensive guide walks you through every step of the F-150 oil change process using verified data from workshop manuals and technical specifications. You will learn the correct oil type, exact capacities, torque specs, and pro tips to avoid common mistakes. Whether you are a first-timer or seasoned DIYer, this article gives you everything needed to complete a clean, correct oil change in under an hour.
Warming Up Your Engine Before Oil Drain
Start by warming the engine to improve oil flow and ensure a complete drain. Run your F-150 at idle for 5 to 10 minutes, long enough to thin the oil but not so long that components become dangerously hot. Never attempt an oil change immediately after highway driving because warm oil drains faster and carries more contaminants out with it.
Safety Considerations for Hot Oil
Hot oil can cause severe burns. If the engine was recently under heavy load, let it cool for 15 to 20 minutes before starting. Wear gloves and eye protection throughout the process. Place protective cardboard or plastic beneath your work area to contain any spills.
Breaking the Vacuum Before You Start
Before crawling under the truck, remove the oil fill cap located on the driver-side valve cover. This breaks the vacuum in the engine crankcase and allows oil to drain freely. Also pull the dipstick to further assist airflow. Skipping this step can slow drainage or cause gurgling as air fights to enter the system.
Positioning Your F-150 Safely
Park your F-150 on level ground to ensure an accurate oil level reading after refilling. Engage the parking brake and chock the rear wheels to prevent movement during the service.
Ground Clearance and Lifting Options
Many F-150 models, especially 2018 and newer with 5.0L V8, have enough clearance to access the oil pan without lifting. But if you are working with a lowered truck or need better access to the filter, use rhino ramps or jack stands. Never work under a vehicle supported only by a jack. Always use jack stands for safety.
Removing Underbody Covers If Needed
Some models, especially 2019 and newer EcoBoost and 3.3L V6, have a plastic belly pan blocking access to the oil pan and filter. Locate the four 8mm or 5/16-inch bolts securing the cover and remove the front screws first because the front has a retention tab. Removing rear screws first can crack the plastic. One bolt may be a clip-style fastener, so handle it gently. Slide the pan toward the back to release it.
Draining the Oil Completely
Locating the Drain Plug
The 15mm drain plug sits centered on the oil pan, often beneath a crossmember. It features a built-in rubber O-ring, so no crush washer is used. Look for a hex bolt with a black rubber gasket around the threads.
Opening and Draining the Oil
Use a six-point 15mm socket or wrench for best grip. Turn counterclockwise slowly because old plugs can be tight. As soon as it breaks loose, angle your drain pan to catch the full flow. Place a cardboard splash guard under the pan if working on aluminum because it can direct spray and reduce mess. Allow 5 to 10 minutes for complete drainage. The stream will slow to a drip. Expected volume is 8 to 8.5 quarts for 5.0L V8 and 6 to 6.5 quarts for 3.5L EcoBoost.
Installing the Drain Plug Correctly
Inspecting the O-Ring
Before reinstalling, wipe the plug and inspect the rubber O-ring. Replace it if cracked, swollen, or deformed. Spare O-rings are available from Ford dealers or online. Never reuse a damaged gasket because it is the leading cause of post-change leaks.
Torque Specifications
Reinstall the plug and tighten with a torque wrench to 19 to 20 ft-lbs (25.7 to 27.1 Nm). This range is confirmed across workshop manuals and user reports. Avoid over-tightening because aluminum oil pans, common on EcoBoost models, can strip easily.
Replacing the Oil Filter
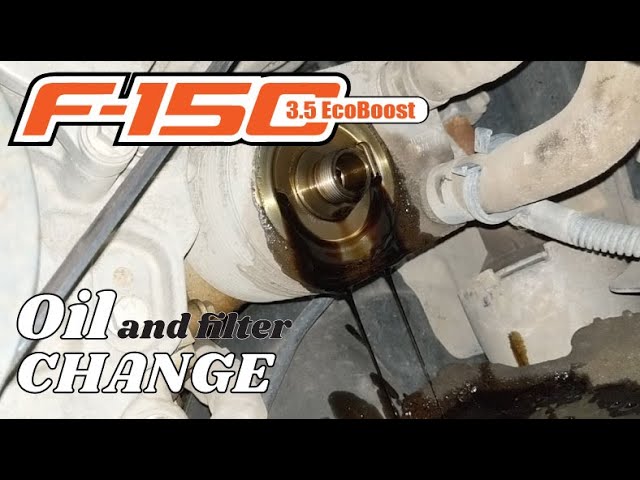
Finding the Filter Location
| Engine | Filter Location |
|---|---|
| 5.0L Coyote V8 | Front of engine block |
| 3.5L EcoBoost / PowerBoost | Side of block, near serpentine belt |
Removing the Old Filter
Factory filters are often tightened excessively. Use a strap wrench or oil filter pliers to break it loose. Let it drain fully over the pan before full removal. On some models, tilting the truck slightly front or back directs oil into a drain canal in the skid plate.
Installing the New Filter
Wipe the filter boss on the engine block with a clean rag. Check the old filter for metal flakes because their presence may indicate internal engine wear. Pour half a quart of fresh oil into the new filter to reduce dry-start time and help build oil pressure faster at startup. This is especially important for turbocharged engines. Apply a thin coat of oil to the rubber O-ring on the filter to ensure a proper seal and prevent galling during installation.
Screw the filter on by hand only. Tighten until the gasket contacts the block, then give it an additional half to three-quarters turn. On 3.5L models, up to one full turn with a filter wrench may be acceptable. Never use a wrench to over-tighten because this can damage the housing or make removal difficult next time.
Refilling with the Correct Oil
Choosing the Right Oil Viscosity
| Engine | Recommended Oil |
|---|---|
| 5.0L Coyote V8 | 5W-30 (WSS-M2C961-A1 spec) |
| 3.5L EcoBoost / PowerBoost | 5W-20 |
| 3.3L V6 | 5W-20 |
Always verify via the oil fill cap label, owner is manual, or service records. Using 5W-30 in a 5W-20 engine may be acceptable in some cases, but check compatibility first.
Pouring Oil Gradually
Use a narrow-neck funnel inserted into the oil fill hole. Add oil in one-quart increments. Start with 7 quarts for 5.0L V8 and 6 quarts for 3.5L EcoBoost. Replace the oil cap temporarily after each pour. Place a debris screen over the funnel to catch dirt or metal shavings.
Checking Oil Level Accurately
Running the Engine Briefy
Start the engine and let it run for 1 to 2 minutes for 5.0L engines and 10 to 15 seconds for 3.5L engines. This primes the filter and circulates oil. Then shut off the engine.
Waiting and Reading the Dipstick
Wait 1 to 3 minutes for oil to drain back into the pan. Pull the dipstick, wipe it clean, reinsert fully, then pull again to read. The lower dot indicates minimum, the upper dot indicates maximum, and the hatched area is the acceptable range. Add oil in quarter-quart increments if below minimum. If overfilled, drain excess carefully because overfilling risks oil foaming, crankshaft windage, increased pressure, and potential engine damage.
Resetting the Oil Life Monitor
For 2015-2020 Models
Turn the ignition to ON (do not start). Use steering wheel buttons to navigate to Settings, Vehicle, then Oil Life Reset. Press and hold OK until the display resets to 100%.
For 2023 and Newer Digital Clusters
Press OK on the steering wheel. Go to Settings, Vehicle Maintenance, then Oil Life. Hold OK to confirm the reset. Reset only after the oil and filter are changed because an unreset monitor gives false maintenance alerts.
Performing Final Leak Inspection
Checking for Seepage
After refilling, inspect the drain plug and oil filter base for drips or wetness. Start the engine and let it idle for a minute, then shut off and recheck. Some leaks appear only after thermal cycling, so let the truck sit overnight and inspect again in the morning. Clean any spills immediately because oil on hot exhaust components can smoke or ignite.
Disposing of Oil Responsibly
Most auto parts stores, including AutoZone, O’Reilly, and Advance Auto, accept used motor oil (up to 5 gallons) and used oil filters. Call ahead to confirm local policies. Keep maintenance records documenting the date, mileage, oil type and quantity, filter model, and torque values used. This supports warranty claims and boosts resale value.
Frequently Asked Questions About Changing Oil on F150
How often should I change the oil on my F-150?
Ford recommends oil changes every 10,000 miles under normal driving conditions. However, many owners and mechanics recommend changing oil every 5,000 to 7,500 miles for enhanced engine protection, especially if you tow, haul, or drive in extreme conditions.
What type of oil does a 5.0L F-150 take?
The 5.0L Coyote V8 requires 5W-30 full synthetic motor oil meeting the WSS-M2C961-A1 specification. Motorcraft SAE 5W-30 is the OEM-recommended choice, but Mobil 1, Valvoline, and Castrol full synthetic options meeting the specification are also acceptable.
How much oil does an F-150 hold?
The 5.0L V8 holds 7.75 to 8.8 quarts (with filter), while the 3.5L EcoBoost holds 6.0 to 6.3 quarts. Always check the dipstick after filling because capacities vary by model year and filter type.
Can I change my own oil on an F-150 without voiding the warranty?
Performing your own oil change does not void the warranty, provided you use the correct oil type and specification, install a proper filter, and document your maintenance. Keep receipts and records for warranty claims.
What torque spec should I use for the drain plug?
Tighten the drain plug to 19 to 20 ft-lbs (25.7 to 27.1 Nm). Do not over-tighten because aluminum oil pans can strip easily.
Key Takeaways for Changing Oil on Your F-150
Changing the oil on your F-150 is a simple, high-impact maintenance task that keeps your engine running smoothly for years. Always warm the engine before draining, break the vacuum by removing the oil fill cap and dipstick, and use a torque wrench to tighten the drain plug to 19 to 20 ft-lbs. Pre-fill your new oil filter with half a quart of fresh oil and lubricate the gasket to ensure a proper seal and faster oil pressure at startup. Use full synthetic oil meeting the correct specification for your engine type, check the dipstick after running the engine, and reset the oil-life monitor to keep maintenance tracking accurate. With the right tools, correct oil, and attention to detail, you can complete a professional-grade oil change in under an hour and save over $580 compared to dealership service over ten changes.


