

If your F-150 heater fan isn’t working, you’re facing one of the most common electrical problems affecting models from 2003 to 2021. The symptoms range from complete airflow loss to only high speed functioning, and the root cause is usually electrical—a failed relay, blown fuse, burnt resistor, or poor ground connection. This guide walks you through the exact diagnostic steps Ford technicians use, so you can identify whether it is a simple $18 relay fix or something requiring deeper wiring repair. By the end, you will know exactly what to test, what to replace, and how to get your heater fan working again in under an hour with basic tools.
Check Key Fuses First
Fuses are the first line of defense in your F-150’s blower motor circuit. A single blown or faulty fuse can kill all fan operation, so always start here before moving to more complex diagnostics.
Test F51, F45, and F52 Under Load
Do not rely on visual inspection alone. Many fuses fail internally while still appearing intact. Use a multimeter or test light to check voltage on both ends of each fuse with the ignition in RUN or ACC.
Check these three critical fuses:
• F51 (40A) in the under-hood fuse box powers the blower motor directly
• F45 (5A) in the under-dash fuse box powers the control circuit for automatic climate control
• F52 supplies the relay control side
You should see 13.5–14V on both ends of each fuse. If one side reads zero or low voltage, the fuse is bad or has poor contact.
Replace Faulty Fuses Immediately
If any fuse is blown, replace it with the correct amperage. A blown F51 often indicates a short circuit, so check for damaged wiring or a failing motor before reinstalling. A blown F45 typically points to a control module or head unit issue. After replacement, test the fan. If it works, monitor for recurrence. If the fuse blows again, further diagnosis is required.
Swap the Blower Relay
The blower motor relay is a known failure point, especially in 2008 and newer F-150s. When it fails, the fan gets no power, resulting in complete airflow loss.
Locate Relay Position 3 Under Hood
Find the blower motor relay in position 3 of the under-hood fuse box. Check the diagram on the fuse box lid for confirmation. It is labeled “BLOWER” or sits in slot 3. Remove it carefully. A discolored or melted relay body indicates overheating and failure.
Test with a Known Good Relay
Swap the blower relay with an identical one, such as the rear window defroster relay in position 4 or the horn relay. Turn the ignition on and set the climate control to fan speed 1. If the fan turns on, the original relay was faulty. If the defroster or horn stops working, this confirms the swap worked and the original relay is bad. Replace the faulty relay with an updated OEM version, which costs approximately $18.
Diagnose No Airflow at Any Speed

When the fan does not run at all, you need to test power delivery at the motor itself. This narrows down whether the issue is upstream (fuse, relay, wiring) or the motor itself.
Measure Voltage at Blower Motor Connector
Disconnect the blower motor connector behind the passenger-side dash. With ignition ON and climate control ON, use a multimeter to check the Yellow/Green wire. Expected voltage is 13.5–14V. A low reading (for example, 1.8V) indicates poor ground, bad relay output, or wiring resistance. One customer with a 2011 F-150 showed only 1.8V at the motor. After replacing the resistor and pigtail, voltage jumped to 13.93V and the fan worked.
Backprobe the Ground Control Wire
Reconnect the motor and backprobe the Yellow/Orange wire while setting the fan to high speed. On manual systems, this wire should show 12V when high speed is selected because it grounds directly. If Y/O has power but the motor does not spin, the motor is likely dead.
Test Blower Motor Directly
To rule out motor failure, perform a direct power test. This confirms whether the motor is functional or if the problem lies in the control circuit.
Bench-Test with 12V Power Source
Unplug the blower motor and connect a 12V power source (from a battery or jump box) to the Y/G terminal. Connect ground to the Y/O terminal. If the motor spins, it is good and the issue is upstream. If it does not spin, replace the motor. Many auto parts stores offer free bench testing, so you can remove the motor and bring it in for verification. A failed motor may hum but not spin, indicating worn brushes or internal failure.
Fix Only High Speed Works

If your F-150 fan only works on speed 4 (high), the blower motor resistor is almost certainly failed. This is a classic issue in 2003–2011 models with manual climate control.
Replace Blower Motor Resistor
The resistor controls speeds 1–3 by limiting current. When it fails, only high speed (which bypasses the resistor) still works. If no speeds work, the resistor is not the sole cause.
Replace Burnt Pigtail Connector Too
Inspect the resistor’s electrical connector for melted or discolored plastic, burnt or loose terminals, or blackened metal contacts. If damage is present, replace the pigtail (connector) along with the resistor. Reusing a damaged connector leads to repeat failures due to poor contact and overheating. Use OEM or high-quality aftermarket parts for the resistor and pigtail.
Inspect G203 Ground Connection
The G203 ground (black/white wire) near the blower motor and resistor is a common failure point. A poor ground causes intermittent operation, low voltage, or complete fan failure.
Locate and Clean Critical Ground Point
Find the black/white wire at the resistor connector or motor housing. Check for corrosion, loose bolts, or burn marks. Unbolt the ground, clean the metal surface with sandpaper, and reattach with dielectric grease to prevent future corrosion. This is especially critical in humid or salty climates. One coastal vehicle owner cleaned G203 with dielectric grease and solved their intermittent blower issue.
Handle Automatic Climate Control Issues
2009 and newer F-150s with Automatic Temperature Control use a blower motor control module instead of a resistor. This solid-state unit uses PWM to control fan speed.
Test Blower Motor Control Module
Failure results in total fan loss, not just loss of lower speeds. Common symptoms include the fan stopping during idle (especially in 2021+ PowerBoost hybrids), no response from the climate control head unit, and dealership replacements of both motor and module. Test by checking the F45 (5A) fuse, verifying voltage at the motor connector, and replacing the module if all else checks out.
Address 2021+ Hybrid Fan Shutdowns
Some 2021+ F-150 PowerBoost hybrids report the blower shutting off during extended idle. The fan may restart after driving or engine shutdown.
Check for Idle-Related Fan Failure
Possible causes include thermal protection in the control module, 12V battery charging strategy affecting accessory power, and software logic limiting fan during EV mode. While unconfirmed, user reports suggest a temporary software or thermal cutoff. Restart the engine to restore fan operation. If the issue persists, have the vehicle scanned for codes. Dealers may replace the control module or motor under warranty.
Repair Melted Wiring & Connectors
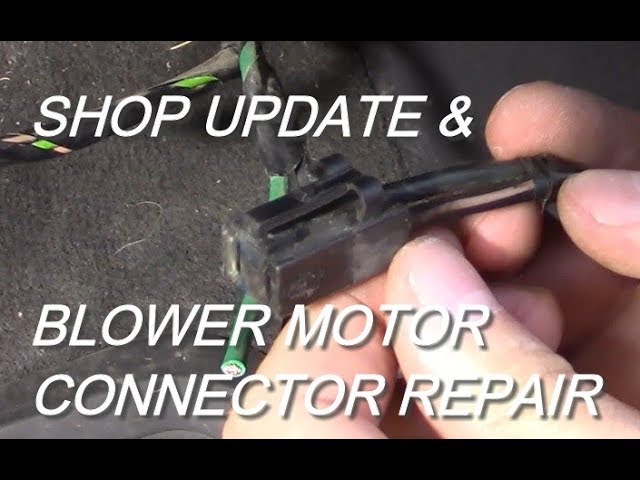
In 2011–2014 models, overheated and degraded connectors are a known design flaw. High current causes terminals to loosen, overheat, and melt.
Solder New Leads for Long Life
If you find wiggling pins, discolored insulation, or soft or brittle plastic, do not reuse the connector. Cut it out and solder new leads with heat-shrink tubing for a permanent fix. Use dielectric grease on new connections to prevent oxidation. Replace with OEM pigtails when possible to ensure correct pinout and fit.
Avoid Common Misdiagnoses
Many owners replace the blower motor unnecessarily. A dead motor is rare compared to relay, fuse, or ground issues.
Don’t Replace Motor Without Testing
Always test fuses under load, swap the relay, check voltage at the motor, and bench-test the motor before replacing it. If the motor runs on direct power, the problem is not the motor—it is in the circuit.
Verify Wiring Colors Correctly
Some believe there are two yellow wires at the motor. Correct wiring is Y/G (Yellow/Green) for power, Y/O (Yellow/Orange) for ground control, B/W (Black/White) for ground (G203), and Br (Brown) for feedback/signal on ATC systems. Incorrect wiring or misidentified terminals can cause failure.
Follow Proven Repair Workflow
Use this step-by-step diagnostic flow to avoid wasted time and parts.
Step-by-Step Diagnostic Flow
-
Determine if any fan speed works. If only speed 4 works, replace the resistor and pigtail (manual HVAC). If no speeds work, continue to step 2.
-
Check F51, F45, and F52 under load. Replace blown fuses and retest.
-
Swap relay #3. If the fan works, replace with an updated OEM relay.
-
Test voltage at the motor Y/G wire. If less than 12V, check ground (G203) and wiring. If approximately 14V, proceed.
-
Backprobe Y/O wire at high speed. If it has 12V, the motor is likely bad. If no 12V, check the resistor (manual) or control module (auto).
-
Inspect the resistor or module and connector. If burnt, replace both component and pigtail.
-
Check the engine temperature gauge. If also dead, inspect G203 and other major grounds.
Apply Preventive Maintenance
Stop future failures before they happen with simple annual checks.
Stop Future Failures Before They Happen
Prevent blower issues by inspecting the resistor and connector for heat damage, cleaning and greasing the G203 ground, testing fuses under load during routine maintenance, and replacing the cabin air filter every 12–15K miles to reduce motor strain. Carry a spare OEM-updated relay in your glovebox for a 2-minute fix. Use dielectric grease on all HVAC electrical connections to block moisture and corrosion, especially in snowy or coastal regions.
Frequently Asked Questions About F-150 Heater Fan Not Working
Why does my F-150 heater fan only work on high speed?
This is a classic symptom of a failed blower motor resistor in models with manual climate control (2003–2011). The resistor controls fan speeds 1–3 by limiting current. When it fails, only high speed (which bypasses the resistor) still works. Replace both the resistor and the connector pigtail for a permanent fix.
How do I test if my blower motor is bad?
Disconnect the motor connector and apply 12V directly to the Y/G terminal with ground to the Y/O terminal. If the motor spins, it is functional and the problem is upstream (relay, fuse, wiring, or ground). If it does not spin, the motor is defective and needs replacement.
What causes complete heater fan failure in F-150s?
Complete failure (no airflow at any speed) typically points to the blower motor relay, a blown fuse, or a poor ground connection. The resistor is not the cause when no speeds work. Start by checking fuses F51, F45, and F52, then swap relay position 3.
Can I drive my F-150 with a non-working heater fan?
You can drive it, but you will have no cabin heat or defrost function, which creates visibility and comfort issues in cold or wet weather. This is especially dangerous in winter conditions, so address the issue promptly.
How much does it cost to fix a non-working heater fan in an F-150?
Most repairs cost between $18 and $40. A blower motor relay runs about $18, while a resistor and pigtail kit costs approximately $40. This is a fraction of dealership fees, which can exceed $500 for the same repairs.
Key Takeaways for Fixing Your F-150 Heater Fan
Most F-150 heater fan issues stem from the blower relay (2008+) or the resistor (2003–2011). Complete failure points to relay, fuse, or ground problems, never the resistor alone. With basic tools and this guide, you can diagnose and fix the problem in under one hour. Always test before replacing components, and do not skip the pigtail connector when replacing the resistor. Apply dielectric grease to all electrical connections to prevent future corrosion, and keep a spare OEM relay in your vehicle for emergency repairs.


