If your F-150 headlights not working—especially the low beams—while high beams still function, you’re dealing with one of the most common electrical issues across model years 2004–2021+. The good news: this is rarely a mystery. Most failures stem from blown fuses, faulty connectors, multi-function switch wear, or BCM shutdowns due to LED upgrades. High beams staying on confirms the ground circuit is intact, narrowing your focus to power delivery and control logic.
This guide walks you through proven diagnostic steps used by technicians and experienced DIYers. You will learn exactly where to check fuses by model year, how to test for voltage loss, and why your LED retrofit might have triggered a complete headlight blackout. Whether you are troubleshooting a 2006 work truck or a 2018 Lariat with adaptive lighting, this plan gets you answers and working lights fast.
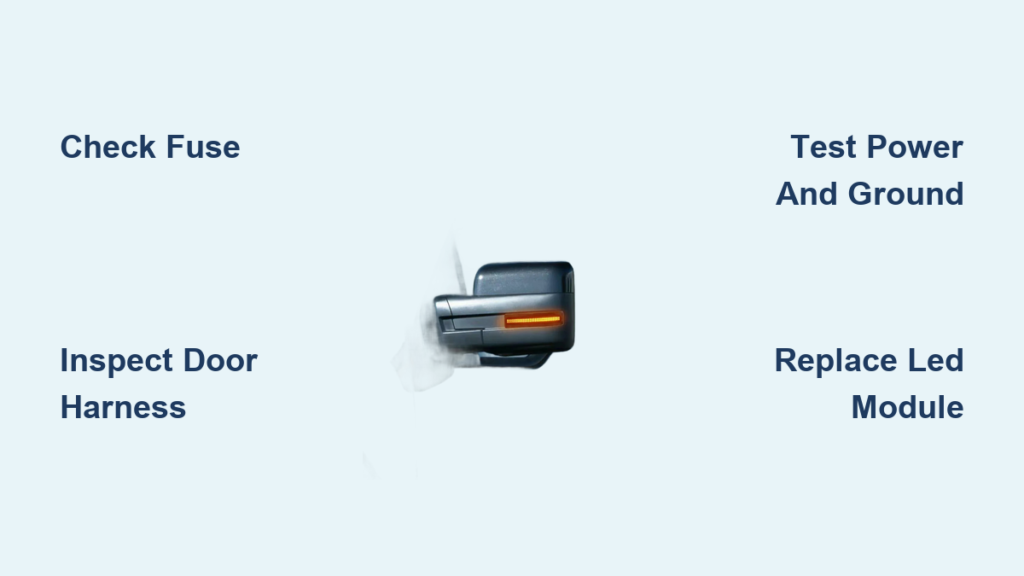
Check Fuses by Model Year
Your first move is inspecting fuses, but not just visually. A fuse can look fine and still be dead inside. Use a multimeter or test light to verify power on both sides of each fuse slot.
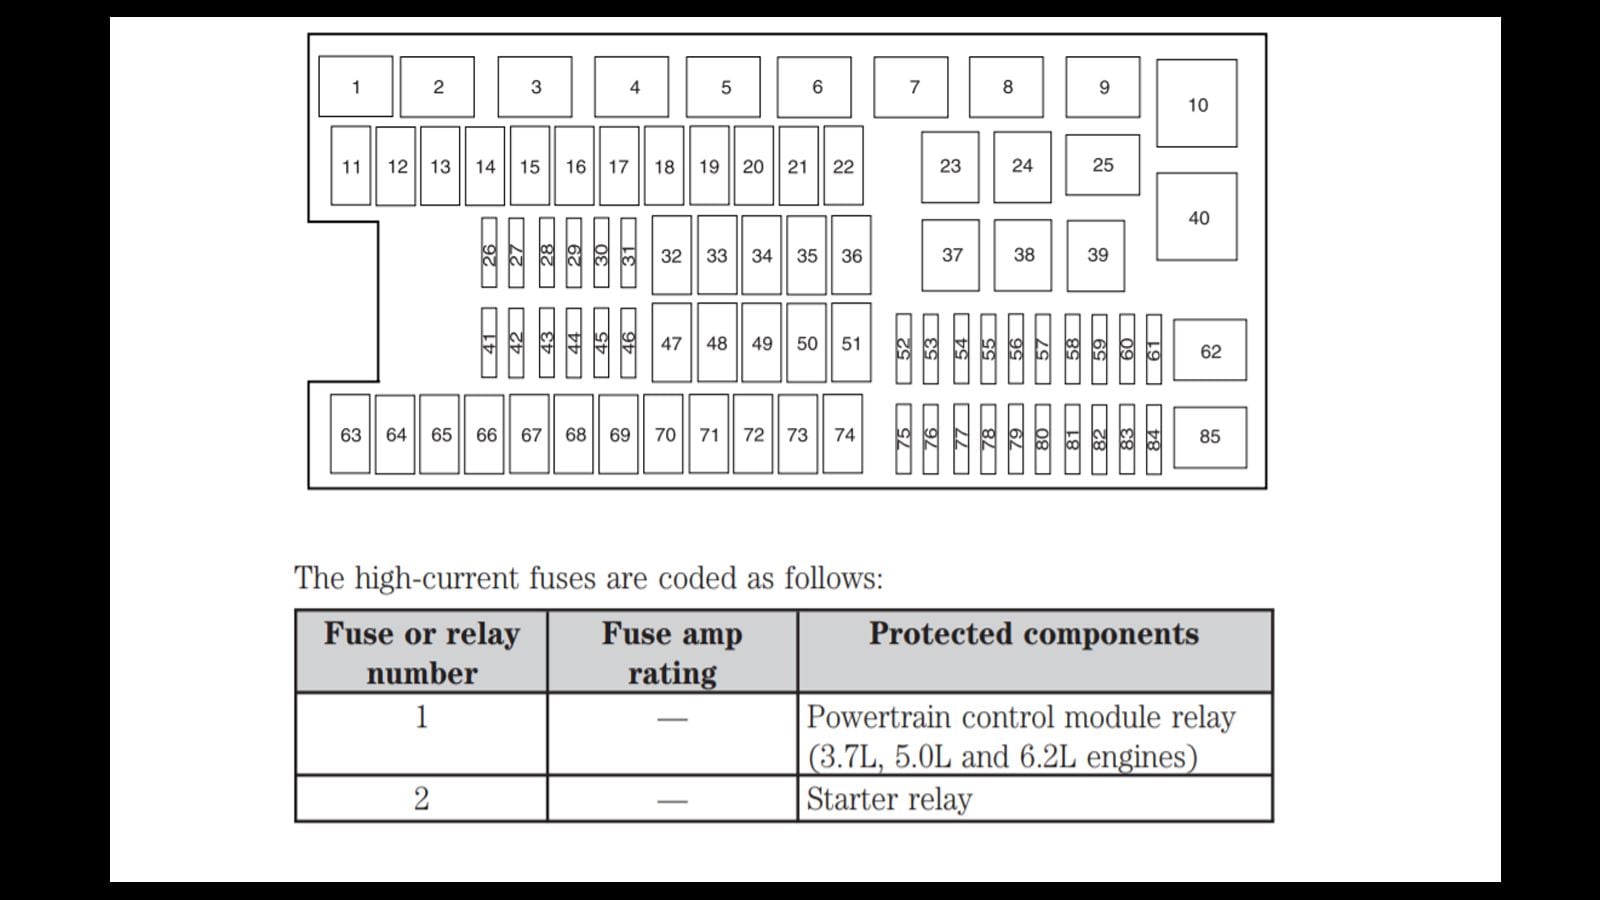
2004–2008: Passenger-Side Footwell CJB
In older F-150s, the Central Junction Box is under the dash on the passenger side. Open the panel and check these critical fuses:
- Fuse #23 (10A red): Right low beam
- Fuse #25 (10A red): Left low beam
- Fuse #40 (20A): Powers both low beams and DRLs
- Fuse #35 (20A): High beams
Pro Tip: Fuse #40 affects multiple systems. If it is blown, you may lose DRLs and low beams together.
2009–2014: Kick Panel CJB
The fuse box moves to the passenger kick panel. Key fuses to inspect include:
- Fuses #12 through #17: 15A lighting circuits
- Fuse #39 (20A): Often missed, located in a separate row
Pull each fuse and test for continuity. Replace any showing infinite resistance (OL on meter).
2015–2021+: Dual-Panel System
Newer models split fuses between the driver-side BCM panel and under-hood Battery Junction Box.
Check these in the BJB:
- F26 (10A): Left low beam
- F28 (10A): Right low beam
- F3 (30A): Main headlight power feed
- F76, F15, F61, F95: Related control circuits
Inside the cabin CJB:
- F5 (15A), F16 (20A): High beams
- F27/F29 (5A): Sensor circuits
Critical: Even if one side works, test both F26 and F28. A partial failure can affect one beam only.
Test Voltage at Key Points

Fuses pass? Now verify power is actually reaching the headlights. Use a multimeter or test light with the ignition on.
At the Fuse Output
Insert probes into the back of the fuse slot. You should read 12V on both sides if the fuse is good and powered.
- No power on input side: Broken feed from battery
- Power in, no power out: Blown fuse, even if it looks fine
At the Bulb Socket
Unplug the headlight connector and test the terminals.
- No voltage: Power is not making it to the bulb
- Voltage present only when engine is off: Points to BCM shutdown, common with LEDs
Visual Cue: Look for melted or discolored plastic on the connector. This indicates high resistance and heat buildup.
Inspect Connectors and Sockets
Many “no low beam” cases are actually bad connections, not dead bulbs or fuses.
Wiggle Test
Turn headlights on and gently wiggle the plug at the back of the headlight.
- Lights flicker or come on: You have found a loose or corroded connection
- No change: Move to the next test
Check for Melting or Corrosion
Remove the bulb and inspect the socket:
- Bent or loose terminals: They will not grip the bulb properly
- Brown or black discoloration: Heat damage from poor contact
- Moisture inside: Corrosion breaks the circuit
Fix: Splice in a new socket assembly or replace the harness section. Solder and heat-shrink for a lasting repair.
Diagnose Multi-Function Switch Failure
If high beams work but low beams do not, the multi-function switch on the steering column is a prime suspect.
Why It Fails
This switch handles turn signals, wipers, and high/low beams. The low beam contact wears out from frequent use over time.
Test It
Activate high beams and verify they work. Then flip to low beams and check for operation. If fuses and voltage check out, the switch is likely faulty.
User Confirmed: “I have replaced the multi-function switch twice. It is packed with contacts, and one wears out.”
Replacement Note: You do not need a dealer. Aftermarket switches are reliable and cost under $80.
Solve BCM Shutdown from LED Upgrades
If you installed LED or HID bulbs, your BCM may have disabled the headlights automatically.
How It Happens
The Body Control Module monitors current draw. Factory halogen bulbs pull about 55W. LEDs pull about 20W.
- BCM sees low draw: Thinks bulb is out
- BCM cuts power: No voltage at connector when engine runs
- Power returns when off: Classic BCM shutdown signature
Real Case: 2018 F-150 lost passenger-side low beam. Fuses were good, wiring was intact. The fix was CANbus decoders.
Install CANbus Error Decoders
These load resistors mimic the electrical load of halogen bulbs.
- One decoder per bulb
- Wire in parallel with the LED bulb
- Cost: about $15 to $25 per pair
After installation, the BCM sees normal load and headlights turn on normally.
Rule: Never skip this step when upgrading to LED on 2015 and newer F-150s.
Test HID Ballast and Electrodes
If your F-150 has HID headlights (Lariat, King Ranch, Platinum trims), the ballast or electrode may be dead.
Check the Electrode
Remove the rear cap and inspect the green-tipped center electrode inside the bulb housing.
- Crack or carbon tracking: Bulb will not ignite
- Bent or corroded terminal: No power transfer
Test the Ballast
Confirm 12V input to ballast with multimeter. No output voltage means the ballast is dead.
Swap Test
Move the working side’s ballast to the dead side.
- Light works now: Original ballast is bad
- Still no light: Check wiring or bulb
Pro Tip: HID bulbs degrade over time. Replace in pairs every five years.
Scan for BCM Fault Codes

Generic OBD2 scanners will not catch headlight issues. You need FORScan or a CAN bus scanner.
Why It Matters
The BCM logs “lamp out” warnings and circuit faults, even if no dash light appears.
Use FORScan
- Download free software from forscan.org
- Use a $20 OBD2-to-USB adapter
- Connect and read BCM trouble codes
Common codes include:
- U2100: Communication loss with lighting module
- B2345: Low beam circuit fault
- B2370: Bulb current out of range (LED issue)
Verified Fix: One user cleared a hidden code after installing decoders and headlights were restored.
Repair Damaged Wiring
If voltage drops out along the circuit, you have a nicked, corroded, or broken wire.
Find the Break
Use a multimeter in continuity mode:
- Disconnect battery
- Probe from fuse output to bulb socket
- No beep: Wire is broken
Common failure zones include behind the headlight assembly (vibration damage) and near the radiator support (chafing on sharp edges).
Solder and Seal
Cut out the damaged section, splice with rosin-core solder, and seal with heat-shrink tubing.
Safety First: Always disconnect battery before soldering.
Prevent Future Failures
Avoid repeat issues with these simple steps.
Use Dielectric Grease
Apply to every connector before plugging in.
- Prevents corrosion
- Reduces resistance
- Extends connector life
Handle Bulbs Properly
Never touch HID or LED bulb glass with bare hands.
- Skin oils create hot spots
- Bulbs fail prematurely
Rule A: Do not touch the glass
Rule B: See Rule A
Upgrade Smart
When switching to LED:
- Buy CANbus-compatible kits
- Install load resistors
- Keep OEM connectors
Frequently Asked Questions About F-150 Headlights Not Working
Why do my low beams work but high beams do not?
This is typically a fuse issue. Check Fuse #35 (20A) in the passenger-side footwell for 2004-2008 models, or F5/F16 in the interior CJB for 2015 and newer. A blown high beam fuse is the most common cause.
Can I fix F-150 headlights not working without a mechanic?
Yes. Most failures are solvable with basic tools: a multimeter, test light, and fuse puller. Follow the diagnostic sequence in this guide. Start with fuses, then test voltage at key points, and inspect connectors.
Why do LED headlights stop working on my F-150?
The BCM detects the lower current draw of LED bulbs (about 20W versus 55W for halogen) and interprets this as a burned-out bulb. Install CANbus error decoders (load resistors) to simulate the proper electrical load and restore functionality.
How much does it cost to fix F-150 headlight issues?
Costs vary by cause. Fuses cost under $10. A multi-function switch runs $50 to $80 aftermarket. CANbus decoders are $15 to $25 per pair. Wiring repairs depend on damage extent. Most DIY fixes are under $100.
Do I need a special scanner to diagnose F-150 headlight problems?
For 2015 and newer models, yes. The BCM controls headlight logic, and generic OBD2 scanners cannot read BCM codes. Use FORScan software with an OBD2-to-USB adapter (about $20) to access body module diagnostics.
Why does wiggling the headlight plug make my lights work?
This indicates a loose or corroded connection at the bulb socket. The terminals have lost spring tension or developed corrosion. Replace the socket assembly or repair the harness section for a permanent fix.
Key Takeaways for Fixing Your F-150 Headlights
Most F-150 headlights not working cases are solved in under an hour when you follow the right diagnostic sequence. Start by checking fuses in the correct location for your model year, then test voltage at the fuse outputs and bulb sockets. If high beams work but low beams do not, focus on the multi-function switch and power delivery circuits. The most common modern issue is BCM shutdown after LED upgrades, which is easily fixed with CANbus decoders. Use a multimeter instead of guesses, document your voltage readings at each test point, and always inspect connectors before replacing expensive parts. With the right approach, you will have your headlights working again without a trip to the dealership.