
Transforming your Ford F-350 into a heavy-duty towing machine starts when you know how to install a gooseneck hitch on an F350 correctly. The B&W Turnoverball system offers a seamless, no-weld solution that preserves your truck bed while providing massive towing capacity for livestock or commercial trailers.
This guide walks you through every critical step from safety prep to final torque specifications so you can complete the job with confidence. You will learn exactly how to drill the access hole, align frame brackets, and secure the center section for years of reliable service.
Prepare Your F350 for Safe Installation
Proper vehicle preparation prevents accidents and ensures you have clear access to the frame rails and underbed area. Skipping these initial safety steps can lead to injury or damage to your truck during the installation process.
Secure the Truck and Remove Obstructions
Park your F-350 on level ground with the wheels straight before engaging the parking brake. Block the front and rear wheels securely and lift the truck using a jack supported by heavy-duty jack stands. Never work under a vehicle supported only by a hydraulic jack.
Disconnect the negative battery terminal to prevent electrical shorts while moving wiring harnesses. Lower and remove the spare tire completely as it blocks access to the exhaust and frame components needed for bracket installation.
Clear Heat Shields and Wiring Harnesses
Remove the spare tire heat shield using a 14 mm socket to expose the frame rails where side brackets will mount. Identify any wiring harnesses running near the hitch zone and carefully disconnect them to move them out of the way. Secure these harnesses with zip ties to keep them clear of drilling areas and moving parts.
Lower and Relocate the Exhaust System
The exhaust system often blocks the path for hitch components on newer F-350 models and must be moved temporarily. Properly supporting the exhaust prevents damage to hangers and ensures you have working room.
Remove Exhaust Hangers and Brackets
Locate the exhaust hangers on both sides of the truck and remove the bolts securing them to the frame. Unbolt the bottom and outer bolts of the exhaust bracket to allow the system to drop slightly. Do not fully disconnect the exhaust pipes as the remaining hangers will support the weight.
Secure Exhaust with Relocation Bracket
Use a ratchet strap or the supplied relocation bracket to hold the exhaust system in a safe position. The B&W kit includes a specific bracket to reposition the exhaust slightly forward using a 1/4-inch carriage bolt. Install this bracket through the frame and secure it with a flange nut and spacer to maintain proper clearance.
Drill the Bed Access Hole Accurately
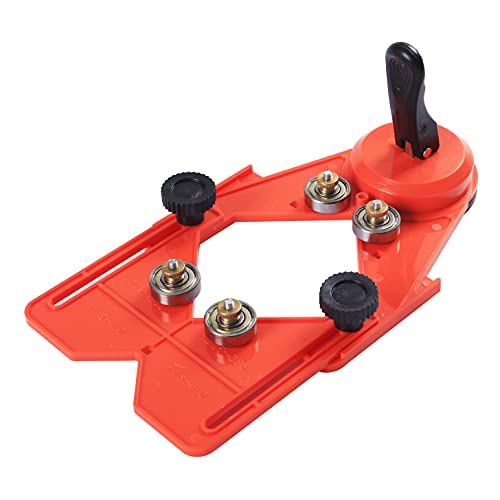
The 4-inch hole in your bed floor is the gateway for the gooseneck ball and requires precise location. A misaligned hole can cause fitting issues with the center section and compromise the entire installation.
Locate the Exact Center Point
Find the factory center dimple on your bed floor which marks the exact spot for drilling. If your truck has a spray-in bed liner or lacks a dimple, measure from the rear of the bed to the midpoint between wheel wells using your manual. Mark the location clearly with a paint marker so it remains visible during drilling.
Cut the Hole and Protect Edges
Drill a pilot hole first to guide your 4-inch hole saw before cutting through the bed floor. Apply steady pressure and let the bit do the work to avoid overheating or creating jagged edges. Vacuum all metal shavings immediately and seal exposed metal edges with clear coat or a paint marker to prevent rust.
Install Frame Brackets Based on Model Year
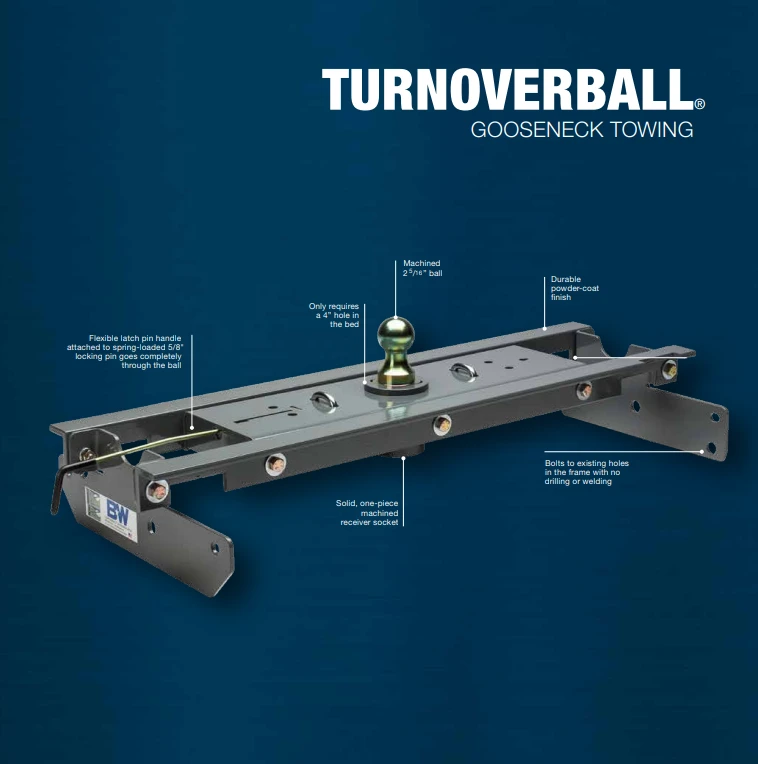
Your installation method depends on whether your F-350 has a factory-reinforced frame or requires full bracket installation. Identifying your truck configuration early saves time and ensures you use the correct hardware.
Mount Side Brackets on Non-Prepped Frames
For 2016 through 2022 models without factory brackets, feed the side brackets through the 4-inch hole from the driver side. Sandwich the frame rails between the inner and outer plates and secure them with bolts, washers, and nuts. Leave these bolts slightly loose initially to allow for final alignment adjustments later.
Utilize Factory Sleeved Holes on Newer Models
On 2023 through 2025 F-350s, look for factory-installed brackets and sleeved holes that eliminate the need for side plates. Drive the provided threaded inserts into the frame using a hammer and secure them from underneath with black bolts. This streamlined approach reduces drilling but requires verifying your kit matches your specific truck configuration.
Insert and Seat Threaded Bushings Correctly

Threaded bushings anchor the hitch to the frame and must be fully seated to prevent movement or wobble. Improper installation here can lead to premature wear and unsafe towing conditions.
Align and Tap Bushings into Place
Position each bushing with the flat side facing the frame and the protrusion pointing upward. Use a hammer to gently tap each bushing until it sits flush with no gaps allowed. Double-check all four bushings to ensure they are seated correctly before proceeding to crossmember assembly.
Assemble and Position the Crossmembers
The front and rear crossmembers form the foundation of your hitch and support the heavy center section. Proper positioning ensures the ball aligns perfectly with the bed hole.
Install Rear Rail and Front Crossmember
Slide the rear rail with two notches under the frame from the driver side about 4 inches behind the main hole. Install the front crossmember with oval holes facing rearward and attach C-channel brackets to the frame. Bolt both crossmembers loosely in place to hold the center section while allowing for alignment adjustments.
Lift and Secure the Center Section
The center section is heavy and awkward to handle so using a jack or helper is highly recommended. Getting this large component into place requires care to avoid damaging your truck bed.
Support and Align the Center Section
Lift the center section into the bed using a floor jack with a wood block or ratchet straps to prevent bed deformation. Align the top hole with your 4-inch cutout and ensure the weld seam faces upward with the flange on the back side. Installing this backward will block the latch mechanism and prevent operation.
Verify Critical Bolt Orientation
Bolt direction matters significantly for proper function and safety during installation. Cab-side bolt heads face inward while tailgate-side heads face outward with center bolts facing forward. Follow your manual diagram exactly for bottom bolts as they alternate directions on each side.
Attach Handle Bracket and Test Latch
The handle allows you to deploy and stow the ball with one hand so it must operate smoothly. Testing the mechanism before final tightening ensures everything works correctly.
Mount Handle and Test Deployment
Pull the bracket out and twist it toward the front to lock before sliding it over the crossmember with the curved side up. Insert the carriage bolt from the opposite side and snug the flange nut without crushing the handle. Test the ball deployment by pulling the handle and rotating the ball 180 degrees to ensure it locks with a solid click.
Drill and Install Safety Chain Anchors
Safety chains are critical for secure towing and must be installed with precision. These anchors provide an essential backup connection between your truck and trailer.
Drill Holes and Assemble U-Bolts
Locate the inner holes in the bed stiffener and drill four 1/2-inch holes using a step bit for smooth fitment. Deburr edges with a file and apply clear coat to prevent rust before assembly. Place the small end of the spring down and slide the U-bolt through before positioning the safety loop flush with the bed surface.
Route and Secure the Wiring Harness
Electrical integration often happens alongside mechanical installation to ensure full towing capability. Proper routing protects wires from damage and ensures reliable light function.
Install Plug-and-Play Harness
Drill a small hole to route the 7-way harness from the bumper to the bed without splicing factory wires. Connect the Curt harness inline with the factory plug and run the wire up and over the frame. Secure the wiring with zip ties and heavy-duty loom to prevent chafing and mount the connector on the driver side rail.
Torque All Bolts in Correct Sequence
Final tightening ensures stability and prevents stress fractures in the frame or hitch components. Following the correct sequence is vital for a safe installation.
Follow the Specific Torque Sequence
Never tighten all bolts at once but instead use a torque wrench to follow a specific order. Start with the four top bolts then move to bracket bolts, black flange nuts, and outer frame bracket nuts. Finish with crossmember bolts, bottom bolts, side plate bolts, and safety chain hardware using the exact torque values in your manual.
Perform Final Operational Checks

Before towing any load you must test every function and restore your truck to full readiness. These final checks ensure safety and proper operation.
Test Ball Lock and Reinstall Components
Deploy and stow the ball multiple times to ensure it locks smoothly and sits flush when stored. Check clearance around the exhaust, frame, and fender liners to ensure no parts rub during travel. Reinstall the heat shield and spare tire then reconnect the battery to verify all lights work with the trailer harness.
Maintain Your Gooseneck Hitch Long-Term
Proper upkeep extends the life of your hitch and keeps it reliable for years of heavy towing. Regular maintenance prevents rust and ensures smooth operation.
Inspect Bolts and Apply Lubricant
Check bolt tightness every few months especially after heavy use or long trips. Apply Fluid Film seasonally to the lever arm, latch, and hinges to prevent rust and ensure smooth operation. Keep the bed clear of debris and inspect the hole area regularly for dirt or moisture buildup.
Frequently Asked Questions About Gooseneck Hitch Installation
How long does it take to install a gooseneck hitch on an F350?
Most first-time installers complete the job in about 3.5 hours with the right tools and help. Experienced users may finish faster but should still allow ample time for precise alignment and torqueing.
Do I need to weld anything to install this hitch system?
No welding is required for the B&W Turnoverball system as it uses a bolt-on design. This preserves your factory frame integrity and makes the installation completely reversible if needed.
Can I install this hitch if my F350 has a factory prep package?
Yes but you may use different hardware depending on your model year and frame configuration. Newer 2023-2025 models with factory-reinforced frames utilize existing sleeved holes instead of side brackets.
What tools are essential for this installation?
You need a drill with a 4-inch hole saw, socket set with extensions, torque wrench, and jack stands. A helper or mechanical lift aid is highly recommended for lifting the heavy center section.
How do I prevent rust on the drilled holes?
Apply clear coat or a paint marker to all exposed metal edges immediately after drilling. Regularly apply Fluid Film to moving parts and inspect the area for debris or moisture buildup.
Key Takeaways for Installing Your Gooseneck Hitch on F350
Installing a gooseneck hitch on your F350 transforms your truck into a powerful towing machine when done correctly. Focus on precise hole alignment, proper bolt orientation, and following the exact torque sequence for a safe installation.
Regular maintenance with Fluid Film and periodic bolt checks will keep your hitch operating smoothly for years. Start your project today by gathering your tools and reviewing your specific model year requirements.


