
A failing ball joint on your Ford F-150 can lead to dangerous handling, clunking noises, or even sudden wheel separation. These critical suspension components connect the steering knuckle to the control arms and endure constant stress from bumps, turns, and road debris. Over time, wear sets in, especially if the joints are dry, corroded, or damaged by impacts. The good news? You can catch problems early with a simple, accurate inspection using basic tools.
This guide shows you exactly how to check ball joints on an F-150 using the pry bar method trusted by seasoned technicians. You’ll learn the proper lifting technique, step-by-step inspection process, warning signs to watch for, and when replacement is necessary. Whether you drive a classic 1998 model with torsion bars or a newer F-150, this process works across generations.
Proper Lifting Technique for Accurate Ball Joint Testing

Lift from Lower Control Arm Only
To get an accurate reading, you must unload the suspension completely. Lifting from the frame or axle keeps pressure on the ball joint, masking internal wear. Always place your floor jack directly under the lower control arm, close to the ball joint. This mimics the suspension’s natural droop and allows any play to show during testing.
Raise the truck just 1 to 2 inches, enough to take the front wheel barely off the ground while the other three tires stay planted. Some mechanics lift up to 4 inches for better tool access, but more than that can shift suspension geometry and skew results. Never rely on the jack alone. Once lifted, secure the vehicle with jack stands placed under solid frame points. Remove the jack only after confirming stable support. Working under a truck held up by a hydraulic jack is extremely dangerous.
Why Standard Hand-Rock Tests Fail
Grabbing the tire at 12 and 6 o’clock and rocking it by hand may seem logical, but it’s often ineffective, especially on heavier trucks like the F-150. The vehicle’s weight compresses the joint, making even a badly worn ball joint feel tight. One can be fairly bad and you would not feel it just by mussing the wheel around with your arms. This method frequently gives false-negative results, leading drivers to believe their joints are fine when they’re actually failing. Without sufficient force and proper unloading, subtle but dangerous play goes undetected.
Pry Bar Inspection: The Gold Standard Method
Step-by-Step Pry Bar Test
This is the most reliable way to check ball joints on an F-150. It applies direct upward force to simulate road impact and exposes internal clearance.
Follow these steps:
- Park on level ground, engage the parking brake, and chock the rear wheels.
- Loosen lug nuts slightly before lifting.
- Jack up the lower control arm until the front wheel lifts 1 to 2 inches.
- Place jack stands for safety, then remove the floor jack.
- Slide a 24 to 36 inch pry bar under the bottom edge of the tire.
- Push upward firmly and steadily, do not jerk, to move the suspension through its travel.
- Crawl underneath or use a flashlight and mirror to watch both upper and lower ball joints.
Look for vertical movement between the ball stud and socket, gaps opening or closing in the housing, and clicking or clunking sounds. Have a helper operate the pry bar while you observe, this makes detection much easier.
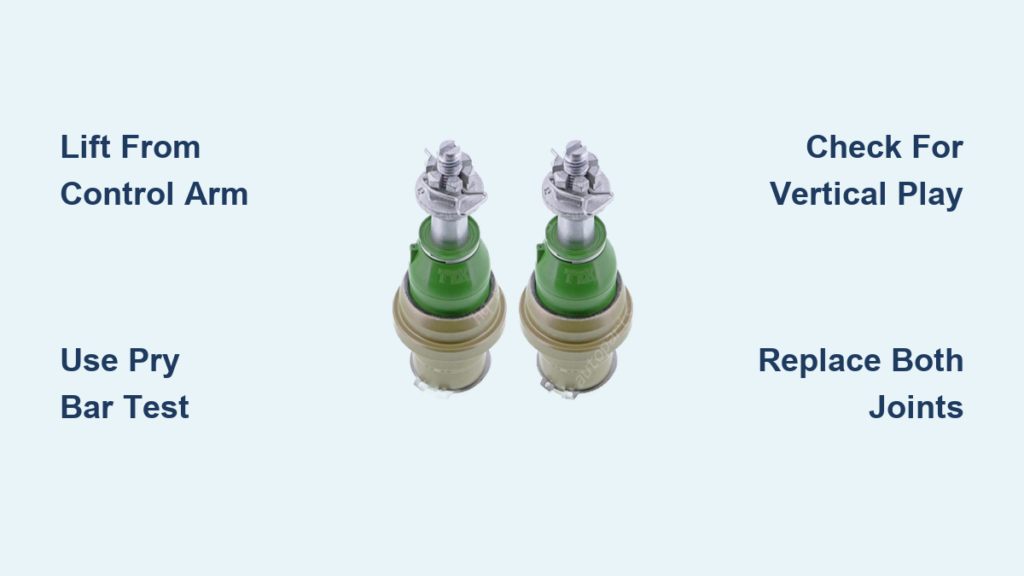
What Real Wear Looks Like
On a healthy joint, there should be zero visible movement. If you see even slight shifting inside the housing, especially more than 0.050 inches (1.27 mm), the ball joint is worn and needs replacement. Common signs during the test include a visible gap appearing between the stud and socket when force is applied, the joint popping or clicking with each movement, grease leaks from a cracked boot, and corrosion around the joint body. Even minor play indicates advanced wear due to the high loads these parts carry.
Enhanced Diagnosis with Wheel Removed

Remove Tire for Clearer View
When wear is suspected but not clearly visible, remove the front wheel. This eliminates tire sidewall flex, which can absorb movement and hide joint play. Lift and secure the truck using the lower control arm, then remove the front wheel. Support the axle with a jack stand to prevent stress on CV joints. Reapply upward force using the pry bar, now under the spring perch or control arm. Watch the ball joint directly. With the wheel off, you can see the exact point of movement, whether it’s in the upper or lower joint, and confirm if the stud is rattling inside the socket.
Use a Mechanic’s Stethoscope to Pinpoint Noise
If you hear clunks or squeaks while driving but cannot identify the source, use a mechanic’s stethoscope. Have someone bounce the truck or turn the steering wheel while you touch the probe to each ball joint. Vibrations travel through metal, so isolate sounds carefully. A sharp knock at the joint confirms failure. Squeaking that stops after greasing may mean the joint is dry but not yet worn out.
Recognize Early Warning Signs
Listen for Clunking Over Bumps
One of the first signs of bad ball joints is a rhythmic clunk or knock when driving over dips, potholes, or speed bumps. The noise comes from the loose ball stud slapping inside the socket under load. It often gets worse during sharp turns or braking, when suspension forces increase. Do not confuse it with sway bar link noise, those tend to rattle rather than knock.
Check for Steering Drift and Vibration
Worn ball joints reduce steering precision. You may notice the truck drifts or wanders on straight roads, the steering wheel feels loose or vague, and vibration through the wheel at highway speeds. These symptoms develop gradually, so drivers often adapt without realizing something is wrong.
Inspect the Dust Boot Visually
Crawl under the truck and examine the rubber dust boot on each ball joint. If it is torn, cracked, or missing, dirt and water have entered the joint. If it is greasy or oily, seal failure has occurred. If it is hard or shriveled, it has aged and is no longer protective. A damaged boot means the joint is compromised, even if no play is visible yet.
Greasable vs. Sealed Ball Joints: Know the Difference
Aftermarket Joints Often Have Zerk Fittings
Many replacement ball joints come with grease fittings (zerk fittings). These allow periodic lubrication, which extends life and reduces squeaks. If your F-150 has greasable joints, use a grease gun every 5,000 to 10,000 miles. Pump until fresh grease appears at the boot edge, then wipe off excess to prevent dirt buildup. Lubricating dry joints may quiet squeaks temporarily, but will not fix mechanical wear.
OEM Joints Are Usually Non-Serviceable
Factory-installed ball joints on older F-150s (especially pre-2000s) are sealed for life. Once the internal grease dries out or the seal fails, replacement is the only option. If it does not have a grease fitting, they are OE and likely dry as a bone. Do not waste time trying to inject grease into non-greasable joints, they lack the internal channels to distribute it.
When to Replace Ball Joints
Replace at First Sign of Play
Any visible vertical movement during the pry bar test means the joint is beyond safe limits. Replace it immediately. Other replacement triggers include audible clunking or clicking, cracked or missing dust boot, grease leakage, and confirmed wear from an alignment shop. If one is bad, you might as well replace both since the other will go eventually.
Replace Both Sides Per Axle
Even if only one ball joint shows wear, replace both upper and lower joints on the same side, or even both sides if mileage exceeds 80,000 to 100,000 miles. They have endured the same conditions, and labor is nearly identical. Use quality parts like Moog or OEM-spec units for durability. Avoid cheap aftermarket joints that fail prematurely.
DIY Replacement Feasibility and Tools
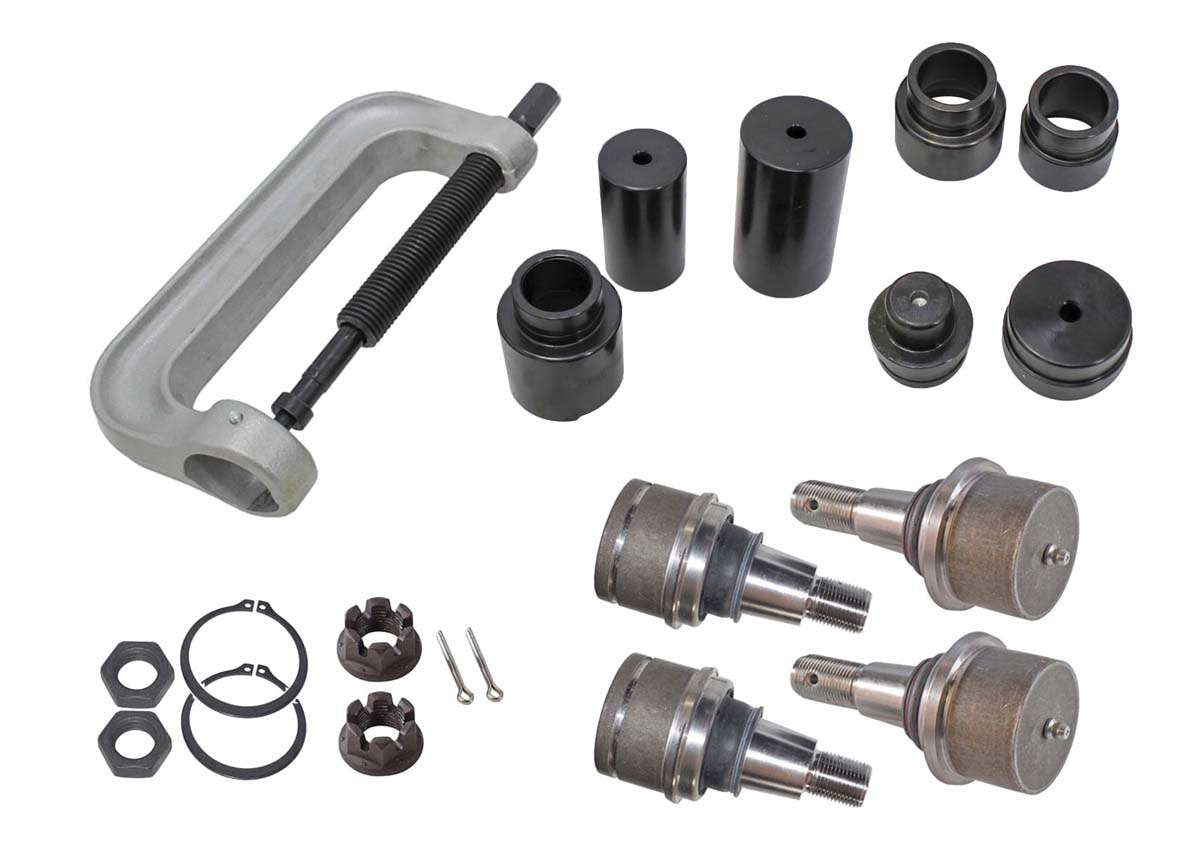
Essential Tools for Ball Joint Swap
Replacing ball joints on an F-150 is manageable for DIYers with intermediate skills. You will need a ball joint separator (pickle fork or hydraulic press), socket set and breaker bar, torque wrench (critical for reassembly), ball joint press kit (loaner available at AutoZone, O’Reilly’s, Advance Auto), and hammer and punch for stubborn pins. I borrowed a press from Advance and did both upper and lower in under 2 hours.
Watch for Loaner Tool Limitations
Some store-loaned ball joint presses lack the correct adapters for F-150 upper or lower joints. The press I borrowed did not have the right cups to install the joint. Solutions include trying a different auto parts store, renting a complete kit (for example, $162 deposit, fully refundable), or paying a machine shop $20 to $50 to press in the new joint. Always follow factory torque specs when reinstalling. Improper tightening can damage components or create safety risks.
Safety Rules You Must Follow
Never Work Under a Jack-Supported Truck
Hydraulic jacks can fail unexpectedly. Always use jack stands rated for your truck’s weight and place them on solid ground. Double-check stability before going underneath. Even a small shift can be deadly.
Wear Protective Gear
Wear gloves and safety glasses when using pry bars, hammers, or presses. Metal fragments, grease, and sudden component release pose real hazards. Have a second person assist when applying force or observing joint movement. It improves accuracy and safety.
Model-Specific Considerations
Older F-150s with Torsion Bar Suspension
Models like the 1998 F-150 with 5.4L engine use torsion bars instead of coil springs. This design maintains constant preload on the lower control arm, making wear harder to detect. Simple hand-rocking is ineffective on torsion bar suspensions. The pry bar method is essential here. Also note that removing control arms requires torsion bar unloading and careful re-adjustment during reassembly.
Applies to Other Trucks Too
This inspection technique works on F-250 (light-duty), Expedition, Excursion, GM trucks (Silverado, Sierra) with independent front suspension, and Dodge Ram 1500 with double-wishbone setup. Always confirm your suspension type before starting.
Frequently Asked Questions About Checking F-150 Ball Joints
How often should I check my F-150 ball joints?
Inspect ball joints every 15,000 to 20,000 miles or every 6 to 12 months, whichever comes first. Also perform checks after hitting potholes, curbs, or rough terrain.
Can I check ball joints without lifting the truck?
Standard hand-rock tests performed without unloading the suspension are unreliable and often give false-negative results. You must lift from the lower control arm to properly unload the joint for accurate testing.
What does bad ball joint sound like?
Bad ball joints typically produce a rhythmic clunk or knock when driving over bumps, potholes, or during turns. The noise comes from the loose ball stud slapping inside the socket under load.
How much play indicates a bad ball joint?
Any visible vertical movement during the pry bar test indicates a worn ball joint. Even movement less than 0.050 inches (1.27 mm) means the joint is beyond safe limits and needs replacement.
Can I drive with a bad ball joint?
Driving with a bad ball joint is dangerous. It can lead to loss of steering control, sudden wheel separation, or suspension collapse. Replace ball joints immediately at the first sign of play.
Should I replace both upper and lower ball joints at the same time?
Yes, if one ball joint is bad, replace both upper and lower joints on the same side. They have endured the same conditions and labor is nearly identical. For high-mileage vehicles, consider replacing both sides preemptively.
Key Takeaways for Inspecting Your F-150’s Ball Joints
Regular ball joint checks are a critical part of F-150 maintenance. Use the pry bar test with proper lifting from the lower control arm to avoid false readings. Inspect every 15,000 to 20,000 miles or after hard impacts. Replace at the first sign of play, and always prioritize safety by using jack stands never the jack alone. With the right method, you can prevent failure, save money on unnecessary repairs, and keep your truck running safely for years.


