

You turn the key, switch the climate control to max cool, and nothing happens. No click, no engagement, just warm air blowing through the vents. If your Ford F150 AC compressor is not engaging, you are dealing with one of the most common issues across F-150 models from 2004 to 2015. The root cause is usually one of a few repeatable electrical, mechanical, or refrigerant-related failures. This guide walks you through every possible cause, how to test each component, and exactly what to do to restore cold air.
Signs Your Compressor Is Not Engaging
Your AC system gives clear warning signs before it fails completely. Watch for these symptoms to confirm the compressor is not engaging.
The inner clutch plate stays still while the outer pulley spins freely. There is no change in engine idle when AC is turned on. Climate control shows cooling mode, but no cold air comes out. You may hear a relay click, but the compressor does not activate. Voltage at the compressor connector reads below 12V, sometimes as low as 4.5V, despite relay operation.
These symptoms point to a failure in the AC clutch engagement circuit. The clutch needs power, ground, correct refrigerant pressure, and a command signal from the PCM. If any one of these is missing, the compressor will not engage.
How the AC Clutch System Works
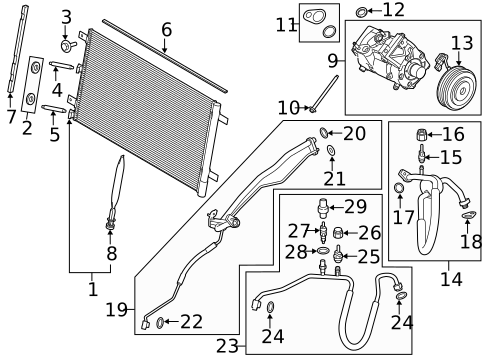
Understanding the engagement chain helps you diagnose faster. The AC compressor clutch is electromagnetic. When you turn on the AC, the climate control sends a request to the PCM. The PCM checks refrigerant pressure, engine temperature, and throttle position. If conditions are safe, it grounds the AC clutch relay, which sends 12V to the clutch coil. This creates a magnetic field that pulls the clutch plate inward, engaging the compressor.
If any link in this chain fails, the clutch will not engage, even if refrigerant levels look normal on a DIY gauge.
Check Fuses First
Fuses are the easiest and most overlooked fix. Do not rely on visual inspection. Test with a multimeter instead.
Locate and Test Model-Specific Fuses
2004 to 2008 Models:
– Fuse 11 (10A) under the hood
– Unlabeled “5 volt can bus” fuse on the passenger side dash (critical for AC command)
2008 F-150: Fuses #11 and #32
2015 F-150: Fuses #44 and #97, both must be intact for compressor operation
Test Method:
– Set multimeter to continuity or voltage
– Key on, AC on
– Probe both ends of the fuse
– No continuity or voltage drop means replace the fuse
A blown fuse often indicates a deeper issue, such as a shorted clutch coil. Replace the fuse only after diagnosing the root cause.
Test the AC Clutch Relay
The AC clutch relay is the number one culprit in non-engagement cases, especially in 2008 to 2014 models. Contacts degrade over time, failing to deliver full 12V. You might hear a click, but voltage drops under load.
Why Relays Fail Over Time
The symptom is clear. The relay clicks, but voltage at the compressor reads 4.5 to 9V instead of 12V, and the compressor does not engage.
Bypass Test to Confirm Relay Fault
- Locate the relay in the under-hood fuse box on the passenger side
- Remove the relay
- Use a jumper wire to connect pin 3 (bottom-left) to pin 5 (upper-left)
- Turn the AC on
If the compressor engages, the relay is bad. If there is no engagement, the problem is upstream or downstream.
Replace with Cardone R81735, verified for 2008 F-150 4.6L. This relay delivers consistent 12V output.
Inspect the Compressor Connector
The 2-pin connector at the compressor is fragile. Probing with back-piercing test leads or aftermarket repairs often spread the pins, breaking contact.
What to Look For
- Bent or loose terminals
- Green corrosion
- Burnt insulation
Disconnect the connector and check for power and ground with a multimeter. If voltage drops when reconnected, the connector is bad.
Replace with an OEM-spec pigtail. Never reuse damaged connectors. Crimp and seal properly.
Diagnose Clutch Coil and Air Gap

The magnetic clutch coil can fail open or shorted. Test both to rule out this cause.
Test Clutch Coil Resistance
The specification is 3.8 to 3.9 ohms resistance across terminals.
Test Steps:
1. Disconnect the 2-pin connector
2. Set multimeter to ohms
3. Probe both pins on the clutch side
Results below 3.5 ohms indicate a short (may blow fuses). Results above 5 ohms indicate an open circuit. Either way, replace the clutch or compressor.
Measure and Adjust Clutch Air Gap
Wear increases the gap between the clutch hub and pulley face. Too wide, and the magnetic field cannot pull it in.
The specification is 0.35 to 0.60mm (0.014 to 0.024 inches).
Adjustment:
1. Use a feeler gauge to measure the gap
2. Remove one shim or washer behind the clutch plate
3. Recheck the gap. Do not eliminate it entirely, as this causes drag.
One user fixed a 2006 F-150 by taking one washer out. The clutch engaged again. High-mileage trucks often need this simple fix.
Refrigerant and Pressure Checks

The PCM disables the compressor if pressure is out of range. Even if gauges look normal, the PCM may see a fault.
Low or High Charge Prevents Engagement
Too low (below 20 psi) triggers low-pressure lockout. Too high (above 400 psi) triggers high-pressure cutout.
DIY cans show “full,” but static pressure or faulty gauges mislead. Connect a manifold gauge set instead. At idle with 85°F ambient, low-side should be 30 to 50 psi, and high-side should be 200 to 250 psi.
If gauges show normal pressure but the compressor will not engage, check the PCM-reported pressure.
Compare PCM vs. Actual Pressure
Modern F-150s (2009 to 2015) use electronic pressure transducers, not simple switches. The transducer fails or wiring corrodes. The PCM sees 20.9 psi while actual is 65 psi. The compressor stays disabled.
Use ForScan software with an OBD2 adapter. Read live AC refrigerant pressure and compare to gauge reading. If the mismatch is more than 10 psi, replace the transducer. Check wiring for chafing or corrosion.
One user case: transducer replaced, compressor engaged immediately.
Mechanical Failures to Rule Out
Sometimes the problem is physical, not electrical. Rule these out before replacing expensive components.
Stuck or Seized Compressor
Compressors can seize after long inactivity. Test by trying to rotate the clutch hub by hand with the engine off. If it is stuck, apply gentle force with a wrench or breaker bar. One 2013 F-150 sat for 7 weeks, the compressor seized, was freed manually, and full cooling was restored.
Failed Rubber Donut Coupling
Found between the clutch and compressor shaft in 2004 to 2008 models. The clutch engages, but there is no cooling and no pressure change. The rubber coupling is cracked or missing. Replace the compressor, as the coupling is not serviceable separately.
Internal Compressor Failure
The clutch engages but there is no refrigerant flow. Gauge signs include low-side at 85 to 90 psi (static), high-side below 20 psi, and no change when the compressor runs. The cause is broken valves, pistons, or internal blockage. Replace the compressor, flush the system, replace the receiver/drier and expansion valve, and recharge with the correct R134a amount.
PCM, Climate Control, and CAN Bus Issues
Modern vehicles rely on control modules. Faults here can prevent engagement without any mechanical problem.
Climate Head Failure (2009 to 2010 Models)
Known issue: the climate control head sends no AC request to the PCM, even if the display shows cooling mode. Use ForScan to check the AC request signal. If it is missing, replace the climate control head.
Cooling Fan Circuit Lockout (2015+ Models)
The PCM disables the compressor if cooling fans are not working. One 2015 F-150 had a new compressor but no engagement. The fans were not running. The fan relay was repaired, and the compressor activated. Check fuses #44 and #97, fan relays, and the PCM fan control signal.
PCM Logic Conditions
The PCM will not allow engagement if the engine is not at operating temperature, battery voltage is below 11.5V, throttle is wide open (WOT cutout), or there is a CAN bus fault (such as a bad “5 volt can bus” fuse). Use KOEO (Key-On, Engine-Off) test in ForScan to manually command the clutch, bypassing some logic.
Step-by-Step Diagnostic Flow
Follow this sequence to isolate the fault efficiently.
1. Start with the Basics
- Engine at operating temperature
- AC set to 60°F, max fan, recirc
- Check for relay click
2. Scan Tool Check
Use ForScan to read AC clutch commanded ON/OFF, AC clutch allowed YES/NO, refrigerant pressure (PCM vs. actual), and DTCs (P1461 for pressure sensor, P1469 for low performance). If commanded ON but not allowed, check pressure, voltage, fans, and temperature.
3. Voltage Test at Compressor
Disconnect the 2-pin connector and test for 12V with AC on. No power means check the fuse and relay output. Power present means test the clutch directly.
4. Direct Battery Jump
Apply 12V from the battery to the clutch terminal and ground the other pin. If it engages, the wiring or relay is at fault. Weak or no pull means bad clutch or gap too wide.
5. Load Test the Harness
Replace the clutch with an incandescent bulb or window motor on the harness side. Run the KOEO test. If the load activates, the harness, relay, and PCM are OK. The fault is in the compressor or connector.
6. Pressure and Refrigerant Verification
Use manifold gauges, not DIY cans. Compare to PCM-reported pressure. Leak test if low charge is found.
Repair and Replacement Tips
These best practices ensure a lasting fix.
Replace the relay with Cardone R81735. It restores full 12V output in 2008 to 2014 models. Avoid cheap relays that degrade quickly.
Adjust the clutch air gap. It is a simple fix for high-mileage trucks. Remove one washer and recheck the gap. Do not eliminate the gap entirely.
Use OEM pigtails, not splices. Replace damaged connectors with OEM-spec pigtail. Crimp, seal, and avoid piercing wires.
Replace critical components when swapping the compressor. Always replace the receiver/drier or accumulator (absorbs moisture), expansion valve or orifice tube (prevents clogging), and flush the system if the old compressor failed (removes metal debris).
Recharge correctly. Evacuate the system for 30 minutes or more. Charge with the exact R134a amount (24 to 32 oz, check the under-hood decal). Use PAG 46 or PAG 100 oil as specified. Add oil only if components were replaced.
Model-Specific Alerts
2004 to 2008: Check Hidden Dash Fuse
The unlabeled “5 volt can bus” fuse under the passenger dash is critical. Failure kills the AC command signal.
2009 to 2010: Climate Control Head Failure
The display works, but no AC request is sent. Replace the head or reprogram it.
2015: Cooling Fans Must Work
The PCM disables the compressor if the fans are not running. Check fuses #44 and #97 first.
All Models: Avoid Defective Aftermarket Compressors
Some reman units fail out of the box. Motorcraft OEM is recommended for reliability.
Final Verification Steps
After repair, verify the fix properly.
- Start the engine, AC on max cool
- Watch for clutch engagement within 30 seconds
- Confirm cycling every 30 to 60 seconds
- Measure vent temperature. It should drop to 40 to 45°F within 5 minutes
- Use a scan tool to verify AC clutch commanded ON, no DTCs, and normal pressure readings
Success looks like this: clutch engages smoothly, cold air restored.
Frequently Asked Questions About Ford F150 AC Compressor Not Engaging
Why does my AC compressor not engage but the relay clicks?
The relay clicks but the compressor does not engage because the relay contacts are worn and cannot carry full current. Voltage drops to 4.5 to 9V instead of reaching 12V. Replace the relay with Cardone R81735 to restore proper voltage.
How do I test if my AC clutch coil is bad?
Disconnect the 2-pin connector and set a multimeter to ohms. Probe both pins on the clutch side. The specification is 3.8 to 3.9 ohms. Below 3.5 ohms indicates a short. Above 5 ohms indicates an open circuit. Either result means replace the clutch or compressor.
Can low refrigerant cause the compressor not to engage?
Yes. The PCM disables the compressor if low-side pressure drops below approximately 20 psi. Even slightly low charge (below 25 psi on low side) can inhibit operation. Use manifold gauges, not DIY cans, to check the actual charge.
What is the clutch air gap specification for an F-150?
The clutch air gap specification is 0.35 to 0.60mm (0.014 to 0.024 inches). Excessive wear increases this gap, preventing the magnetic field from pulling the clutch in. Remove one washer to reduce the gap and restore engagement.
Do I need to replace the receiver/drier when replacing the compressor?
Yes. Always replace the receiver/drier or accumulator when replacing the compressor. It absorbs moisture, and contamination from a failed compressor can clog the system. Replace the expansion valve or orifice tube as well, and flush the entire system.
Key Takeaways for Fixing Your Ford F150 AC Compressor
The most common cause of a Ford F150 AC compressor not engaging is a failing AC clutch relay delivering less than 12V, especially in 2008 models. The best diagnostic tool is ForScan software, which reveals real-time pressure, commands, and DTCs. A hidden fault to watch for is spread connector pins at the compressor. Inspect carefully and replace with an OEM pigtail.
Never trust DIY gauges. Use a manifold set and compare the readings to PCM data. Adjusting the clutch air gap can revive high-mileage systems by removing one washer. Cooling fans must work for the PCM to allow engagement, particularly in 2015 and newer models.
Replace the drier and valve with every compressor job to prevent moisture and clogging issues. Run the AC monthly, even in winter, to keep seals lubricated and the compressor free.
Fixing a non-engaging AC compressor on your F-150 does not require a shop visit. With the right tools and this guide, you can diagnose and repair it yourself, saving hundreds while getting cold air fast.


