You’re cruising down the highway when a bug splatters across your windshield. You pull the washer lever, and nothing happens. No spray, no sound, just a dirty windshield and a growing frustration. If your 2017 F250 windshield washer not working has left you stuck with poor visibility, this guide will help you pinpoint the exact cause and fix it yourself.
Most Super Duty owners assume the pump motor died or a fuse blew. The reality? The number one cause is a clogged inlet screen caused by mixing incompatible washer fluids that react to form a thick gel. This guide walks you through every symptom, from silent pumps to weak sprays, with step-by-step fixes, verified part numbers, and money-saving tips to restore your washer system in under two hours.
Match Your Symptom to the Real Problem
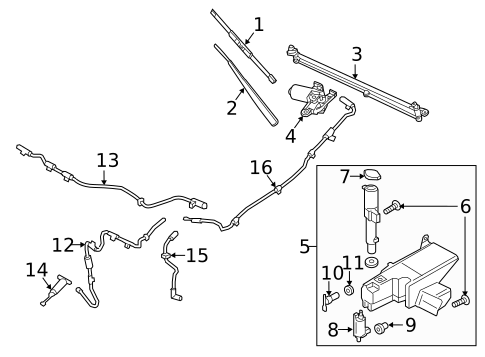
Before grabbing tools, identify what your washer system does (or doesn’t do) when you pull the lever. Each behavior points directly to a specific root cause, saving you from replacing parts you don’t need.
No Sound and No Spray at All
Complete silence means the system isn’t receiving power or the pump motor has failed entirely.
Start with Fuse #77
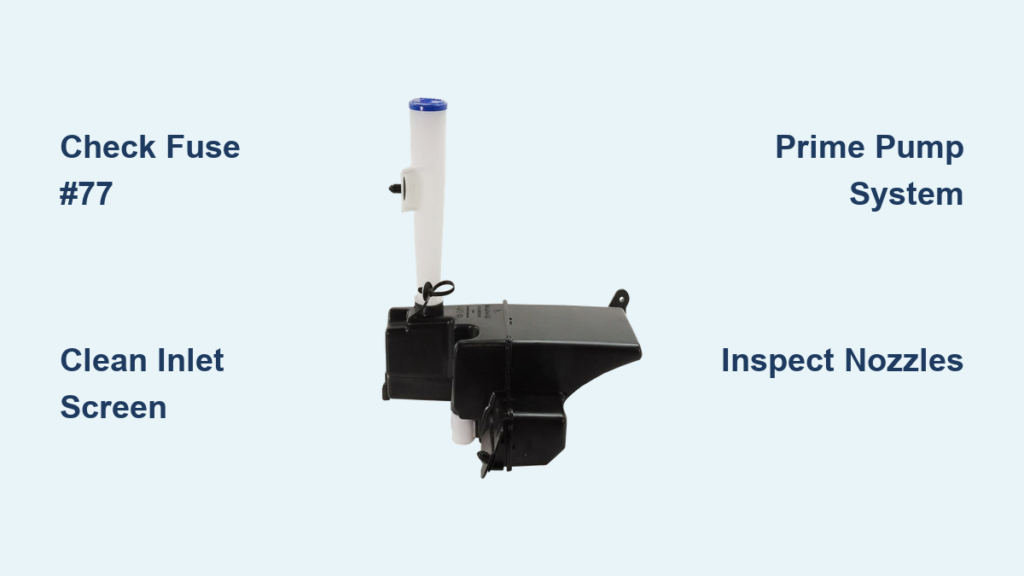
Pop open your Battery Junction Box (BJB) on the driver’s side of the engine bay. Find Fuse #77, a 30-amp fuse dedicated to the washer pump. Even if it looks intact, test it with a multimeter. Many owners report “ghost” fuses that appear fine but are broken internally.
Test for Power at the Pump Connector
If the fuse checks out, move to the pump itself. It’s located on the driver’s side of the washer fluid reservoir, just forward of the battery. Have an assistant pull the washer lever while you check for voltage at the pump’s electrical connector. No voltage means the problem is upstream in the wiring, BCM, or switch.
Inspect the Wiring Harness and Connector
Unplug the harness and examine both sides carefully. Look for green corrosion, bent terminals, or rodent damage. Clean corroded contacts with electrical contact cleaner and reseat the connector firmly.
Consider BCM or Switch Failure
The Body Control Module controls the washer pump circuit. If power isn’t reaching the pump and the fuse is good, the BCM may not be grounding the circuit. Less commonly, the wiper stalk switch wears out. Intermittent operation often points to switch wear.
Confirm Pump Motor Failure
If voltage reaches the pump connector but the motor stays silent, the pump has died. Pumps sitting inactive for long periods can temporarily seize. Some “wake up” after days of use, but permanent silence requires replacement.
Humming Sound But No Fluid Spraying
A distinct whirring from the driver’s side of the engine bay means the pump motor works but fluid can’t flow. This is the most common failure mode on the 2017 F250.
Clean the Inlet Filter Screen
A clogged inlet screen causes the majority of humming-with-no-spray complaints. Mixing different washer fluid brands (like bug remover with de-icer) creates a gel-like sludge that blocks the tiny mesh screen at the pump’s base.
How to clean it properly:
1. Drain the washer reservoir into a bucket.
2. Pull the pump straight out of its rubber grommet.
3. Inspect the bottom of the pump for a small black or white filter screen.
4. Remove gunk with a toothbrush, compressed air, or a thin wire.
5. Reinstall the pump and test.
This 10-minute fix resolves the issue in over 60% of cases, often eliminating the need for a new pump entirely.
Bleed Out an Air Lock
After replacing the pump or running the reservoir bone dry, air can trap inside the pump housing. A spinning impeller can’t move fluid if it’s pumping air instead.
Prime the pump correctly:
1. Fill the reservoir with fresh washer fluid.
2. Disconnect the output hose from the pump outlet.
3. Activate the washer switch.
4. Wait until fluid flows freely with no air bubbles.
5. Reconnect the hose while fluid is still flowing.
6. Test the nozzles immediately.
Skipping this step is the top reason for “new pump, still no spray” complaints.
Check for Pinched or Kinked Hoses
The hose from the pump runs up to the hood and along the cowl. Recent work near the grille or headlights can kink or crush the line. Follow the hose from the pump to the nozzles, looking for flat spots, sharp bends, or tool damage.
Weak or Uneven Spray Pattern
Fluid reaches the windshield but lacks force or proper coverage. The problem is downstream of the pump.
Unclog the Spray Nozzles
Dirt, dried fluid residue, or insects can partially block the spray jets on the cowl. Use a fine needle or pin to gently clear each hole without oversizing it, which would ruin the spray pattern.
Pro Tip: Soak the nozzle area with warm water first to soften buildup, then blow debris back through the line with compressed air.
Replace Deteriorated Cowl Seals
Rubber seals around the cowl nozzles degrade from heat and UV exposure over time. Cracked seals leak pressure before fluid exits the nozzle. Inspect them closely. If they feel brittle or show splits, replace the entire cowl assembly.
Test Pump Pressure Output
A weak motor can’t generate full pressure. If nozzles are clear and seals look good, the pump may be failing internally. Compare spray strength to a known-good vehicle. A dying pump needs replacement.
Access and Replace the Washer Pump
Replacing the pump requires moderate mechanical skill. You’ll need to remove several front-end components for safe access.
Remove the Grille and Driver’s Side Headlight
Tools needed: Socket set with 10mm attachments, trim removal tools, and a drainage bucket.
Step-by-step removal:
1. Remove the plastic radiator shroud held by clips.
2. Unclip the front grille starting at the top, then release side clips and remove 10mm bolts at the bottom.
3. Remove the driver’s side headlight by unscrewing visible 10mm bolts.
4. Locate the hidden fender bolt behind the wheel well liner and remove it.
5. Gently pull the headlight assembly forward and set it aside safely.
This process takes 30–45 minutes but prevents costly damage during pump access.
Uninstall the Old Pump
- Place a bucket under the reservoir to catch draining fluid.
- Press the tab and pull to disconnect the electrical connector.
- Grasp the pump body and pull it straight out of the rubber grommet.
- Inspect the inlet screen for clogs and clean if necessary.
Important: The pump is press-fit, not threaded. Use steady, straight force. Don’t twist or you’ll damage the grommet.
Install the New Pump
- Push the new pump firmly into the grommet until it seats completely.
- Reconnect the electrical harness until the tab clicks.
- Reinstall the headlight, grille, and shroud in reverse order.
Critical: Prime the system before final reassembly to avoid air locks.
Prime the System After Any Pump Work
A common mistake is installing a new pump and declaring failure when no fluid sprays. The pump is spinning air, not fluid.
Follow This Priming Procedure
- Fill the reservoir with fresh washer fluid.
- Disconnect the output hose from the pump outlet.
- Activate the washer switch.
- Let fluid flow until it runs clear and bubble-free.
- While fluid is still flowing, reconnect the hose to the pump.
- Test the nozzles immediately.
Without priming, the pump may eventually self-prime after repeated attempts. Manual priming guarantees instant function and saves you troubleshooting time.
Prevent Future Washer System Failures
Avoid repeat repairs with these simple maintenance habits.
Use Compatible Washer Fluid Exclusively
Never mix brands or types unless specifically labeled as compatible. Combining bug wash with de-icer can create gel that clogs the inlet screen. Stick to one trusted brand, preferably Motorcraft or another Ford-recommended fluid.
Pro Tip: In winter, use a -20°F rated fluid. In summer, opt for bug-removing formulas. Switch seasonally rather than mid-season.
Run the System Monthly
Trucks that sit idle develop dry pump seals and stagnant fluid. Activate the washer every 3–4 weeks, even if you don’t need it. This keeps seals lubricated, prevents clogs, and confirms system health.
Inspect Cowl Seals Annually
During routine maintenance, check the rubber seals around the nozzles. Replace the cowl assembly if seals are cracked or hardened. A $20 part prevents a $100 diagnostic later.
Clean the Inlet Screen Early
At the first sign of weak spray, pull the pump and clean the screen. It takes 10 minutes and can extend pump life by years.
Choose the Right Replacement Pump
When buying a new pump, you have OEM and aftermarket options at different price points.
OEM vs Aftermarket Comparison
| Part Type | Part Number | Price Range | Notes |
|---|---|---|---|
| OEM Motorcraft | WG-335 | $45–$70 | Factory spec, guaranteed fit |
| Aftermarket Trico | 11-526 or 11-531 | $25–$45 | Cost-effective, proven performance |
Recommendation: Aftermarket pumps like Trico 11-526 offer excellent value. They meet OEM flow specifications and are widely used in fleet repairs. Avoid cheap no-name pumps from unknown sellers, as they often fail within months.
Know Relevant TSBs and Recalls
While not directly related to the main washer pump, two service bulletins affect the overall washer system.
Fix Camera Washer Jet Leaks
TSB 20-2267 addresses fluid leaking from the front camera washer on trucks with the prep package. The seal inside the jet fails, dripping fluid onto the camera lens. If you see fluid near the camera rather than the windshield, this TSB applies. Resolution requires replacing the camera washer jet assembly.
Check for Wiper Arm Recalls
Recall 22V250000 covers certain Super Duty models with wiper arms that may detach. While not a pump issue, it affects overall visibility safety. Check your VIN at nhtsa.gov/recalls to confirm if your 2017 F250 is affected. Dealers replace wiper arms free of charge under this recall.
Frequently Asked Questions About 2017 F250 Windshield Washer Problems
Where is the windshield washer fuse on a 2017 F250?
The windshield washer pump is protected by Fuse #77, a 30-amp fuse located in the Battery Junction Box on the driver’s side of the engine compartment. Always verify with a multimeter, as fuses can appear intact but be internally broken.
Why does my washer pump hum but not spray fluid?
A humming sound with no spray typically indicates a clogged inlet filter screen at the pump’s base. This blockage commonly forms when incompatible washer fluids mix and create a gel-like substance. Cleaning the screen resolves this issue in most cases.
Can I replace the washer pump without removing the headlight?
No. On the 2017 F250, accessing the washer pump requires removing the front grille and driver’s side headlight assembly. This process takes 30–45 minutes with basic hand tools but is necessary to reach the pump safely.
How do I prime the washer pump after replacement?
Disconnect the output hose from the pump, activate the washer switch, and wait until fluid flows freely with no air bubbles. While fluid is still flowing, reconnect the hose to the pump outlet. This ensures the pump housing is filled with liquid for immediate pressure buildup.
What washer fluid is best for a 2017 Ford F250?
Motorcraft or other Ford-recommended washer fluids work best. Avoid mixing different brands or types, as chemical reactions can create gel that clogs the inlet screen. Use -20°F rated fluid in winter and bug-removing formulas in summer.
How much does it cost to replace a 2017 F250 washer pump?
DIY parts cost $25–$70 depending on whether you choose aftermarket (Trico) or OEM (Motorcraft) pumps. Professional shop replacement including labor typically runs $150–$310 total.
Key Takeaways for Fixing Your 2017 F250 Windshield Washer
A 2017 F250 windshield washer not working is usually a simple fix you can handle yourself. Start by matching your symptom to the root cause: silence means electrical issues or pump death, humming means a clogged screen or air lock, and weak spray means nozzle or seal problems. Always test Fuse #77 first, clean the inlet screen before replacing the pump, and prime the system after any pump work to eliminate air locks.
Your next step? Pull the pump and inspect that inlet screen. In most cases, a 10-minute cleaning restores full function and saves you from buying parts you don’t need. With proper maintenance and compatible fluids, your washer system will stay reliable for years to come.