
A coolant leak that won’t go away, especially one dripping from the side or rear of your engine, can be maddening. If you have ruled out hoses, the radiator, and the water pump, a failing freeze plug might be the culprit. Despite the name, these components rarely fail due to freezing. Instead, corrosion and aging coolant are the real enemies. On a Ford F-150, especially models with the 4.6L, 5.4L, or 4.9L engines, freeze plugs can rust out over time, leading to persistent leaks. The good news? You do not need to remove the engine. With the right tools and approach, you can replace freeze plugs yourself, even in tight spots. This guide walks you through diagnosing, removing, and installing freeze plugs on your F-150, including access tips, sealant choices, and pro-level techniques to ensure a lasting fix.
Diagnose the Leak Before Replacing Freeze Plugs
Before pulling tools, confirm the leak is actually from a freeze plug. Misdiagnosing leads to wasted time and money.
Coolant vs. Oil: Know the Difference
Coolant leaks are typically green, orange, or yellow, and leave a slimy residue. Oil leaks are brown or black and feel slick. A milky film on the oil dipstick means coolant has entered the oil, possibly through a blown head gasket or rear core plug failure.
If coolant is in the oil, do not start the engine. Hydraulic lock or bearing damage can occur. This is a critical safety issue that requires immediate attention before proceeding with any freeze plug replacement.
Common Leak Locations on Your F-150
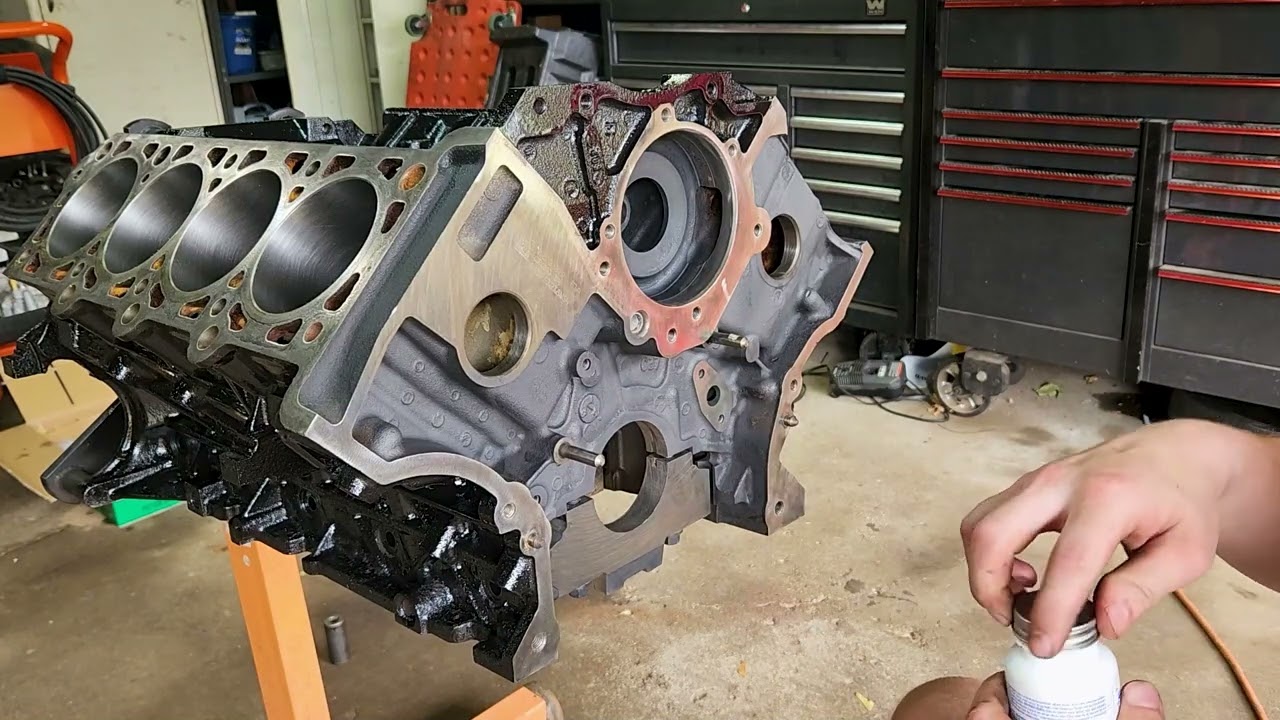
Freeze plugs on Ford F-150 trucks are located in several key areas. The side of the engine block is most accessible, with three plugs per side on V8 engines. Behind the exhaust manifold often blocks rear-facing plugs. A leak between engine and transmission likely indicates a rear core plug or rear main seal failure. Near the timing cover could be a front plug or timing cover gasket leak.
Clean the area, run the engine, and watch where the drip starts. Use a mirror and flashlight for hard-to-see zones to pinpoint the exact location.
Locate All Freeze Plugs by Engine Type
The number and position of plugs depend on your F-150’s engine. Knowing the exact count helps you prepare the right parts.
5.4L V8: 10 Plugs Total
The 5.4L V8 has six side plugs, three per side. Two more are near the motor mount bracket, behind the exhaust. Two more are behind the flywheel, requiring transmission movement for access.
The rear motor-mount plugs often require exhaust manifold removal. This adds time to the job but remains doable without engine extraction.
4.6L V8: 6 to 8 Plugs
The 4.6L V8 has side-mounted plugs, three per side. Rear plugs include one to two behind the flywheel. One plug sits near the timing cover. Do not confuse a timing cover leak with a freeze plug issue.
4.9L I6: 8 to 9 Plugs
The 4.9L inline-six has five plugs on the passenger side. One is behind the rear exhaust. Two are behind the flywheel, requiring transmission movement. One on the cylinder head is easily accessible from above.
Pull the front tire and fender liner. Even the hardest plug becomes accessible through the wheelwell.
Remove Old Freeze Plugs Safely
Never hammer a new plug in until the old one is fully out and the bore is clean. Rushing this step causes leaks later.
Punch and Screw Method for Rusted Plugs
This method works best for corroded plugs that will not budge. Center-punch the middle of the plug to break the seal. Drill a small pilot hole. Insert a long self-tapping screw and tighten with a drill. Clamp vice grips on the screw head. Use a flathead screwdriver to pry one edge outward. Pivot at three and nine o’clock positions, then pull out at six o’clock.
Knock the plug in at twelve o’clock and it will pop out at six. It swivels at three and nine o’clock. Pull it out with pliers at the six o’clock area.
Tools for Stubborn or Broken Plugs
Air hammer tools punch a hole and fragment the plug for removal. Drill and hook extractors remove pieces carefully. Freeze plug puller tools, available for about fifteen dollars on Amazon, work great for recessed plugs.
Never force the plug inward. You risk block damage or trapped debris that compromises the seal.
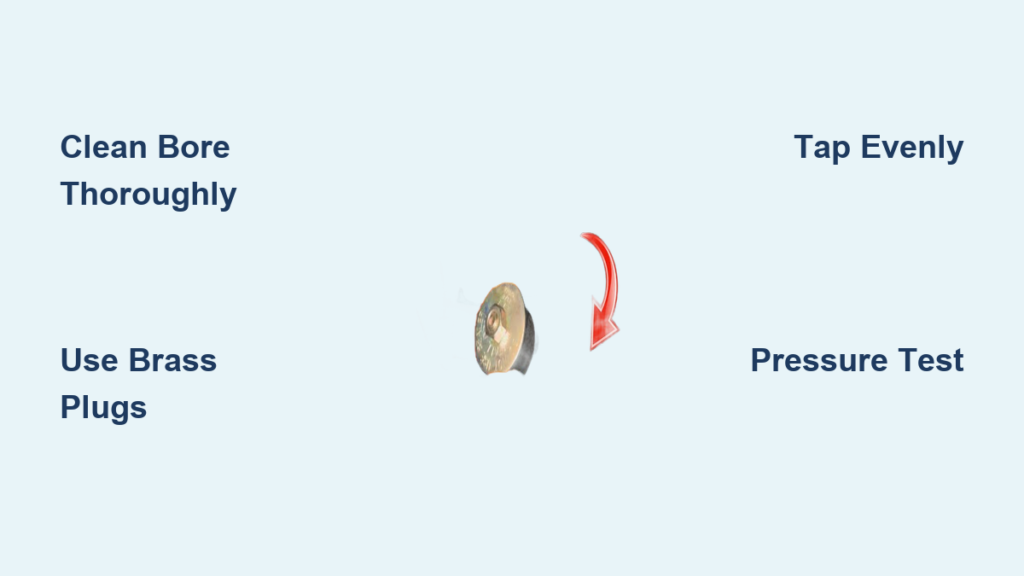
Clean the Plug Bore Thoroughly

A clean surface is critical for a leak-free seal. This step determines whether your new plug holds or leaks.
Tools to Use for Bore Cleaning
Use a Dremel with wire brush or sanding drum. Use eighty to one-twenty grit sandpaper or emery cloth. Use shop rags to wipe out all debris.
What to Look For During Cleaning
Look for rust, scale, old sealant, or burrs. The surface must be smooth and flat. Compare the old plug to the new plug. The new plug should fit snugly.
If the new plug drops in too easily, the bore may be damaged. Consider using an oversized plug or replacing the block.
Choose the Right Replacement Plug
Not all freeze plugs are equal. Your choice affects longevity and leak prevention.
Brass vs. Steel Core Plugs
Brass plugs resist corrosion and last ten years or longer. They are soft and easy to damage during installation. Steel plugs are cheap and widely available but rust over time. Avoid steel in humid or salty climates.
Brass plugs are the expert pick for all replacements, especially in coastal or salty regions.
Common Sizes for 5.4L V8 Engines
Six plugs are one and three-quarter inch deep. Two are one and three-quarter inch shallow, known as 75B. Two are one and one-half inch shallow.
Some users report one forty-five sixty-fourths inches as standard. Measure before buying to ensure proper fit.
Use Expandable Plugs in Tight Spots
When clearance is tight, ratchet-style or rubber plugs can help you complete the job.
OReilly Ratchet-Install Plug
This plug turns with a one-fourth inch ratchet. It expands a rubber seal inside the bore. No hammer is needed, making it ideal behind motor mounts.
An electric ratchet was required due to limited hand clearance. The plug seated securely and stopped the leak immediately.
Dorman Rubber Expansion Plugs
Dorman rubber plugs install easily with no tools needed. They are considered temporary fixes and often leak after weeks.
Do not use rubber plugs. They are a temporary fix and always leak later.
Apply Sealant Only When Needed
Sealant improves reliability but only on the right plug type. Using the wrong sealant causes leaks.
For Steel Plugs
Indian Head Shellac is the traditional favorite. Apply a thin coat around the edge. Permatex High-Temp Red RTV works well for steel and resists heat and vibration.
Use Indian Head gasket stuff. It will help seal the plugs to the block with no leakage.
For Brass Plugs
Install brass plugs dry. They seal via compression fit. Do not use RTV on brass. It prevents proper seating and can cause leaks.
RTV on brass equals potential leak. Skip it.
Improve Access Without Engine Removal
You do not need to pull the engine. Smart disassembly provides the access you need.
Front Wheel and Fender Liner Removal
Turn the steering wheel fully, left or right. Remove the front tire and fender liner. This gives direct access to side plugs.
Even the hardest plug, behind the exhaust manifold, is accessible through the wheelwell.
Remove Exhaust Manifold for Rear Plugs
Exhaust manifold removal is required for rear-side plugs. Soak bolts in penetrating oil overnight. Use swivel sockets for tight spaces.
The dipstick tube was the worst part. Plan extra time for this step.
Slide Back the Transmission for Rear Plugs
Remove the driveshaft and crossmember. Use two long guide bolts to support the transmission. Slide back ten to twelve inches. Remove the flywheel or flexplate for full access.
Never rely on a jack alone. Use a transmission jack or support bar for safety.
Install New Freeze Plugs Correctly
Improper installation causes leaks, even with the right plug. Follow these steps carefully.
Steps for Metal Plugs
Dry-fit first to ensure alignment. For steel plugs, apply thin sealant. Place the plug into the bore. Use a socket slightly smaller than plug diameter as a driver. Tap evenly around the edge with a hammer. If the plug tilts, tap the high side lightly to realign. Stop when the plug is flush or slightly below the surface. Hammer bounce returns when fully seated.
The plug flange should sit flat against the block lip.
Steps for Ratchet-Style Plugs
Insert by hand. Attach a one-fourth inch ratchet, electric preferred. Turn clockwise until the seal expands fully. Confirm no gaps or tilting.
An electric ratchet fits where hands cannot.
Replace Rear Core Plugs Behind Flywheel
This is the toughest job but doable with patience.
Step-by-Step Procedure
Drain coolant and disconnect the battery. Remove the driveshaft and transmission crossmember. Install two guide bolts in bellhousing holes. Slide the transmission back ten to twelve inches. Remove the flywheel or flexplate. Remove the old rear core plugs, usually one to two. Install new brass plugs and tap evenly. Reassemble in reverse order.
Replace the rear main seal while you are in there. Do not pull the transmission twice.
Refill and Bleed the Cooling System
Proper refill prevents air pockets and overheating.
Refill Steps
Reinstall all components. Refill with OEM coolant. Most F-150s use Motorcraft Orange fifty-fifty. Use fifty percent coolant and fifty percent distilled water. Bleed air by opening the bleed screw if equipped. Or run the engine with the radiator cap off until the thermostat opens. Top off coolant when cooled.
Check for no leaks at idle. Verify heat works in the cabin. Confirm coolant level stable after twenty-four hours.
Pressure Test Before Driving
Never assume it is fixed. Test it.
How to Pressure Test
Attach a cooling system pressure tester to the radiator neck. Pump to fifteen to eighteen psi or cap rating. Wait ten to fifteen minutes. Watch for drips or pressure drop.
If it fails, disassemble and recheck plug seating and bore prep.
Prevent Future Freeze Plug Failures
One bad plug means others are likely corroded. Address all at once.
Maintenance Tips
Flush coolant every fifty thousand miles or five years. Use OEM-recommended coolant only. Replace all plugs at once if one failed. Inspect during major work like timing chain or mount replacement. Upgrade to brass during engine rebuilds.
Some owners install a block heater in the plug hole. This seals the leak and helps cold starts.
Time, Cost, and Difficulty Comparison
DIY versus professional shop work involves significant differences.
DIY vs. Professional Repair
DIY time ranges from two and a half to ten hours. Parts cost is thirty to fifty dollars for a brass kit. Labor cost is zero. Difficulty is moderate to high.
Professional time ranges from six to twelve hours. Parts cost is one hundred fifty dollars or more. Labor cost is six hundred to twelve hundred dollars.
Two and a half hours works for side plugs. Ten plus hours includes transmission work.
Final Checklist Before Restart
Before turning the key, verify everything.
Verify all plugs are seated flush. Check for no coolant in oil. Confirm coolant level is correct. Ensure the system is pressure tested. Change oil if contaminated. Reconnect the battery.
Do not start the engine if coolant entered the oil pan. Drain and flush first.
Frequently Asked Questions About Ford F-150 Freeze Plugs
How Do I Know If My Ford F-150 Has a Bad Freeze Plug?
Signs include coolant dripping from the engine sides or rear, unexplained coolant loss with no other visible leaks, puddles under the vehicle after shutdown, and coolant mixing with oil. A pressure test confirms the location.
Can I Replace Freeze Plugs Without Removing the Engine?
Yes. Most freeze plugs on the F-150 can be replaced without engine removal. Side plugs are accessible through the wheelwell. Rear plugs behind the flywheel require sliding the transmission back but the engine stays in place.
What Happens If I Do Not Replace a Leaking Freeze Plug?
The leak worsens over time. Coolant loss leads to overheating. If coolant reaches the oil system, it causes bearing damage. Running the engine with coolant in the oil risks catastrophic engine failure.
How Long Does It Take to Replace Freeze Plugs on an F-150?
Side plugs only take two and a half to four hours. Adding exhaust manifold removal adds four to six hours. Including transmission work for rear plugs extends the job to six to ten hours.
Should I Use Brass or Steel Freeze Plugs?
Brass is preferred. It resists corrosion and lasts over ten years. Steel is cheaper but rusts faster, especially in humid climates. The small cost difference is worth the longevity.
Do I Need Sealant for Freeze Plug Installation?
Use sealant on steel plugs only. Indian Head Shellac or Permatex High-Temp Red RTV works well. Install brass plugs dry. They seal via compression fit. RTV on brass prevents proper seating.
Key Takeaways for Replacing Freeze Plugs on Your Ford F-150
Freeze plugs are core plugs that seal casting holes in the engine block. Failure is due to corrosion, not freezing. Replace all plugs if one fails because others are likely weak. Brass plugs last longer and install dry without RTV. Steel plugs need sealant like Indian Head Shellac. Clean the bore thoroughly for a smooth, leak-free seal. Tap metal plugs evenly using a socket driver. Rear plugs behind the flywheel require transmission movement. Replace the rear main seal while the transmission is out. Pressure test at fifteen to eighteen psi after repair. Flush coolant every five years to prevent future corrosion.
With the right prep and tools, replacing freeze plugs on your Ford F-150 is a doable DIY job, even on the 5.4L and 4.9L engines. Skip the shops one thousand dollar bill and fix it yourself. Remember: clean bore, correct plug, even seating, and pressure test. Do it right and your F-150 stays leak-free for years.


