
If your Ford F-150’s air conditioner blows weakly, smells musty, or fills the cabin with dust, a clogged cabin air filter is likely the culprit. Replacing the cabin air filter in a Ford F-150 is one of the easiest and most impactful DIY maintenance tasks you can perform, especially on 2021 and newer models. This simple fix restores strong airflow, eliminates foul odors, and improves HVAC efficiency without requiring a trip to the dealership.
This guide covers every model year from 2015 to 2025, including the tool-free process for 2021 and newer trucks. You’ll learn exactly where the filter is located, which tools you need, common mistakes to avoid, and how to choose the right replacement filter for your needs.
Model Year Determines Your Approach
Ford completely redesigned the cabin air filter system in 2021, making replacement dramatically faster and simpler. Knowing your model year is the first step to a successful replacement.
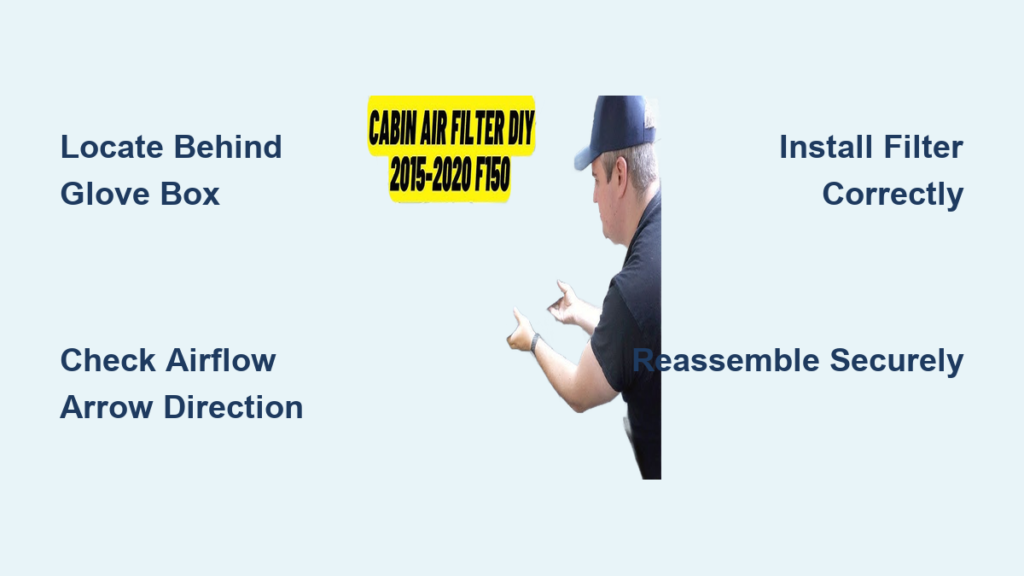
2015 to 2020 Models: Behind the Glove Box
On these models, the filter hides behind the glove compartment. You’ll need to remove interior panels and two 7 mm bolts.
- Empty the glove box completely.
- Depress both side tabs to lower the glove box fully.
- Use a trim removal tool to release five plastic clips on the rear trim panel.
- Remove the panel and locate the two 7 mm bolts at the top of the upper glove box frame.
- Remove the bolts, then gently unclip the upper glove box.
- Disconnect the electrical connector for the glove box ajar switch if equipped.
- Pull the assembly forward to expose the filter housing.
Pro Tip: Work slowly because plastic clips break easily. Replacement clips cost under $5 if one snaps.
2021 to 2025 Models: Tool-Free Access
Ford made a game-changing improvement starting in 2021.
- Open the glove box and press both bottom corner tabs inward.
- Let the glove box swing fully downward.
- The filter access door is now visible without any disassembly.
- Unlatch the door and pull out the filter.
Time Saver: This entire process takes under 5 minutes and requires zero tools.
Locate the Filter Housing
Once you have access, finding the housing ensures a smooth replacement process.
Behind Glove Compartment (2015 to 2020)
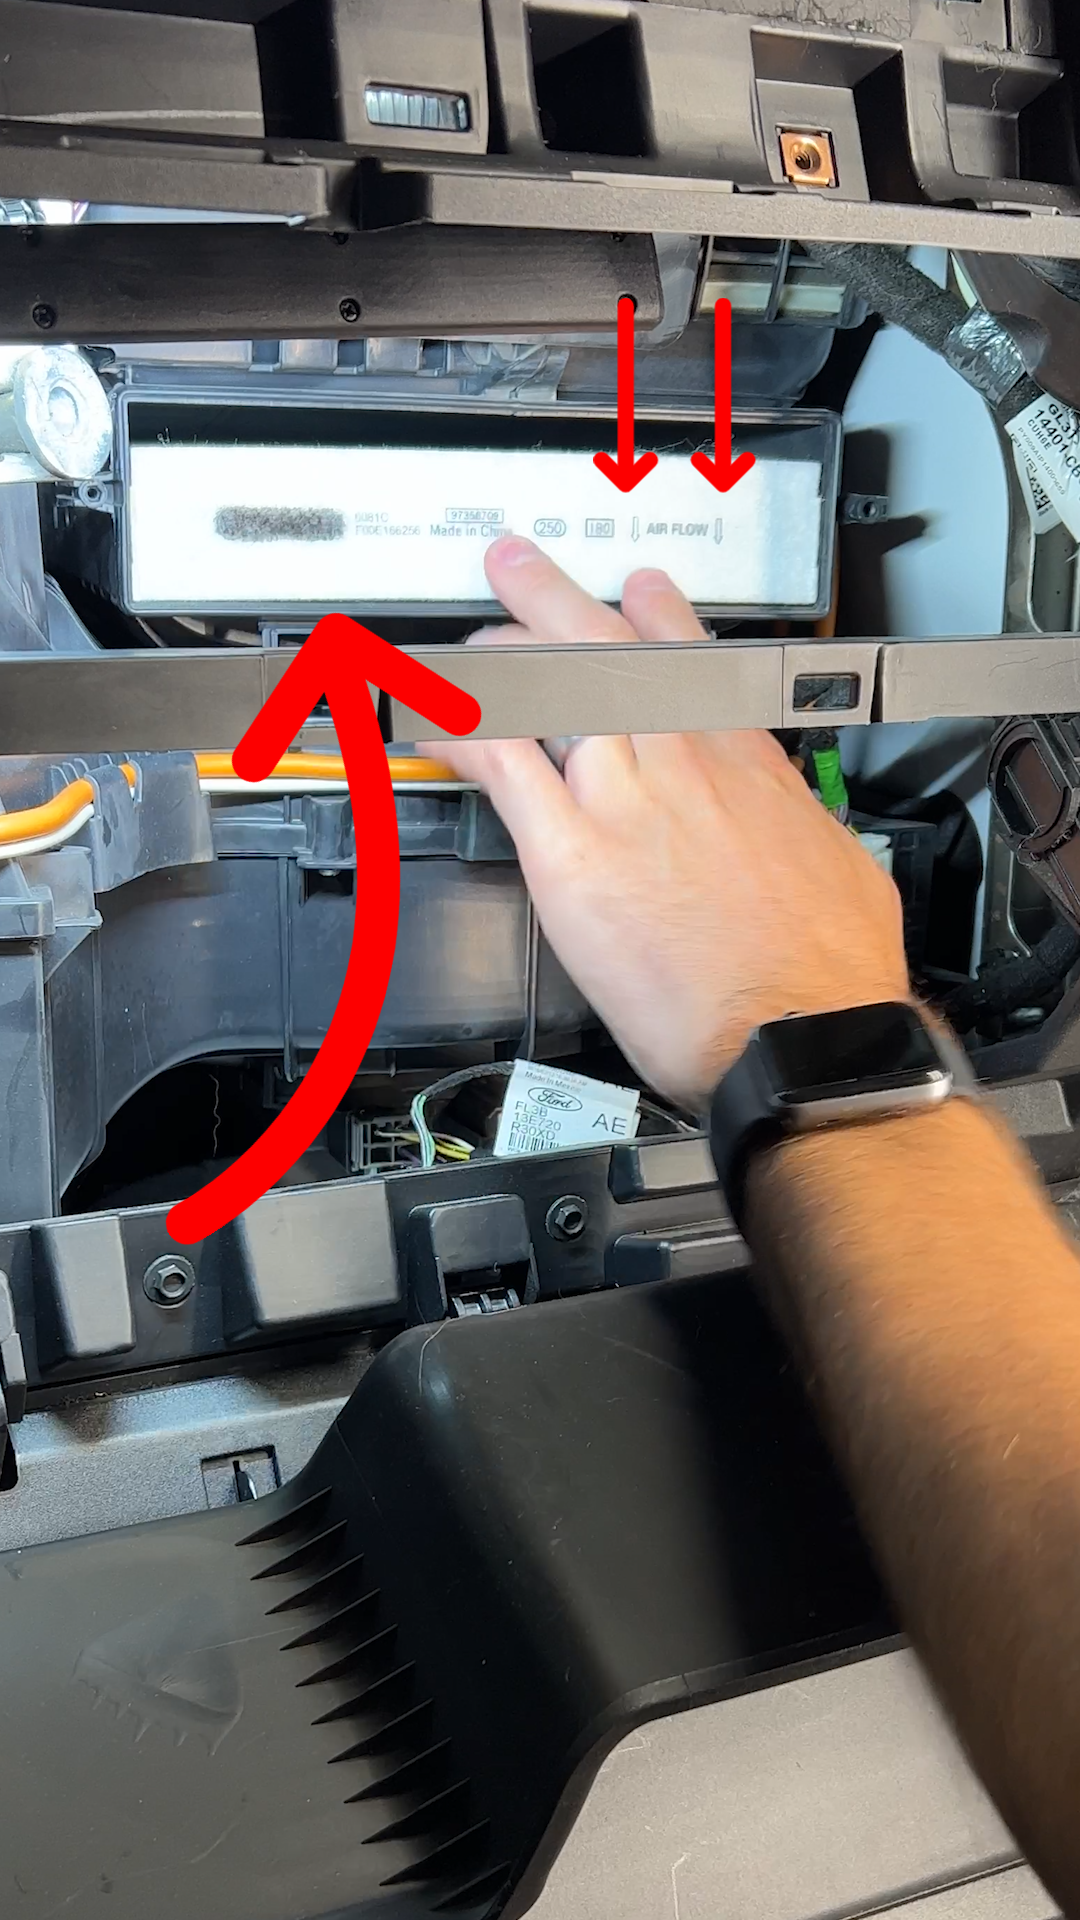
After removing the upper glove box, look for a plastic rectangular housing with a wire harness nearby. The housing has two side clips securing the filter cover. You can either disconnect the harness or rotate the unit aside if slack allows.
Direct Access (2021 and Newer)
With the glove box fully lowered, the black access door is clearly visible. It opens via side or top clips. Simply unlatch and swing it open.
Visual Cue: The old filter will likely be dark gray or black with visible debris accumulated over thousands of miles.
Remove the Old Cabin Air Filter
Extraction is straightforward, but orientation matters for proper reinstallation.
Slide Filter Out Horizontally
Grasp the filter by the edges and pull it straight out. Avoid tilting or forcing it.
- Inspect for heavy dust, leaves, or a musty smell confirming it is time for replacement.
- Note the airflow arrow on most filters that points downward toward the floor.
Warning: Never reuse a dirty filter. Even lightly clogged filters reduce airflow and strain the blower motor over time.
Install the New Filter Correctly

Installing the filter backward is the most common DIY mistake, and it significantly hurts performance.
Verify Airflow Direction
Check the arrow on the filter frame. It must point downward toward the floor.
- Installing arrow-up reduces filtration efficiency and restricts airflow.
- On activated carbon filters, incorrect orientation traps odors inside the cabin instead of outside.
Insert Gently and Fully
Slide the new filter in horizontally, ensuring it seats completely.
- Do not bend or crinkle the pleats.
- If resistance occurs, double-check orientation and alignment before forcing.
Pro Tip: Lubricate the edges with a small amount of silicone spray if the fit is tight, but use sparingly.
Reassemble Without Issues
Reassembly often causes more problems than removal, especially on 2015 to 2020 models.
Secure All Clips and Bolts
For 2015 to 2020 models:
- Snap the filter cover back into place and listen for all four clips to click.
- Reconnect the wire harness if disconnected.
- Insert and tighten the two 7 mm screws securely.
- Reattach the rear trim panel starting from the bottom and press upward.
- Align the upper glove box and snap it into place.
- Reconnect the glove box ajar switch if applicable.
For 2021 and newer models:
- Close and latch the access door securely.
- Raise the glove box until both side tabs snap into place.
Common Mistake: A rattling noise after reassembly usually means a loose trim panel or unsecured housing that needs tightening.
Choose the Right Replacement Filter
Using the correct filter ensures proper fit and optimal performance.
Filter Size and Specifications
Standard size measures approximately 11.8 x 9.4 x 1.2 inches. Always verify compatibility using your VIN or model year before purchasing.
Filter Type Options
• Standard particulate: Affordable and effective for dust and pollen capture but offers no odor control.
• Activated carbon: Eliminates smoke, VOCs, and odors but may slightly reduce airflow compared to standard filters.
• Reusable (K&N): Provides long-term savings through washing and reuse but has an initial smell requiring drying time after cleaning.
Recommended Brands
• Motorcraft (OEM): Perfect fit and factory-standard performance.
• FRAM, Bosch, WIX: High-quality aftermarket options widely available.
• Amazon Basics: Budget-friendly with reliable performance.
• K&N: Ideal for frequent off-road use and long-term savings.
User Tip: Motorcraft filters on Amazon often cost less than at dealerships while maintaining OEM quality.
Fix Common Post-Replacement Issues
Even simple jobs can go wrong. Here is how to troubleshoot the most frequent problems.
Reduced Airflow After Replacement
- Cause: Filter installed backward with arrow pointing up.
- Fix: Remove and reinstall with arrow pointing downward toward the floor.
Glove Box Will Not Close
- Cause: Hinge arms misaligned or knobs not seated properly.
- Fix: Lower glove box fully and realign side knobs into their slots.
Trim Panel Will Not Snap Back
- Cause: One or more clips not fully engaged.
- Fix: Press firmly from bottom to top and listen for clicking sounds at each clip location.
Electrical Warning Light (Glove Box Ajar)
- Cause: Connector not reconnected after reassembly.
- Fix: Locate and reconnect the small harness near the hinge area.
Spare Parts Tip: Keep a few extra plastic clips in your glove box because some break during removal on older models.
When to Replace the Filter
Do not wait for symptoms to appear. Stay ahead of performance loss by replacing at proper intervals.
Recommended Intervals
• Replace every 15,000 to 20,000 miles under normal driving conditions.
• Replace every 12,000 miles in dusty, rural, or high-pollen areas.
• Replace annually as part of fall maintenance before winter heating season.
• Replace immediately if you notice weak airflow or bad smells.
Reality Check: Many F-150s go 30,000 miles or more without a filter change, even when sold as certified pre-owned vehicles.
Model-Specific Notes
Not all F-150s are created equal. Know your truck before starting.
Pre-2015 Models May Lack a Filter
The 10th and 11th generation F-150s (pre-2015) often have no cabin air filter at all. Verify presence using a parts lookup tool or your VIN before attempting replacement.
Trim Level Does Not Affect Access
Lariat, King Ranch, Platinum, FX4, and all other trims follow the same procedure. Slight trim differences in materials do not change the filter location or replacement steps.
Critical Step: Always confirm your model year and filter presence before starting the replacement process.
Maximize HVAC Performance
A clean filter is just the start. Maintain peak system efficiency with these additional steps.
Pair with Blower Motor Inspection
While the glove box is lowered:
- Listen for unusual motor noises indicating wear.
- Check for debris near the blower intake that could restrict airflow.
- Consider cleaning the evaporator coil if musty odors persist after filter replacement.
Use Filter Changes as Maintenance Markers
Schedule replacement every 15,000 miles or coinciding with oil changes.
- Set a calendar reminder for annual replacement.
- Mark it on your service log to maintain records.
Pro Insight: One owner sprayed Lysol inside the housing during replacement, which killed lingering mold and freshened the cabin significantly.
Final Steps and Verification
Complete your job with confidence by testing and disposing properly.
Test the HVAC System
- Turn the engine on.
- Set the fan to maximum speed.
- Verify strong, even airflow from all vents.
- Check for unusual noises or rattles during operation.
Success Signal: A noticeable increase in airflow confirms a job well done.
Dispose of Old Filter Properly
Seal the old filter in a plastic bag if it is dirty or moldy. Dispose in an outdoor trash bin to avoid indoor contamination.
Frequently Asked Questions About Changing Cabin Air Filter Ford F150
How often should I replace the cabin air filter on my Ford F-150?
Replace the cabin air filter every 15,000 to 20,000 miles under normal conditions. In dusty or rural areas, reduce this interval to every 12,000 miles. Annual replacement is also recommended, particularly in the fall before winter.
Can I change the cabin air filter on my Ford F-150 myself?
Yes. The process is 100% DIY-friendly. Models from 2021 onward require no tools and take under 5 minutes. Models from 2015 to 2020 require basic hand tools but are still manageable for most owners.
What happens if I do not replace my cabin air filter?
A clogged filter reduces airflow from HVAC vents, causes musty odors, increases dust accumulation in the cabin, and strains the blower motor. Over time, this can lead to reduced HVAC performance and potentially costly repairs.
Where is the cabin air filter located on a Ford F-150?
On 2015 to 2020 models, the filter is located behind the glove compartment. On 2021 and newer models, the filter is accessible through a door behind the lowered glove box without any disassembly required.
What is the correct airflow direction for the cabin air filter?
The arrow on the filter frame must point downward toward the floor. Installing the filter backward reduces filtration efficiency and restricts airflow through the HVAC system.
How much does a replacement cabin air filter cost for a Ford F-150?
Prices range from $10 to $25 depending on brand and type. Standard particulate filters cost around $10 to $15, while activated carbon filters typically cost $15 to $25. Reusable K&N filters cost more upfront but save money over time.
Key Takeaways for Changing Your Ford F-150 Cabin Air Filter
Replacing the cabin air filter in a Ford F-150 takes minutes and costs less than a fast-food meal, but the impact on comfort and air quality is enormous. Whether you drive a 2015 or 2025 model, this task is completely DIY-friendly with the right approach for your model year. Remember that 2021 and newer models offer tool-free access that makes the job faster than ever, while older models require basic tools but remain straightforward.
Stick to the correct filter type for your driving conditions, always verify airflow direction during installation, and reassemble all components carefully to avoid rattles and warning lights. Consider using Motorcraft OEM filters for guaranteed fit, or explore activated carbon options if you frequently encounter odors or need VOC control. Use this opportunity to inspect your HVAC system and schedule regular filter changes every 15,000 to 20,000 miles to maintain peak performance. Your lungs and your HVAC system will thank you for this simple maintenance task.


