
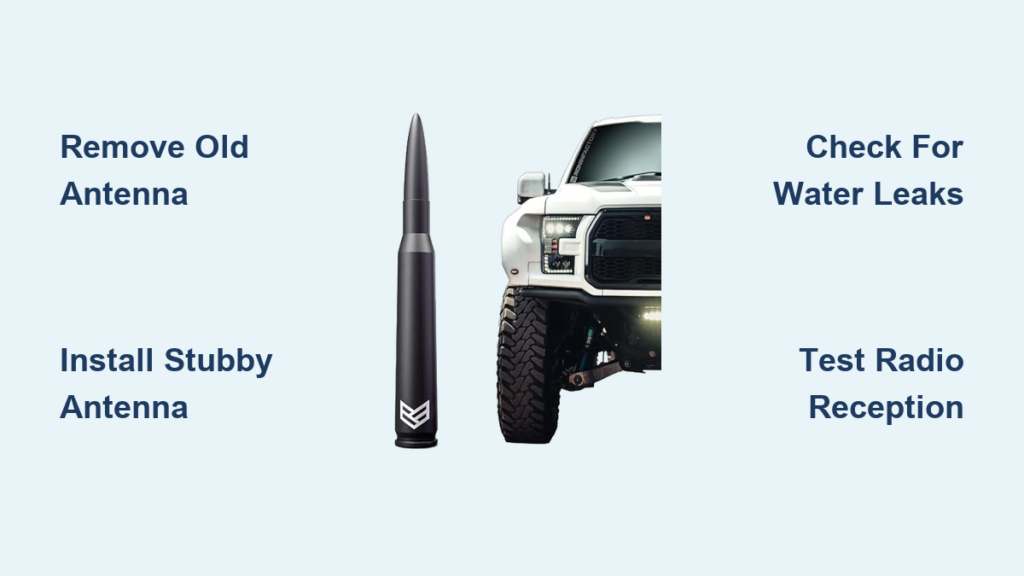
If your Ford F-150’s antenna keeps scraping garage doors or swaying at highway speeds, you are not alone. Thousands of owners swap out the factory 32-inch mast for a sleeker, shorter alternative, and the good news is it takes less than two minutes with no tools required. Whether you drive a 2015 model or a 2024 F-150, changing the antenna is one of the easiest upgrades you can make. This guide covers everything from quick stubby swaps to full base and cable replacements, so you can eliminate damage risks, improve aesthetics, and maintain solid radio performance.
You will learn which antennas work best, how to avoid common mistakes, and when a simple swap is not enough. We will walk through the entire process step by step, covering both the quick antenna-only method and the more involved full base and cable replacement procedure.
Why Replace Your F-150 Antenna
The stock antenna on your F-150 can cause multiple problems that make replacement worth considering. Understanding these issues helps you decide whether a simple swap meets your needs or if a more comprehensive solution is required.
Prevent Garage and Car Wash Damage
The stock 32-inch flexible antenna on 2021-2024 F-150s extends above the roofline, making it prone to hitting garage doors, automatic car washes, or low-clearance structures. Many owners report snapped or bent antennas after repeated contact. A shorter 5- to 7-inch stubby antenna sits well below the roofline, eliminating these risks entirely.
Reduce Antenna Sway at High Speeds
Long antennas vibrate and sway noticeably at speeds over 55 mph, creating wind noise and visual distraction. Shorter models drastically reduce movement, offering a smoother, cleaner look while driving.
Improve Truck Aesthetics
Many F-150 owners prefer the aggressive, OEM-like appearance of a stubby antenna. It gives the truck a more refined, modern profile, especially on lifted or off-road builds. One user noted it looks like it came from the factory that way.
Choose the Right Antenna Type

Selecting the correct antenna ensures you get the appearance and performance you want without unexpected issues. The type you choose depends on your priorities and driving conditions.
Stock vs. Aftermarket Antennas
The factory F-150 antenna is a 32-inch flexible mast with a threaded base and rubber boot. Despite some sources citing a 7-inch length, that figure refers only to the visible threaded stub, not the full mast. Aftermarket stubby antennas range from 5 to 13 inches, with 7 inches being the most popular for balance between function and form.
Top Aftermarket Options
The Rydonair 7-inch antenna offers premium fit and finish with a slightly smaller diameter than generics and no vent holes. It costs around $27 on Amazon. The Masts-are-Us 7-inch option is designed specifically for 2021-2024 models and provides reliable connection and durability. Generic eBay models cost about half as much but may have inconsistent quality or trap debris in vented designs.
For most users, the Rydonair 7-inch offers the best value with great fit, solid signal, and clean appearance.
When to Upgrade Just the Antenna
If your radio reception is strong and the base is intact, replacing only the antenna is sufficient. This is ideal when the current antenna is broken or unsightly, you want to prevent future damage, or you primarily use Bluetooth, USB, or streaming audio.
Full Base and Cable Replacement: When It Is Needed
Sometimes the antenna itself is not the problem. Understanding when a full replacement is necessary saves you from wasted effort on a simple swap that will not fix the underlying issue.
Diagnose Reception Issues First
If you are experiencing poor AM/FM signal, static, or intermittent dropouts, the problem may lie deeper than the mast. Common culprits include corroded antenna base, damaged cable connector, and water intrusion through cracked grommet.
Replacing the entire assembly restores signal integrity and prevents electrical issues.
Signs You Need a Full Replacement
Watch for moisture inside the cabin near the glove box, loose antenna base that wobbles, visible corrosion on connector pins, and persistent radio errors after antenna swap. Ignoring water intrusion can lead to damaged HVAC controls or short circuits.
Tools You Need for the Job
Having the right tools ready before starting prevents mid-project trips to the hardware store. The complexity of your job determines what you need to gather.
For Antenna-Only Swap
You will need a new stubby antenna such as the 7-inch Rydonair. A 10 mm wrench or 3/8-inch combo wrench is optional for final tightening. Adjustable pliers are optional if hand grip is not enough. No disassembly or specialty tools are required, making this a true two-minute job.
For Full Base and Cable Replacement
A 38 mm wrench removes the antenna base. A 10 mm socket or wrench secures the base mounting bolt. A 5.5 mm socket or wrench handles fender liner bolts. You will also need a trim removal tool or flat-blade screwdriver, a long pry bar for stubborn connectors, and zip tie and string or pull tape for cable routing. A replacement antenna base and cable assembly completes the list.
Tie a string to the old cable before pulling it out to make reinstallation 10 times easier.
Step-by-Step: Replace Antenna Only on 2021-2024 Models

This simple procedure takes under two minutes and requires no tools for most steps. Follow these instructions carefully to avoid damaging the mounting threads.
Remove the Stock Antenna
Grip the antenna base firmly where it meets the fender. Turn counter-clockwise by hand until fully unscrewed. Pull straight off and inspect the threaded socket and rubber boot for cracks or debris.
Install the Short Antenna
Align the new antenna threaded stud with the socket. Begin turning clockwise by hand to prevent cross-threading. Tighten until snug. Use a 10 mm wrench for a final quarter-turn if desired. Avoid twisting the rubber boot and keep it seated properly.
Ensure the antenna sits below roofline and does not interfere with garage doors.
Replace Antenna on 2015-2020 F-150
The process for older models differs slightly but remains straightforward. Some antennas include thread adapters while others fit directly.
Use pliers or hand grip to turn the stock antenna counter-clockwise. Remove completely. Check if your aftermarket kit includes thread adapters, though most fit directly. Screw in the new antenna clockwise, hand-tighten, then secure with a wrench if needed.
Some stubby antennas come with multiple tips. Choose the one that matches your base.
Full Replacement: Base and Cable for 2015-2020 Models
This more involved procedure addresses deeper issues but requires patience and careful attention. Take your time with each step to avoid complications.
Access Interior Components
Empty the passenger-side glove box. Hold the travel-limit rod forward and lift the box to release it from the groove. Depress the locking tabs on both sides. Lower the glove box and set aside.
Look for the orange antenna cable running near the HVAC ducts.
Disconnect the Antenna Cable
Locate the connector near the HVAC system. Squeeze the white-dot locking tabs on both sides. Pull the connector apart. Inspect for corrosion or moisture and clean with electrical contact cleaner if needed.
Never force the disconnect. Damage to the push-lock connector can cause permanent signal loss.
Remove Fender Liner and Antenna Base
Remove four 5.5 mm bolts from the rear passenger fender liner. Two are at the corner and two along the wheel well. Use a trim tool to push inward on push pins and release them. Gently pull back the fender liner.
Locate the cable grommet and carefully pull it through the body opening. Find the metal antenna base behind the wheel well. Loosen the 10 mm bolt securing it while holding the base to prevent dropping. Gently free the base if it is hooked on body metal.
Tie a string to the cable end before pulling it through to avoid fishing blind during reinstallation.
Install New Base and Cable
Insert the new rubber grommet into the body hole. Align the groove with the body contour and press until fully seated to prevent leaks. Position the new antenna base and insert the 10 mm bolt. Tighten securely but do not over-tighten.
Reinstall the fender liner by sliding into place, reattaching push pins until they click, and reinstalling the 5.5 mm bolts with even torque.
Reconnect Interior Components
Route the cable along the HVAC box. Reconnect the antenna connector until it clicks. Test retention with a gentle tug. Reconnect any other harnesses you moved. Snap the trim panel back into place.
Reinstall the glove box by aligning mounting points, re-engaging the lever rod into the groove, and confirming it clicks and holds securely.
Final Exterior Installation
Screw the new antenna mast onto the base by turning clockwise until bottomed out. Use a 38 mm wrench to snug it without over-tightening. Start the engine and test radio reception.
Tune into several AM/FM stations, especially weaker ones, to check for dropouts or static.
Signal Performance After Upgrade
Understanding how a shorter antenna affects reception helps set realistic expectations. Your typical driving environment determines how much impact you will notice.
Reception by Driving Environment
In urban areas, there is no noticeable change and you get full clarity on local stations. In suburban areas, you may experience slight hiss on weak stations, which is minor and not disruptive. In rural or remote areas, you may notice a noticeable signal drop with intermittent loss on distant AM/FM channels.
Most modern F-150 owners rely on Bluetooth or streaming, so a small reception dip is not a dealbreaker.
How to Minimize Signal Loss
Choose higher-quality stubby antennas like Rydonair, which have better internal conductivity. Use an in-line antenna amplifier if you frequently drive in low-signal zones. Keep the original antenna in case you revert or sell the truck.
Ultra-cheap eBay clones may have inferior internal conductors, worsening reception.
Sealing and Water Intrusion Prevention
Proper sealing prevents costly water damage that can affect your trucks electrical systems. Regular inspection catches problems before they escalate.
Inspect the Rubber Boot and Grommet
The factory rubber boot stays in place during antenna-only swaps. Check annually for cracks, brittleness, and loose fit around the base. Replace if it no longer forms a watertight seal.
Proper Grommet Installation
The grommet must match the body opening, which is approximately 18-20 mm. Incorrect size leads to water leaks into the cabin. Always seat fully before reassembling.
Apply a small bead of dielectric grease on the connector to repel moisture and prevent corrosion.
Torque and Tightening Guidelines
Proper torque prevents damage while ensuring secure attachment. Over-tightening causes more problems than under-tightening.
Hand-tight plus a quarter turn with a wrench is sufficient for the antenna mast. Over-tightening risks stripped threads, damaged grommet, and cracked base housing. Use a 38 mm wrench gently and do not crank it.
Warranty and Resale Considerations
Understanding how modifications affect your truck helps protect your investment and resale value.
Aftermarket antenna installation does not void the factory warranty. Full base and cable replacement may require documentation if claiming related electrical issues. Always keep the original antenna and reinstall before selling if you want a stock appearance.
Store the stock antenna in the glove box. It takes little space and preserves resale value.
Final Recommendations
Choosing the right antenna for your situation maximizes benefits while minimizing drawbacks. Consider how you use your truck before deciding.
Best Antenna for Most Owners
For 90% of F-150 drivers, especially those with 2021-2024 models, the 7-inch Rydonair stubby is the top choice. It is affordable at around $27, easy to install, durable and OEM-like, and effective at preventing damage.
Even with a slight rural reception dip, the functional and aesthetic benefits far outweigh the downsides for most users.
When to Skip the Upgrade
Do not switch to a stubby antenna if you frequently drive in remote areas with weak signals, rely heavily on AM radio such as sports, news, or trucker channels, or plan to sell the truck soon and want to keep it stock.
Key Takeaways for Changing Your F-150 Antenna
Replacing your F-150 antenna is a simple modification with significant benefits. The antenna-only swap takes under two minutes with no tools needed. Seven-inch stubby antennas eliminate garage scrapes and improve looks. Reception loss is minimal in cities but more noticeable in rural zones. Full base and cable replacement fixes deep issues like corrosion or water leaks. String-assisted cable routing prevents frustration during reinstallation. Proper sealing protects against water damage and electrical faults. Keep the original antenna for resale or future reversion.
Upgrade your F-150 antenna to boost durability and clean up its profile. With the right part and a few simple steps, you will never worry about a bent mast again.
Frequently Asked Questions About Changing F-150 Antennas
Does changing the antenna affect my radio reception?
A shorter antenna may reduce signal strength, especially in rural areas. Most users in urban and suburban environments notice no difference. Higher-quality stubby antennas like Rydonair minimize signal loss compared to cheap alternatives.
Can I install a stubby antenna myself without any tools?
Yes. The antenna-only swap requires no tools on most 2021-2024 models. Simply unscrew the old antenna by hand and screw on the new one. A wrench is optional for final tightening.
Will a new antenna void my Ford warranty?
No. Aftermarket antenna installation does not void the factory warranty unless the modification causes unrelated damage. Full base and cable replacement may require documentation if claiming related electrical issues.
How do I know if I need a full base and cable replacement instead of just the antenna?
Replace the entire assembly if you have poor AM/FM reception after changing the antenna, notice water intrusion near the glove box, see corrosion on connector pins, or experience a loose or wobbly antenna base.
What length antenna is best for avoiding garage door damage?
A 5- to 7-inch stubby antenna sits well below the roofline and eliminates garage door scraping. The 7-inch option provides the best balance between appearance and signal performance.


