

If your Ford F-150 sits nose-low or you are adding larger tires and need extra clearance, adjusting the torsion bars is a smart, cost-effective solution—but only if your model actually has them. Many owners mistakenly assume all F-150s can be adjusted this way, but torsion bar suspension was discontinued after certain model years. This guide focuses exclusively on 1997–2014 Ford F-150 4×4 models that use torsion bars, providing clear, actionable steps to safely raise your front end, level your stance, and avoid common pitfalls.
You will learn how to identify if your truck has torsion bars, adjust ride height with precision, measure results accurately, and understand when an alignment is non-negotiable. Whether you are combating front-end sag or prepping for off-road use, this step-by-step walkthrough ensures you get the lift you want without damaging critical components.
Confirm Your F-150 Has Torsion Bars
Before grabbing tools, verify your truck even has torsion bars. Adjusting what is not there leads to frustration and potential damage.
Check Model Year First
The following models have torsion bar suspension:
- 1997–2003 F-150 4×4
- 2004 F-150 Heritage 4×4
- Some 2004–2014 F-150 4×4 models (especially early 13th-gen)
The following models do NOT have torsion bars:
- 2005 and newer F-150s
- These use coil-spring independent front suspension with no factory ride height adjustment
Visually Identify the Torsion Bar System
Look under the front of your truck. Torsion bars run longitudinally from the frame crossmember to the lower control arms. Each side ends at a torsion key with an adjuster bolt pointing upward, typically 18mm or 21mm hex head.
Do not confuse the torsion bar with the sway bar. The stabilizer bar runs side-to-side and controls body roll, but it does not support weight or allow height adjustment.
Gather Required Tools and Prep
Having the right tools saves time and prevents snapped bolts or inaccurate results.
Essential Tools List
- 18mm or 21mm socket for adjuster bolts
- Ratchet or breaker bar for turning bolts
- Torque wrench for final tightening
- Measuring tape or ruler
- 24-inch level for checking camber
- Wheel chocks
- Paint marker or permanent marker
- PB Blaster or penetrating oil for rusty bolts
- Jack and jack stands (optional)
Prepare the Vehicle
Park on a level surface. Load the truck as it is normally driven, whether empty, half-tank, or with typical cargo. Chock the rear wheels. Measure starting ride height from the center of the front wheel hub to the ground for accuracy. Record measurements for both sides. Mark the adjuster bolt head and frame with paint to track turns.
Locate and Adjust Torsion Bar Bolts

Now you are ready to turn the adjuster bolts and begin lifting your front end.
Find the Adjuster Bolts
The adjuster bolts are located at the rear of the torsion bar, near the frame crossmember. One exists on each side, screwed upward into the torsion key. Turning the bolt changes the preload on the torsion bar.
Direction matters for results:
- Clockwise raises the front end
- Counterclockwise lowers the front end
Make Incremental Adjustments
Start with 1/4 to 1/2 turn per side. Always adjust both sides equally to maintain level stance. Lower the truck and re-measure after each adjustment. Take a 1–2 mile test drive to let suspension settle. Re-check height afterward because torsion bars can settle up to 1/4 inch.
Track Your Progress
Record the number of turns made on each side. If one side lifts more than the other, fine-tune until fender heights match. Typical lift averages 0.5 to 0.75 inches per full turn, depending on bar condition and preload.
Know Safe Lift Limits

More lift is not always better. Exceeding safe limits causes premature wear and safety risks.
Maximum Lift with Factory Keys
The recommended maximum lift is 1.5 to 1.75 inches. This maintains acceptable component angles and adds minimal stress on ball joints and CV axles. The absolute maximum, which is risky, is 2.5 inches. Beyond this, you increase the chance of CV binding, ball joint failure, and uneven tire wear.
Aftermarket Keys for Higher Lift
Aftermarket torsion keys can achieve 2.0 to 3.0+ inches of lift. They require torsion bar removal and re-indexing. These cost $100–$250 per pair but allow higher ride height even with adjuster bolts loosened.
Finalize and Secure Adjustments
Once target height is reached, lock it in properly.
Tighten and Recheck
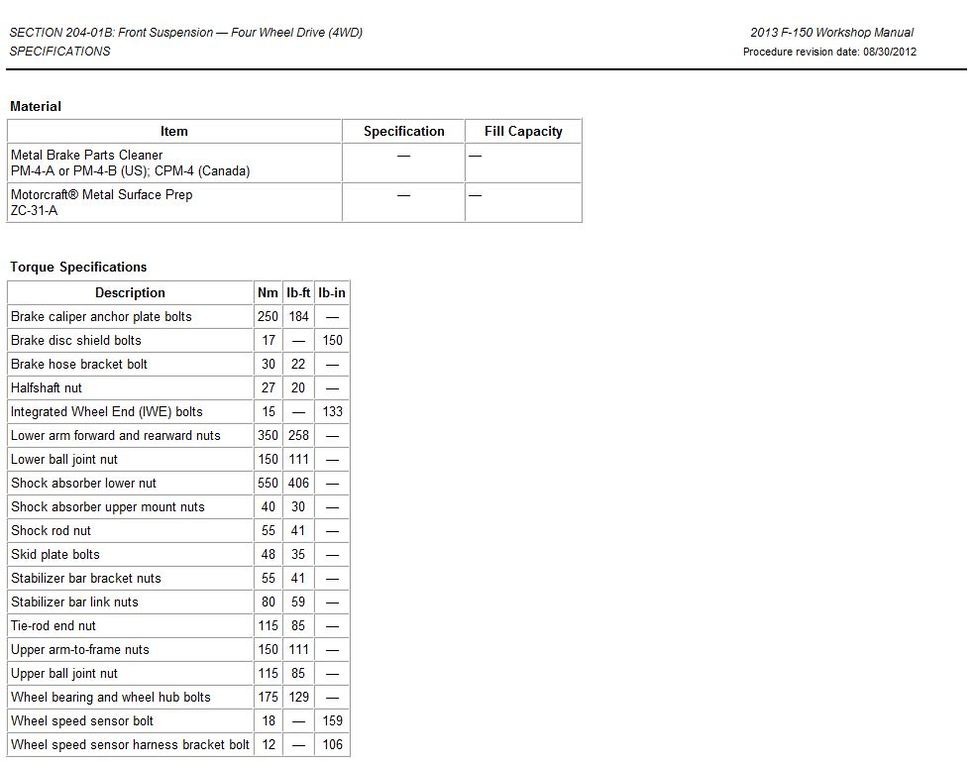
Torque adjuster bolts to 35–50 ft-lbs. Re-measure ride height on both sides. Use a level against the tire to confirm camber. The top of the tire should tilt inward 1/4 inch to 3/8 inch. More than 1/2 inch indicates excessive negative camber that needs alignment.
Clean and Lubricate
Wipe off dirt and old grease. Apply light lubricant to bolt threads to prevent future corrosion. Seized bolts are common, so penetrating oil now saves headaches later.
Get a Front-End Alignment (Must-Do)
This step is non-negotiable. Even a small lift changes suspension geometry.
Why Alignment Is Critical
Adjustment alters camber, toe, and caster. This causes inner and outer edge tire wear, pulling, or scalloping. Misalignment can ruin a set of tires in under 5,000 miles.
When to Get It Done
The best practice is to get alignment within 100 miles of adjustment. It becomes mandatory if your lift exceeds 1 inch.
Inspect Suspension Components
Lifting increases stress on several parts. Check key areas regularly.
Key Areas to Monitor
- Ball joints: Look for play, grease leaks, or clicking noises
- Tie rod ends: Test for looseness affecting steering precision
- CV axles on 4×4 models: Listen for clicking during turns and inspect boots for cracks
- Control arm bushings: Check for uneven compression or tears
Evaluate Ride Quality and Clearance
Adjustment changes how your truck feels and performs.
Ride Becomes Stiffer
Increased preload means a harsher ride over bumps. Some users report better cornering stability and less body roll. The trade-off is a more planted feel but less compliance on rough roads.
Check Bump Stop Clearance
After lifting, ensure tires do not contact bump stops during full compression. If rubbing occurs, remove the bump-stop bolt or relocate the stop. This is typically not needed for lifts under 2 inches.
Avoid Common Mistakes
Even simple jobs go wrong without caution.
Uneven Lifting
One side often lifts more due to bar fatigue or corrosion. Adjust each side independently until measurements match.
Over-Cranking
Cranking more than 1.75 inches with stock keys risks premature ball joint failure, CV axle vibration, and reduced suspension travel.
Ignoring Corrosion
Seized adjuster bolts are common on older trucks. Spray with penetrating oil, wait 15–30 minutes, and use a breaker bar.
Alternatives for 2005+ F-150 Models
If your truck does not have torsion bars, do not force it. Different solutions are needed.
Leveling Options Without Torsion Bars
- Coil spring spacers for 1–2 inch lift
- Aftermarket coil springs
- Strut spacers
- Complete leveling kits
Shocks do not support weight. They only dampen motion, so new springs are necessary to raise the front.
Maintain and Monitor Long-Term
Your job is not over after adjustment.
Document Your Work
Record the number of turns made on each side. Store this in your glove box for future reference. This allows easy return to stock if needed.
Monitor for Wear
Check every 3–6 months for tire wear patterns indicating misalignment, steering feel changes, vibrations or clunks over bumps, and CV boot condition.
Final Takeaways: Safe, Smart Torsion Bar Adjustment
Adjusting torsion bars on a compatible Ford F-150 is one of the most effective free modifications for leveling and tire clearance. However, it must be done correctly, cautiously, and with proper follow-through.
Do confirm your model has torsion bars (1997–2003, 2004 Heritage, some 2004–2014 4×4). Do measure before and after. Do adjust in 1/4 to 1/2 turn increments. Do tighten bolts to 35–50 ft-lbs. Do get an alignment within 100 miles. Do monitor ball joints, CVs, and tire wear.
Do not attempt this on 2005+ models that lack torsion bars. Do not crank more than 1.75 inches with stock keys. Do not skip the alignment. Do not ignore seized bolts or settling.
For lifts over 2 inches, consider aftermarket torsion keys or full leveling kits, but expect stiffer ride and higher maintenance. When done right, torsion bar adjustment is a simple, reversible, and effective way to level your F-150.
Frequently Asked Questions About Adjusting Torsion Bars on Ford F-150
Do I need to jack up the truck before adjusting torsion bars?
No, jacking is not required. You can adjust with the truck on the ground. Some users prefer jacking to relieve load and make turning easier, but consistency in measurement matters most.
How much lift can I expect per turn on the adjuster bolt?
Approximately 0.5 to 0.75 inches per full turn, though this varies by model year, torsion bar age, and starting preload condition.
Will cranking torsion bars damage my truck?
Within 1.5 inches, no significant damage occurs and minor wear increase is acceptable. Beyond 2 inches, you risk CV axle binding, ball joint stress, and poor alignment that leads to accelerated component failure.
Can I level my truck without a leveling kit?
Yes, torsion bar adjustment is the most common free leveling method for compatible F-150 models with torsion bar suspension.
What if one side lifts more than the other during adjustment?
This is normal. Adjust each side independently until fender heights match. One side often responds differently due to bar fatigue or corrosion.
Is front-end alignment really necessary after torsion bar adjustment?
Yes, alignment is strongly recommended. Even a small lift changes camber, toe, and caster angles, which can cause rapid tire wear if not corrected.


