
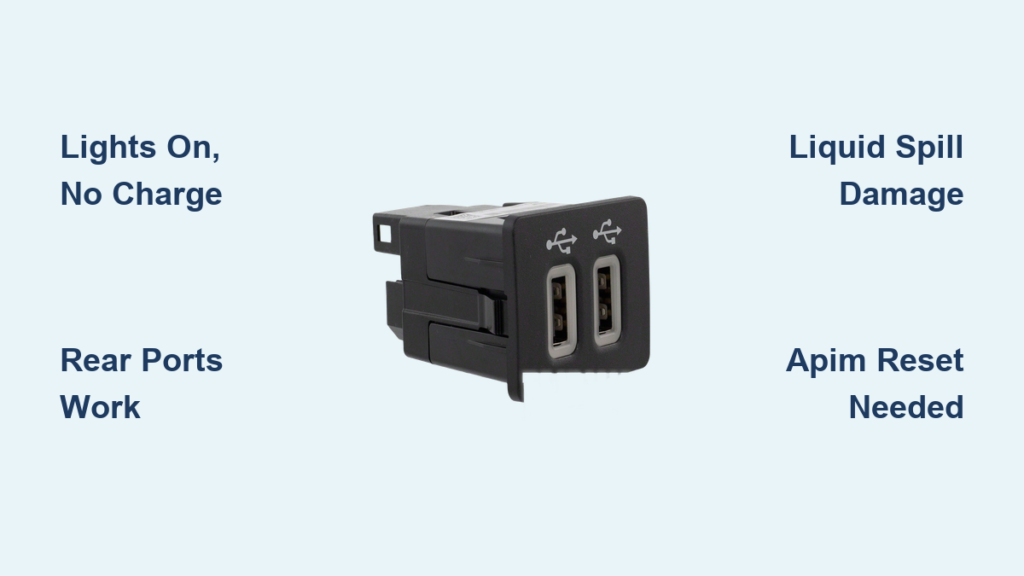
If your 2019 F250 USB port isn’t charging your phone even though the light turns on, you’re facing one of the most common frustrations reported by Super Duty owners. This issue appears across XLT and higher trims, where front USB ports show visible power but refuse to negotiate a charge with any device. The root cause isn’t always a blown fuse or bad cable. In most cases, the problem traces back to either a software glitch in the Audio and Power Interface Module (APIM) or physical damage to the front USB hub from spills or connector stress.
This guide will help you identify exactly what’s wrong with your truck and walk you through the right fix. You’ll learn how to avoid wasting money on parts you don’t need, how to safely replace the USB assembly without breaking fragile clips, and when it makes sense to let a dealer handle the repair instead.
Identify Your F250’s USB Failure Type
Before touching a single tool, you need to determine what kind of failure you’re dealing with. The repair path depends entirely on your symptoms and history. Misdiagnosing this issue leads to wasted time and unnecessary parts purchases.
Lights On But No Charging Happening
When the USB port illuminates but nothing charges, the power line is live but the data handshake is failing. This is the classic signature of an APIM software glitch or communication error, not a dead port. Multiple owners of 2018 and 2019 F250s report this exact behavior, testing with seven or more cables and phones without success. Since the light confirms voltage is present, the problem sits in the control system rather than the physical connector. Swapping the USB hub won’t fix this unless the APIM is reset or reprogrammed first.
Rear Ports Work but Front Ones Don’t
When rear USB ports charge normally while front ports stay dead, the fault is isolated to the front console circuit. This rules out global fuse failures or battery issues entirely. The APIM controls both front and rear ports, so functional rear ports confirm the module has power and partial capability. The issue then narrows to the front hub, its wiring, or a localized software fault. This isolation keeps your focus on the center console rather than the entire electrical system.
Liquid Spilled in the Console
If coffee, water, or any other liquid made its way into the cup holders or console area, the USB hub is likely fried. Liquid causes immediate short-circuiting of the internal circuitry, destroying the hub’s ability to regulate power. No reset or scan tool will revive water-damaged electronics. Owners report instant failure after spills, with no lights and no response. If drying attempts haven’t restored function, replacement is your only path forward.
Diagnose the APIM Module Before Replacing Parts
The Audio and Power Interface Module governs all USB charging in your F250. Even with a brand new hub installed, a faulty or unprogrammed APIM will prevent charging from working. Diagnosing this module requires specific equipment, but recognizing the signs helps you decide where to go for help.
Check for APIM Communication Errors
When the APIM loses sync with the USB system, it stops sending the signal that tells your phone it’s safe to draw current. The port may still light up because the 5V power line is active, but without proper data negotiation, your device displays “Not Charging” or “Accessory Not Supported.” If you’ve already replaced the hub and the issue persists, the APIM is almost certainly at fault.
Use a Ford-Compatible Scan Tool
Confirming APIM health requires a professional-grade scan tool such as Ford IDS, Snap-on, or another OBD2 scanner with Ford-specific software. Generic code readers cannot access the APIM. At a dealership or qualified independent shop, a technician can pull Diagnostic Trouble Codes from the APIM, check for USB-related network faults, reinitialize the USB charging protocol, and reprogram or reset the module as needed. Without this tool, you’re working blind. DIY fixes simply cannot resolve software-level failures.
Reset the System at a Ford Dealership
If you suspect a software glitch, visiting a Ford dealership is your best move. Technicians there have factory-level access to reprogram the APIM and restore USB functionality. Many owners report success with a simple reset, with no hardware replacement required. The cost is often lower than buying a new hub. Request a “USB initialization” or “APIM reset” service specifically. Avoid paying for a hub replacement unless diagnostics confirm actual hardware failure.
Replace the USB Hub After Liquid Damage

If liquid destroyed your hub, replacement becomes necessary. The new hub is plug-and-play only if the internal cables and clips remain intact. This repair requires removing the center console, so don’t attempt to pry the hub out without proper access.
Remove the Center Console Safely
Follow these steps to access the USB hub without damaging your interior:
- Slide the front seats fully backward, then forward again, to expose all mounting bolts beneath the console.
- Remove the four to five 10mm bolts securing the console, typically two near the front and two or three at the rear.
- Disconnect the front USB cable located under the console, which routes from the radio head unit.
- Unplug the rear electrical connector serving the USB hub and cigar lighter.
- Slide the console rearward two to three inches to clear the front dashboard structure.
- Tilt the front of the console upward to access the USB cable connector leading to the module.
- Tilt further to unclip the rear connector, then stand the console upright on its rear end.
Use plastic trim tools throughout this process to avoid scratching surfaces. Never force connectors, as this is where most repair damage occurs.
Swap the USB Hub Module
With the console standing upright, locate the USB hub, a small black module near the front. Disconnect the cable by gently releasing the tiny plastic retaining clip with a small precision screwdriver. Pull the connector straight out without twisting. Install the new hub and reconnect, ensuring the clip clicks firmly into place. Reassemble the console in reverse order.
Avoid Breaking the Retaining Clips
The number one cause of post-repair failure is broken plastic clips on the USB cables. If a clip snaps, the connection becomes intermittent and your new hub won’t work reliably. Always use a precision tool rather than pliers or fingers to release these clips. If you break one, you’ll need to replace the entire internal USB cable harness, available from dealers or specialty parts suppliers.
Prevent Future USB Port Failures
Once your ports are working again, a few simple habits can prevent repeat problems. The 2019 F250’s front USB system is particularly fragile, especially the hub itself.
Keep Liquids Away from the Console
The front console is not spill-proof. Even small amounts of liquid can seep into the hub and destroy it. Use travel mugs with secure lids and avoid placing open cups near the USB ports. If a spill happens, power down the vehicle and disconnect the battery immediately to reduce short-circuit risk.
Use Quality Charging Cables
Frayed or low-quality cables can cause power surges or poor connections over time. Stick to MFI-certified or high-grade USB-A cables from reputable brands. Avoid forcing stiff cables into the port, as this can bend the internal prongs gradually and lead to failure.
Clean the Ports Regularly
Lint and debris accumulate inside USB ports, blocking proper connections. Use compressed air every few months to blow out dust and particles. Never insert metal objects or sharp tools into the port. A soft brush or electronics-safe pick can help with stubborn debris, but always work gently.
Decide Between DIY Repair and Professional Service
Choosing whether to fix this yourself depends on the nature of the problem and the tools you have available.
DIY Works for Hardware Replacement
If you have confirmed liquid damage and need a hub swap, DIY is a realistic option. The replacement part costs around $80 on Amazon, and the repair is primarily mechanical. With a trim tool set and patience, most owners complete the job in one to two hours. Just watch the clips carefully and protect the display screen during reassembly.
See a Professional for Software Issues
If the lights turn on but nothing charges, skip the DIY route entirely. You need a scan tool and factory-level access. A dealership or Ford-savvy independent shop can diagnose and reset the APIM in under 30 minutes. Paying roughly $100 for a professional reset beats buying an $80 hub that won’t actually solve the problem.
Consider the Risk of Interior Damage
DIY console removal carries real risk: broken clips, scratched screens, or misaligned panels. If you’re not comfortable removing interior components, let a professional handle it. The cost of labor is often worth avoiding the expense and frustration of cosmetic damage.
Final Verification Checklist Before You Finish
Before declaring the repair complete, run through these checks to confirm everything works properly.
- Test both USB ports with multiple devices and cables
- Check for solid, consistent charging without dropouts
- Ensure no warning lights appear on the dashboard
- Confirm rear ports still function with no collateral damage
- Inspect for loose cables or unseated connectors
If the new hub doesn’t work after installation, double-check the retaining clips first. A loose connection is the most common oversight and the easiest fix.
Frequently Asked Questions About 2019 F250 USB Port Problems
Why does my 2019 F250 USB port light up but not charge my phone?
The light indicates that 5V power is reaching the port, but the APIM isn’t completing the data handshake required for charging. This points to a software glitch or APIM communication error rather than a hardware failure. A dealership scan tool reset typically resolves this issue.
Can I fix a non-working USB port in my F250 without going to a dealer?
You can if the problem is hardware-related, such as liquid damage requiring hub replacement. Software-related failures where lights work but charging doesn’t require professional diagnostic tools unavailable to most owners. Attempting DIY repairs for software issues usually wastes time and money.
How much does it cost to fix a USB port on a 2019 F250?
A replacement USB hub costs around $80 for the part, with additional cost for trim tools if needed. Dealership APIM resets or diagnostics typically run $100 to $150 depending on the shop. Full APIM replacement is significantly more expensive and requires programming.
What causes the front USB ports to fail while rear ports still work?
This isolation indicates a fault specific to the front console circuit rather than a global electrical issue. Common causes include liquid damage to the front hub, broken internal cables, or localized software faults. The rear ports share the same APIM, so their functionality confirms the module itself has power.
Is liquid damage to the USB hub covered under warranty?
Coverage depends on your warranty terms and whether you report the spill promptly. Liquid damage is often excluded from standard powertrain warranties but may fall under specific component warranties. Check your warranty documentation and consult your dealer about coverage options.
Key Takeaways for Restoring Your F250’s USB Charging
A non-working USB port on a 2019 F250 is rarely a simple fuse problem. More often, it stems from either a software glitch in the APIM, which a scan tool reset can fix, or physical damage from spills requiring hub replacement. Diagnose first by checking whether the lights work: if they do but charging fails, head to a dealer. If you’ve had a spill, replace the hub carefully while protecting those fragile internal clips.
Start by testing your symptoms against the failure types described above, then choose the repair path that matches. With the right diagnosis and approach, your F250’s USB ports can be restored quickly and reliably without unnecessary expense.


