

Is your Ford F-150 blowing warm air when it should be cold? You’re not alone. From 2009 to 2023 models, Ford F-150 AC not working is a widespread issue affecting thousands of owners. Some report the compressor engaging but no cold air, while others see complete failure with no warning lights and no diagnostic trouble codes. The problem spans electrical faults, refrigerant leaks, software logic, and even design flaws.
But here’s the good news: many of these failures stem from simple, low-cost fixes like replacing a damaged connector or resetting system logic rather than expensive compressor replacements. This guide breaks down exactly why your F-150 AC isn’t cooling, how to diagnose it step by step, and what repairs actually work.
Confirm Compressor Engagement First
Before assuming a refrigerant or electrical fault, verify whether the AC compressor clutch is engaging. This single check rules out half the possible causes.
How to Visually Check Clutch Operation
Start the engine and set climate control to AC, 60°F, fan on high. Open the hood and locate the AC compressor on the passenger side of the engine bay. Look at the front of the compressor: the center pulley should spin with the belt when AC is on.
If it spins, the compressor is receiving power and the problem likely involves refrigerant, airflow, or blend doors. If it doesn’t spin, the issue is electrical, sensor-related, or software-controlled.
Use a long screwdriver as a stethoscope. Hold it against the compressor body. You should hear a distinct click when AC is turned on. No click means power isn’t reaching the clutch.
Listen for Cycling Behavior
Some systems show intermittent engagement. The clutch engages for 5 to 10 seconds, then shuts off and repeats every few minutes. This often indicates low refrigerant pressure triggering the PCM’s safety cutoff.
If the clutch never engages, even briefly, the system may be too low on charge to allow startup or there’s an electrical fault in the control circuit.
Check Refrigerant Pressure Accurately
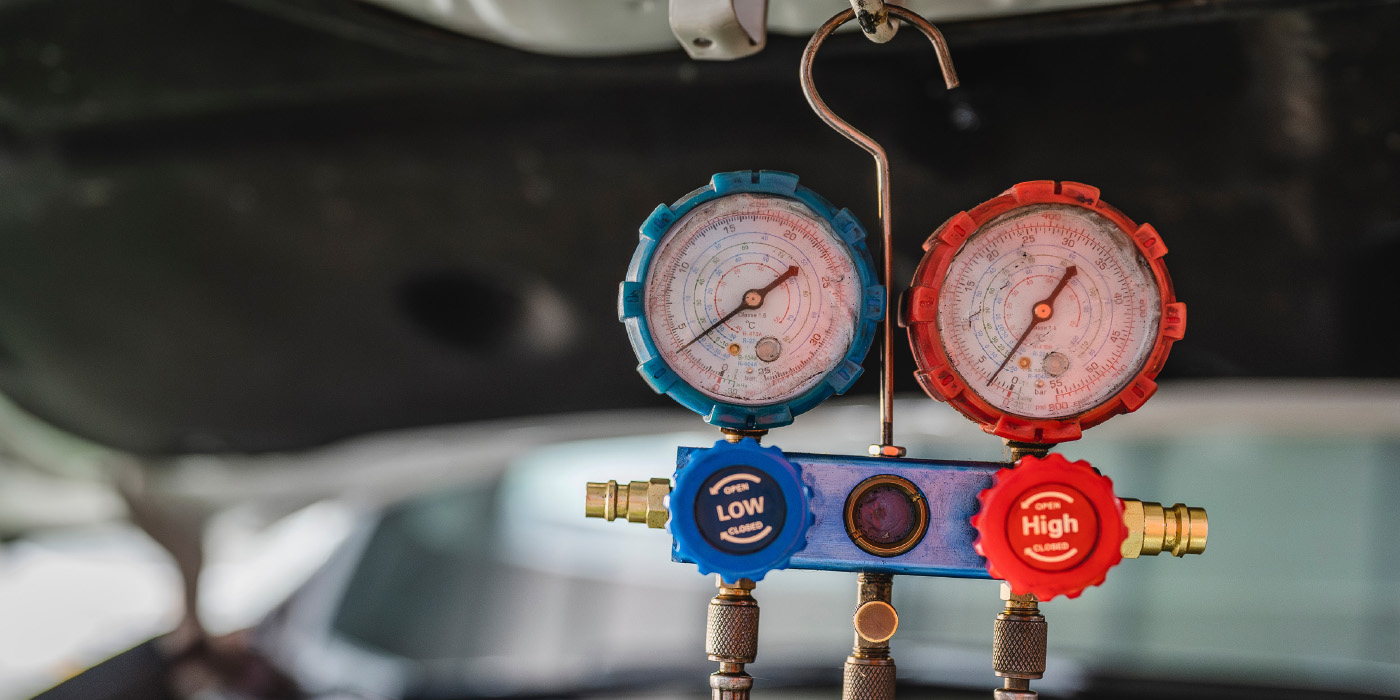
Low refrigerant is the most common cause of AC failure in modern F-150s. But you cannot just add gas and hope it works. Here is how to do it right.
Use Professional Gauges, Not DIY Kits
Consumer-grade refrigerant kits are often inaccurate and misleading. They connect only to the low-side port and assume pressure equals charge, but pressure varies with temperature and flow.
Instead, rent or buy a dual-gauge manifold set. Connect the blue gauge to the low-side service port (larger diameter, left side) and the red gauge to the high-side port (smaller, right side). Run the engine at 1,500 RPM with AC on max.
Normal operating pressures at 85°F ambient are 25 to 45 psi on the low side and 200 to 275 psi on the high side.
Critical threshold: If low-side pressure is below 25 psi, the PCM will disable the compressor to prevent damage. This means no engagement, even if you try to recharge with a can.
What High or Low Readings Mean
Low pressure on both sides, below 20 psi, indicates severe refrigerant leak or undercharge. Do not recharge yet. Find and fix the leak first.
High pressure on both sides, above 300 psi, means overcharge, restricted airflow from a dirty condenser, or failed cooling fan. Check if the radiator fan is running when AC is on.
Zero pressure on both sides indicates total system evacuation, likely a major leak. Suspect O-rings, Schrader valves, condenser, or evaporator core.
Warning: Never connect a DIY recharge hose to the high-side port. It is not designed for it and can cause dangerous overpressure.
Diagnose Electrical Faults Without Codes

Many F-150s, especially 2009 to 2014 models, fail without setting DTCs. That does not mean there is no fix. It often points to electrical connector damage, not a failed compressor.
Inspect the Compressor Connector
The number one culprit in non-engagement cases is spread or widened pins in the clutch harness connector. This damage is caused by improper back-probing or test light use during past diagnostics.
Unplug the connector at the compressor. Examine both male and female terminals. Look for bent, corroded, or loose pins and signs of arcing or overheating. Use a multimeter to measure clutch coil resistance: it should read 3.8 to 4.0 ohms.
If resistance is within range but the clutch won’t engage, the connector is likely the problem.
Real-world fix: One owner replaced a $17 OEM pigtail connector and restored full cooling with no other repairs.
Test Voltage at the Connector
With AC on, back-probe the connector carefully or use a test light. You should see 12 to 14V when AC is commanded. No voltage? Check the AC clutch fuse (usually 10A or 15A in underhood box), the AC clutch relay (swap with identical relay to test), and the PCM output signal.
Caution: Never use a standard 12V test light that forces current into the circuit. It can damage sensitive pins. Use a low-current LED test light instead.
Decode Sensor and Software Issues (2015+ Models)
Starting in 2015, Ford replaced mechanical switches with electronic sensors and PCM logic. This means older fixes like jumpering the pressure switch will not work and could fry your PCM.
No Mechanical Low-Pressure Switch
2015 to 2023 F-150s use a variable resistance pressure transducer. It sends real-time pressure data to the PCM, which decides whether to allow compressor engagement.
If this sensor fails or sends false data, the system thinks refrigerant is too low, even if it is not.
Common DTCs include P1461 (Refrigerant Pressure Circuit Range/Performance) and P1469 (System Low Refrigerant Charge). But many owners report no codes at all despite total cooling loss.
KOEO Self-Test: The Ultimate Diagnostic
Use an advanced OBD-II scan tool (like Ford IDS, Autel, or Snap-on) to perform a Key-On Engine-Off self-test and command the compressor clutch directly.
If the clutch engages during the test, the electrical system works and the fault lies in sensors or logic. No engagement means the problem is in wiring, connector, or clutch coil.
Expert tip: This test bypasses all sensor inputs. If the clutch clicks loudly during KOEO, your compressor is fine. Focus on refrigerant or sensor checks.
Identify Common Leak Points
You cannot recharge until you fix the leak. Here are the most common failure points in F-150 AC systems.
1. Dryer Assembly on Condenser
The dryer is integrated into the condenser unit on many models. It is known to develop slow leaks over time. Visual sign is oil residue near the radiator or condenser area.
2. Schrader Valve Cores
These tiny valves inside the service ports can leak due to age, damage, or debris. Test by spraying soapy water on both ports. Bubbles indicate a leak. Fix by replacing valve cores ($5 each) or the entire service port assembly.
3. Evaporator Core (Inside Cabin)
This is expensive to replace, requiring dashboard removal. A 2012 F-150 owner found ink-like residue in the system, indicating internal breakdown. Repair cost is $1,200 to $1,800 due to labor.
4. Compressor Shaft Seal
This fails as the compressor ages, especially over 90,000 miles. Signs include oil streaks around the compressor front.
Note: Oil near AC components equals refrigerant leak. Oil near transmission cooler lines equals transmission fluid leak. Do not confuse them.
Fix Intermittent Cooling (2021-2023 Models)
Newer F-150s, especially PowerBoost hybrids, report AC stops working suddenly then fixes itself after parking.
Why It Happens
Software logic may disable the compressor to prevent evaporator icing. The system detects excessive condensation or pressure imbalance and cuts power until conditions normalize, often after several hours.
User-Tested Reset Trick
One owner discovered a 30-second fix. Turn off AC but leave the fan on. Run fan only for 30 seconds. Turn AC back on. Cold air returns immediately.
This likely allows pressure equalization, clearing a temporary lockout.
Pro tip: Keep climate control in Auto mode. Manually changing fan speed can disrupt cooling logic.
Check Recirculation Mode
Some systems auto-disable recirculation after extended use, pulling in hot outside air. In 100°F weather, this feels like AC failure.
Fix: Manually re-enable recirculation (closed-loop) mode.
Replace Failed Components Correctly
If diagnostics point to a bad part, replace it the right way, especially on newer trucks.
Expansion Valve Replacement
Located at the firewall (cabin side), it blocks refrigerant flow if clogged with debris. Some owners replace it every 2 years due to contamination.
Must-do steps include replacing the receiver/dryer at the same time, flushing the system if the old compressor failed and released metal shavings, and evacuating for a minimum of 30 minutes before recharge.
Warning: Adding sealant from a DIY can may clog the expansion valve. Avoid it.
Compressor Replacement
Required if the clutch is burned out or bearing seized. Critical step: balance oil levels during install. Remove old oil from the failed unit and add the correct amount (check the service manual). Use new O-rings and lubricate with PAG oil.
Best practice: If the compressor failed catastrophically, flush the entire system to prevent debris from destroying new parts.
Prevent Future Failures
Even after repair, your AC can fail again unless you take preventive steps.
Insulate the Suction Line (2009-2014 Models)
Wrap the large, cold AC line from firewall to compressor with closed-cell foam insulation. This prevents heat absorption from the engine bay and results in better cooling in traffic and hot climates.
DIY cost is $10 for pre-slit tubing. Install in 15 minutes.
Use OEM-Style Connectors
Aftermarket pigtails often have inferior terminals that spread easily. Stick with Motorcraft or OEM-spec connectors. Avoid piercing wires. Use proper splice kits.
Schedule Professional Recharges
Never rely on DIY cans for long-term fixes. Pros use weight-based charging, not pressure. They evacuate moisture with a vacuum pump and are accurate to within plus or minus 1 oz.
When to See a Pro
Some jobs require tools and expertise you cannot DIY.
Seek a Qualified Shop If
No DTCs and no engagement, the leak is hard to find, you suspect evaporator or expansion valve failure, or the system needs flushing or deep repair.
What to Ask
Ask if they have a recovery machine, if they can perform UV dye leak detection, and if they use Ford-specific scan tools.
Avoid shops that want to just replace the compressor without testing.
Final Fixes by Model Year
2009-2014: Check Connector Pins
Most common fix is replacing the damaged pigtail. Test with KOEO scan tool. Add suction line insulation.
2015-2020: Scan Live Data
Use OBD2 tool to read pressure transducer values. Check for P1461 or P1469. Never jumper sensors.
2021-2023: Reset Logic, Check Software
Try the fan-only reset trick. Keep in Auto mode. Ask the dealer for PCM updates or FSAs.
Key Takeaways for Fixing Your Ford F-150 AC
Your Ford F-150 AC not working does not mean a $1,000 repair. Often it is a $20 connector or a system reset. Always diagnose before replacing. Test the compressor first by checking clutch engagement visually and with the KOEO test. Check pressures with professional gauges before assuming low refrigerant. Inspect the harness connector for spread pins, the most common electrical cause. On newer models, use live data to check pressure transducer values rather than jumpering sensors. With the right approach, you can restore cold air fast and avoid getting soaked by unnecessary repairs.
Frequently Asked Questions About Ford F-150 AC Not Working
Why is my Ford F-150 AC blowing warm air but the compressor seems to run?
This typically points to low refrigerant charge, a clogged expansion valve, or a blend door problem. Check low-side pressure first. If it reads below 25 psi, the system is too low on refrigerant. Also verify that recirculation mode is engaged and the blend door is functioning by testing temperature changes from cold to hot.
Can I use a DIY refrigerant kit to recharge my F-150 AC?
DIY kits are not recommended. They connect only to the low-side port and cannot accurately measure charge. More importantly, if refrigerant is critically low, the PCM disables the compressor, so the kit won’t work anyway. Professional recharge uses weight-based charging and vacuum evacuation to remove moisture.
How do I know if my compressor clutch is engaged?
Start the engine and turn AC on max. Open the hood and look at the compressor front. The center pulley should spin with the belt. You can also use a screwdriver as a stethoscope to listen for a click when AC engages. No click means power is not reaching the clutch.
What is the most common fix for 2009-2014 F-150 AC failure?
The most common fix is replacing the damaged compressor clutch connector pigtail. Inspect the connector for spread or widened pins caused by improper testing. Resistance should read 3.8 to 4.0 ohms. A $17 OEM connector often resolves complete AC failure.
Why does my 2021-2023 F-150 AC work then stop working randomly?
Newer models have software logic that disables the compressor to prevent evaporator icing or pressure imbalance. Try the 30-second reset: turn off AC, run fan only for 30 seconds, then turn AC back on. Keep climate control in Auto mode and verify recirculation is enabled.


