Your Ford F350 brake lights not working creates an immediate safety hazard and invites traffic citations. A failure to signal stopping increases rear-end collision risks while a stuck switch drains your battery overnight.
This guide helps you diagnose the exact cause and replace the faulty brake light switch in under 15 minutes. You will learn specific steps for both modern twist-lock and older cotter-pin styles to restore full function.
Verify Symptoms Before Replacing Parts
Start by confirming the issue lies within the brake circuit rather than the bulbs or main wiring. This simple check prevents unnecessary part purchases and saves significant diagnostic time.
Check Turn Signals and Hazard Lights First
Press your hazard button and test your turn signals to see if the rear bulbs illuminate correctly. If these lights work but your brake lights do not respond to pedal pressure, your bulbs and ground connections are functional.
This specific combination points directly to the brake-only circuit controlled by the switch. You can safely rule out blown filaments or corroded sockets when hazards operate normally.
Key Insight: Working hazards combined with non-working brake lights indicates a 95% probability the switch is faulty.
Inspect Fuse Number 7 on Newer Models
Owners of 2020 through 2023 F350 models should check fuse number 7 in the passenger-side floorboard fuse box. This 10-amp fuse protects the brake light circuit from electrical overloads.
- Replace a blown fuse but investigate further for underlying shorts.
- Leave an intact fuse alone as it confirms power reaches the switch.
- Note that constant illumination usually means the fuse remains intact.
Warning: Never replace a blown fuse without finding the root cause. Repeated failures suggest a short in the harness or a defective aftermarket switch.
Identify Your Specific Failure Type
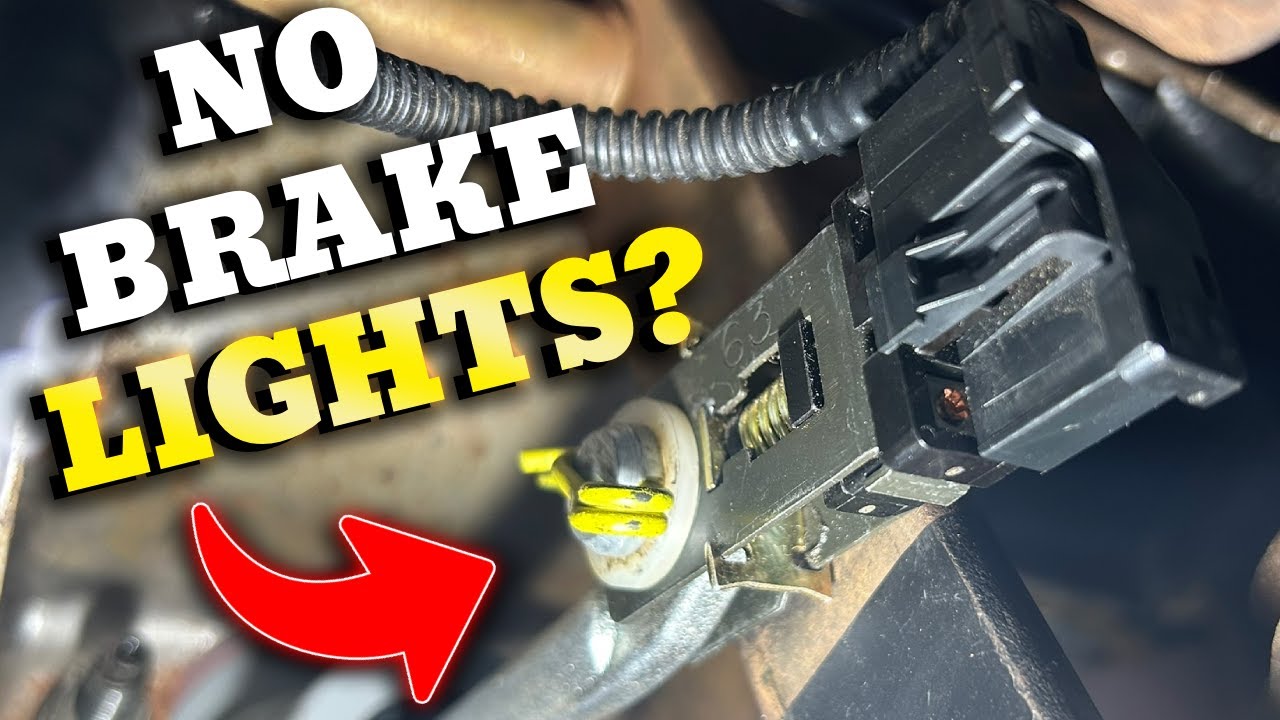
F350 brake light failures generally fall into two distinct categories based on how the switch fails mechanically. Identifying your specific symptom determines the correct repair path.
Lights Stay On Due to Plastic Debris
Brake lights that remain illuminated even when your foot is off the pedal often indicate a disintegrated plastic bushing. This issue is prevalent in 2020 to 2023 Super Duty models.
- Look for small white or tan plastic fragments on the floorboard near the pedal.
- Understand that heat and vibration cause the bushing to crumble over time.
- Recognize that the switch plunger stays extended without the bushing.
Fix: Replace the entire brake light switch since the bushing is integral to the unit.
No Lights When Pressing the Pedal
Total failure where lights never illuminate despite functional hazards suggests electrical or mechanical switch failure. This scenario is common in older 7.3 Powerstroke era trucks.
- Press the pedal firmly with no response from rear lights.
- Confirm absence of plastic debris under the pedal assembly.
- Trust that functional turn signals verify wiring integrity.
Diagnosis Confirmed: Replace the brake light switch to restore operation.
Locate the Brake Light Switch Under Dash
Finding the component is the first physical step in the repair process. The switch is always mounted near the brake pedal but access varies slightly by model year.
Find It on the Left Side of Pedal Assembly
Look under the dashboard on the driver side to find the small cylindrical component. It sits on the left side of the brake pedal assembly and features a plunger touching the pedal arm.
- Identify the single electrical harness connected to the component.
- Use a flashlight to see the connector and mounting mechanism clearly.
- Note the plunger position relative to the moving pedal arm.
Pro Tip: Follow the wiring harness to find the switch. It is the only component on the pedal with an electrical connection.
Access Requirements by Model Year
Newer 2020 and later models offer full visibility from the driver seat without trim removal. Older 7.3 Powerstroke models may require removing a kick panel or dash trim for better access.
- Sit in the driver seat and look upward toward the pedal top.
- Remove interior panels on older trucks if space is too tight.
- Ensure you have enough light to see small locking tabs.
Replace Modern Twist-Lock Switch 2020 to 2023

Newer F350s use a tool-free twist-lock design that allows replacement in under 10 minutes. This procedure addresses the common plastic bushing failure.
Prep by Holding Pedal Fully Up
Ensure the brake pedal is in the fully released up position before installing the new switch. The switch self-calibrates based on the pedal resting state.
- Do not press the pedal during installation.
- Allow the pedal to rest naturally against its stop.
- Verify the area is clear of obstructions.
Critical: If the pedal is pressed during install the lights may stay on or fail to activate.
Remove Old Switch Without Tools
Disconnect the wiring harness by pressing the white locking tab and pulling straight off. Rotate the switch body 45 degrees clockwise to unlock it from the bracket.
- Press the white locking tab on the connector.
- Pull the harness straight off the switch body.
- Turn the switch clockwise about 45 degrees.
- Pull the switch out of the mounting bracket.
No tools needed. You can complete this step with your fingers only.
Install New Switch and Lock In Place
Insert the nose of the new unit into the bracket hole and push until flush. Rotate the switch counterclockwise until it clicks into the locked position.
- Push the new switch firmly into the bracket.
- Turn the switch counterclockwise to lock.
- Snap the connector back on until the tab locks.
- Verify the switch feels secure and seated.
OEM Recommended: Use Ford OEM or high-quality reinforced switches. Cheap aftermarket units often fail within months.
Replace Older Cotter Pin Switch 7.3 Era

Pre-2020 models use a bolt or cotter pin to secure the switch to the pedal rod. This method requires basic tools and battery disconnection.
Disconnect Battery for Safety
Always disconnect the negative battery terminal before starting work on older models. This prevents shorts when handling live connectors near metal components.
- Locate the negative battery terminal.
- Loosen the nut and remove the cable.
- Secure the cable away from the battery post.
Safety First: Skipping this step risks electrical shorts or accidental airbag deployment.
Remove Old Switch and Fastener
Access the pedal area and remove any kick panels if needed for visibility. Extract the cotter pin or bolt securing the switch to the pedal rod.
- Remove the kick panel if necessary.
- Pull out the cotter pin or unbolt the fastener.
- Slide the switch off the pedal rod.
- Unplug the harness from the back of the switch.
Install New Switch and Reconnect Battery
Connect the harness to the new switch before mounting it on the pedal rod. Align the holes and secure with the original pin or bolt.
- Plug the harness into the new switch.
- Slide the switch onto the pedal rod.
- Reinsert the pin or bolt and tighten.
- Reconnect the negative battery terminal.
Time: Expect this process to take 10 to 15 minutes for experienced users.
Test the Repair Thoroughly
Never assume the fix is complete without validation. A full operational check ensures safety and proper transmission function.
Step-by-Step Validation Process
Turn the ignition to the ON position without starting the engine. Observe that brake lights are off when the pedal is released and on when pressed.
- Turn ignition ON with engine off.
- Confirm lights are off with pedal up.
- Press pedal and verify lights turn on.
- Release pedal and watch lights turn off.
- Repeat three to five times for consistency.
Check Transmission Shift Interlock
Attempt to shift out of Park without pressing the brake pedal. The shifter should remain locked until you press the pedal lightly.
- Try shifting without brake pressure.
- Press brake lightly and try shifting again.
- Ensure smooth movement out of Park.
Troubleshooting Tip: If lights stay on after install remove and reinstall with the pedal fully up. Misalignment is the number one cause of repeat issues.
Why OEM Parts Matter for Longevity
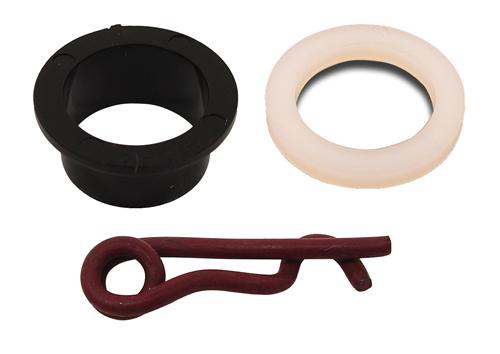
The brake light switch is a wear item in high-vibration environments like Super Duty trucks. Part quality directly impacts repair longevity.
Avoid Cheap Aftermarket Switches
Low-grade plastic bushings degrade fast under heat and vibration. Some aftermarket units fail within 6 to 12 months requiring repeat labor.
- Plastic bushings crack easily in cheap units.
- Premature failure leads to repeated repairs.
- Risk of being stranded with no brake signal.
Choose Reinforced or OEM Units
OEM Ford switches include improved bushing materials designed for durability. Reinforced aftermarket options with metal inserts offer a viable alternative.
- OEM switches last 3 to 5 years under normal use.
- Reinforced parts prevent early comebacks.
- Extra cost prevents future frustration.
Pro Insight: Fleet technicians report OEM switches last significantly longer than inferior parts.
Understand Safety and Legal Risks
Driving with faulty brake lights creates immediate dangers for you and other drivers. It also exposes you to legal consequences.
Collision Risk Increases Dramatically
Following drivers have no warning you are slowing without brake lights. This risk increases in fog rain or heavy traffic conditions.
- No brake signal confuses following traffic.
- Rear-end likelihood increases significantly.
- Highway speeds make reaction time critical.
Battery Drain and Inspection Failures
Lights stuck on can drain your battery in 4 to 12 hours. Commercial vehicles face DOT violations while personal trucks fail state inspections.
- Battery may not crank after sitting overnight.
- Commercial trucks can be placed out of service.
- Traffic citations are common for this violation.
Fix it now: Do not drive the truck until brake lights are fully functional.
Frequently Asked Questions About Ford F350 Brake Lights
Why do my brake lights stay on when I am not pressing the pedal?
This usually means the plastic bushing inside the switch has disintegrated. The switch plunger stays extended keeping the circuit closed constantly.
Can I drive my F350 if the brake lights are not working?
No driving with non-functional brake lights is illegal and dangerous. You risk rear-end collisions and traffic citations immediately.
How long does it take to replace the brake light switch?
Most owners complete the repair in 10 to 15 minutes. Modern twist-lock switches require no tools while older styles need basic pliers.
Do I need to disconnect the battery for all F350 models?
Only older 7.3 Powerstroke era models require battery disconnection. Modern 2020 and newer models do not need this step.
Will a bad brake light switch prevent my truck from shifting?
Yes the shift interlock relies on the brake signal to release Park. A failed switch often mimics a transmission problem.
Where can I find the brake light switch on my F350?
Look under the dashboard on the driver side left of the brake pedal. It is a small cylinder with a plunger touching the pedal arm.
Key Takeaways for Fixing Ford F350 Brake Lights
Most Ford F350 brake lights not working issues stem from a single faulty switch rather than complex wiring problems. Identifying whether your lights stay on or never turn on helps you choose the right replacement procedure quickly.
Always use OEM or reinforced parts to prevent premature failure of the plastic bushing. Test your repair thoroughly including the transmission shift interlock before returning to the road.