
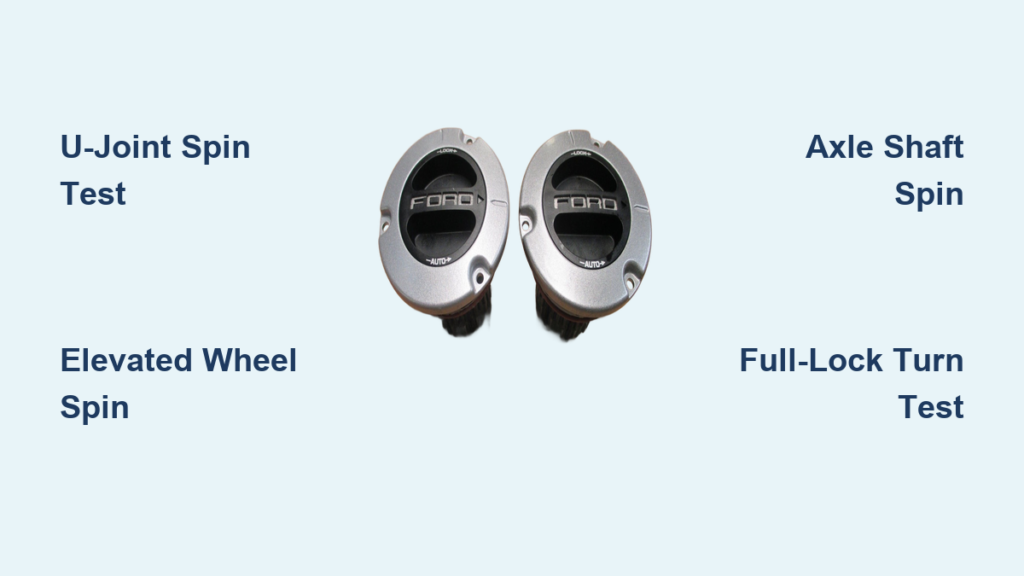
Your Ford F-250 pulls to one side in 4WD, or worse, won’t engage at all, and you suspect the front hubs. Knowing how to tell if hubs are locked on F-250 can save you from a costly tow or drivetrain damage. Many drivers trust the dashboard light or the hub dial, but neither guarantees mechanical engagement. Internal wear, corrosion, or a failed actuator can leave a hub disconnected even when everything looks correct.
This guide walks you through visual checks, hands-on tests, and driving maneuvers that confirm hub status with certainty. You’ll learn how to test each side independently, spot one-sided failures, and avoid the most common misdiagnoses that lead to expensive repairs.
Confirm the Hub Dial Position and Type
Read the Dial Correctly
Manual locking hubs use a simple rotational rule: clockwise locks, counter-clockwise frees. When you face the hub, turning the dial clockwise moves it to “Lock” or “4×4.” The physical direction relative to the truck changes by side. On the driver’s side, the dial rotates toward the rear bumper when locking. On the passenger side, it rotates toward the front bumper. Despite this mirror difference, the hubs themselves are interchangeable.
If the dial feels loose, grinds, or won’t click firmly into position, the internal mechanism may be stripped. A dial that appears locked can still leave the hub disengaged.
Identify Automatic (ESOF) vs. Manual Hubs
Many F-250s use Electric Shift On-the-Fly (ESOF) automatic hubs. These feature a smooth face or a dial labeled “Auto” and “Lock.” In “Auto,” the hub engages automatically when 4WD is selected and the truck moves forward. In “Lock,” the hub stays engaged regardless of transfer case position.
A common ESOF failure is asymmetric engagement, where one hub locks and the other stays free. This makes physical testing essential, because the truck may drive normally in 2WD even with a stuck hub.
Perform the U-Joint Rotation Test
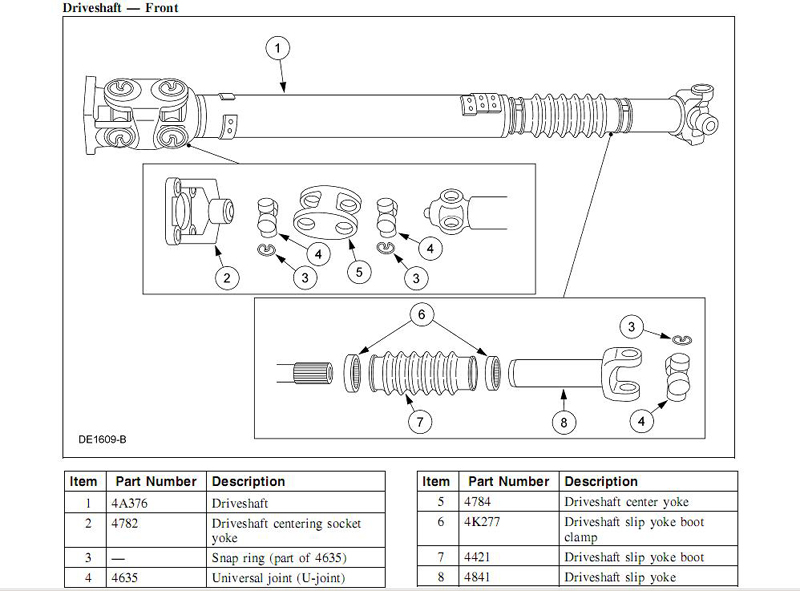
Locate the Front U-Joint
The U-joint test is the most reliable field method and requires no lifting. Crouch behind the front tire and reach around the inner wheel well toward the steering knuckle. You’ll find the front axle shaft ending at a universal joint just inside the hub assembly. Make sure the truck is parked on level ground, in 2WD, with the transmission in Park.
Test Each Side Independently
Grip the U-joint or exposed axle shaft and try to rotate it by hand.
- Resistance or no movement means the hub is locked. The wheel and axle are mechanically connected.
- Free spinning means the hub is unlocked or has failed internally.
Always test both sides. A single failed hub can cripple 4WD performance without triggering any warning light.
Pro Tip: Run this test after shifting back to 2WD. If one U-joint still won’t turn, that hub may be stuck locked and could cause driveline binding on dry pavement.
Use the Elevated Wheel Spin Test
Lift the Front End Safely
For a more definitive check, jack up the front of the F-250 and secure it on jack stands. Confirm the transfer case is in 2WD, because 4WD can spin the driveshaft through the differential and create a false reading.
Watch the Driveshaft While Spinning the Tire
Grab the raised tire and spin it by hand while watching the front driveshaft underneath the truck.
- Driveshaft rotates → hubs are locked. Power is transferring through the axle and differential.
- Driveshaft stays still → hubs are unlocked. The wheel spins independently of the drivetrain.
Repeat on the opposite side. If one tire spins the driveshaft and the other doesn’t, you’ve found a one-sided hub failure.
Warning: Never run this test in 4WD unless you’re specifically diagnosing 4WD engagement. In 2WD, a stationary driveshaft is the expected baseline.
Try the Axle Shaft Direct Spin Test
Grip the Axle Near the U-Joint
With the hub dialed to “Lock,” reach under the truck and grip the front axle shaft near the outer U-joint. Attempt to rotate it by hand.
- Locked hub: The shaft resists rotation or won’t move. It’s bound to the heavy wheel and tire assembly.
- Unlocked hub: The shaft spins easily, often multiple revolutions.
Separate Gear Lash from True Disengagement
A small amount of play (less than 1/8 turn) is normal gear lash inside the differential. Here’s how to tell the difference:
- Locked with lash: You feel a solid stop after minimal movement.
- Unlocked: The axle spins smoothly and freely, like a disconnected shaft.
Compare both sides. They should feel nearly identical. A significant difference points to a failed hub on the looser side.
Conduct the Full-Lock Turn Test
Drive Slowly in a Tight Circle
When you can’t get under the truck, use driving feedback to detect hub status. Find a flat, high-traction surface like an empty parking lot. Turn the steering wheel to full lock and creep forward in a tight circle.
Feel for Drivetrain Binding
- Binding, hopping, or resistance → hubs are locked. The front wheels are forced to turn at the same speed, but a turn requires the outside wheel to travel farther. That tension creates the binding sensation.
- Smooth, free turning → hubs are unlocked.
Critical Warning: Do not drive long distances or make repeated tight turns with hubs locked on dry pavement. This causes driveline wind-up and can damage the differential, axles, or transfer case.
Use this test as a quick field check only. If you feel binding, straighten the wheels immediately and disengage 4WD.
Diagnose One-Sided Hub Failure

Test Both Hubs Every Time
A single failed hub can leave you with only one front wheel pulling, which is easy to miss until traction is lost. Use the U-joint test on both sides and compare results. One side resisting rotation while the other spins freely confirms a one-sided failure.
Address Stuck or Frozen Hubs
Hubs can seize in either position due to corrosion or neglect.
- Stuck locked: The U-joint won’t spin even in “Free” mode. Try rotating the dial back and forth while gently tapping the hub with a rubber mallet. If it still won’t release, disassembly or replacement may be required.
- Stuck unlocked: The internal splines may be worn or broken. These won’t engage even when dialed to “Lock.” Replacement is usually the only fix.
Prevent Misdiagnosis and Costly Damage
Never Trust the Dial Alone
The most common mistake F-250 owners make is relying on the dial position. A hub can look locked but be mechanically disconnected due to worn teeth, dirt, or impact damage. Always confirm with a physical test before heading off-road or assuming 4WD is functional.
Avoid Driving in 4WD on Dry Pavement
Even with hubs correctly locked, driving in 4WD on high-traction surfaces causes driveline bind. The front and rear axles turn at slightly different speeds, creating stress that damages the transfer case and differential over time. Use 4WD only on loose surfaces like dirt, snow, or gravel.
Lubricate Hubs Annually
Manual and automatic hubs need periodic maintenance. Remove them once a year, clean out old grease, and re-lubricate with manufacturer-recommended grease. This prevents freezing, wear, and premature failure. If a hub feels stiff or makes grinding noises, service it immediately.
Quick Reference: Hub Status at a Glance
| Test Method | Hub LOCKED | Hub UNLOCKED |
|---|---|---|
| Dial Position | Clockwise to “Lock” | Counter-clockwise to “Free” |
| U-Joint Spin | Resists or won’t turn | Spins freely |
| Elevated Tire Spin | Driveshaft rotates | Driveshaft stationary |
| Axle Shaft Spin | Rigid, minimal play | Spins easily |
| Full-Lock Turn | Binding or hopping | Smooth turning |
Frequently Asked Questions About F-250 Hub Lock Status
How do I know if my F-250 has manual or automatic hubs?
Look at the hub face. Manual hubs have a prominent dial labeled “Lock” and “Free” (or “4×4” and “2WD”). Automatic ESOF hubs have a smooth face or a dial marked “Auto” and “Lock.” Some older automatic hubs have no dial at all, only a “4×4” marking.
Can the hub dial say “Lock” but the hub still be unlocked?
Yes. Internal wear, broken splines, or debris can prevent full engagement even when the dial is turned to “Lock.” Always verify with a physical test like the U-joint rotation check before relying on 4WD.
Why does my F-250 bind when turning in 4WD on pavement?
Binding during turns means the front hubs are locked and the transfer case is in 4WD. On dry pavement, the front and rear axles can’t tolerate the speed difference required for turning, causing driveline wind-up. Disengage 4WD or unlock the hubs immediately to avoid damage.
How do I free a stuck locking hub?
Try rotating the dial back and forth several times to work through corrosion. Lightly tap the hub body with a rubber mallet to break loose debris. If it still won’t move, remove the hub, clean it thoroughly, and re-lubricate. Severely seized hubs may need replacement.
Should I unlock my hubs when driving in 2WD?
Yes. Leaving hubs locked in 2WD causes unnecessary drag on the front axle, reduces fuel economy, and increases wear on internal components. Unlock them whenever 4WD isn’t needed.
How often should I service my locking hubs?
Service manual and automatic hubs at least once a year, or sooner if you notice stiffness, grinding, or inconsistent engagement. Regular cleaning and lubrication prevent the failures that lead to costly drivetrain repairs.
Key Takeaways for Verifying F-250 Hub Engagement
Knowing how to tell if hubs are locked on F-250 protects your truck from drivetrain damage and ensures 4WD works when you need it. The dial position is a starting point, not a guarantee. The U-joint rotation test is the fastest and most reliable way to confirm engagement, and testing both sides independently catches the one-sided failures that often go unnoticed.
Before your next off-road trip or winter storm, spend five minutes verifying hub status with a physical test. Clean and lubricate the hubs annually, and never drive in 4WD on dry pavement. A few minutes of prevention can save thousands in repairs and keep your F-250 ready for whatever the road throws at it.


