
If your Ford F-150 won’t start but the dashboard lights up, you might be dealing with a failing ignition switch. Unlike a broken key or dead battery, this issue often shows up as a silent no-crank condition. The good news is that replacing the ignition switch on a Ford F-150 (1997–2019) is a manageable DIY job that can save you hundreds compared to dealership labor.
This guide walks you through every step from diagnosing the real problem to installing the new switch and testing it. You’ll learn how to avoid common mistakes like misalignment, using low-quality parts, or confusing the ignition switch with the lock cylinder.
Diagnose the Real Problem First
Before removing any screws, confirm the ignition switch is actually at fault. Many no-start issues are misdiagnosed as switch failures when the real culprit is a worn key, PATS system error, or weak battery.
Test Battery and Crank Response
Start with a multimeter. Check voltage at the battery. You need at least 12.6V when off and 13.5V+ when running. A weak battery won’t engage the starter solenoid, mimicking switch failure.
Then, turn the key to Start. If you hear silence, it’s likely an ignition switch or starter relay issue. If you hear a click but no crank, that’s a starter or relay problem. If it cranks but won’t start, check the fuel, spark, or PATS system.
Rule Out Key and PATS Issues
Insert a spare key and try starting. If it works, your original key is worn. If not, check the security light on the dash. A rapidly flashing light means the key isn’t recognized (PATS issue). If it stays on, the immobilizer is active. It should turn off after 3 seconds if the system is normal.
Use an OBD-II scanner to pull codes. Look for B1676 (Ignition Switch Input Circuit Failure) or U2019 (Lost Communication with Theft Deterrent Module). These often appear temporarily after switch replacement but confirm electrical circuit integrity.
Remove Steering Column Covers Safely
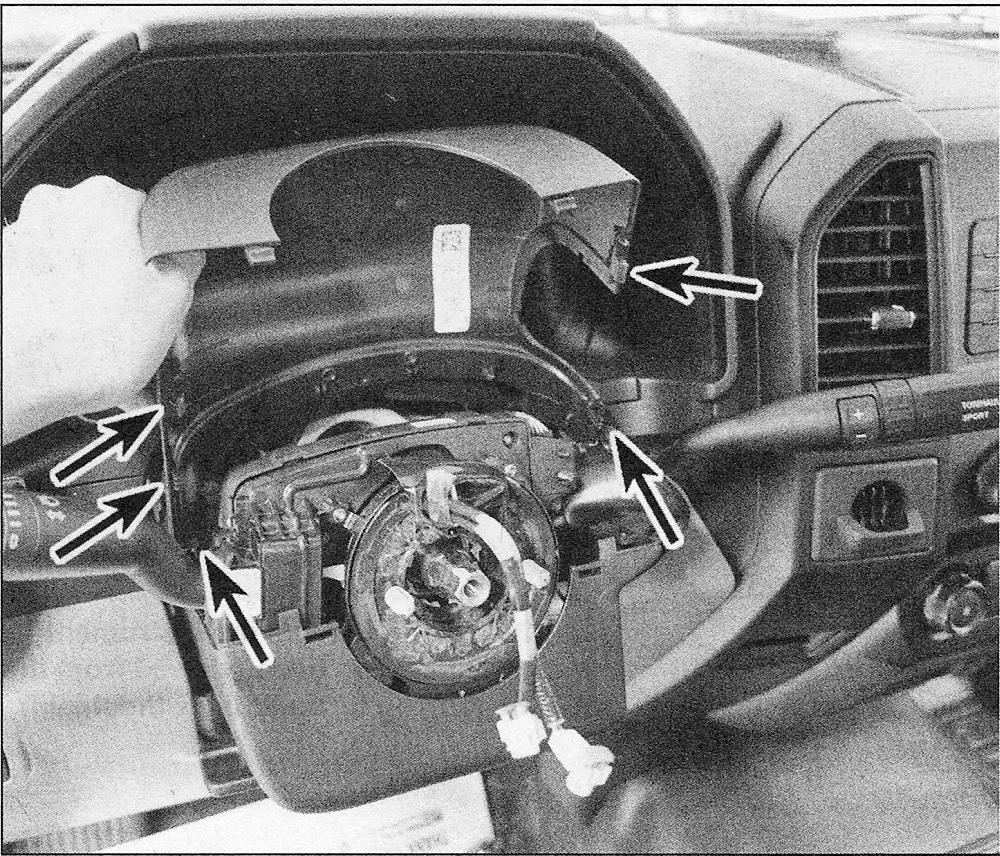
Accessing the ignition switch requires removing the steering column shrouds. Do it right to avoid breaking clips or scratching trim.
Remove Lower Cover (2009–2019 Models)
Locate three screws under the lower shroud. Use a 5.5 mm socket or 7/32-inch screwdriver to remove them. Gently pull the cover downward. Don’t force it. Set it aside carefully.
Pro Tip: On 2011 models, some fasteners may be 1/4-inch screws. Always check first.
Remove Upper Trim Piece
Find three more screws on the upper trim. Remove them, then use a plastic trim tool to release the clips starting at the top edge. Work your way around until all clips pop free. Carefully lift the piece off.
Warning: Never use metal tools. Scratches are permanent, and you risk damaging airbag wiring.
Disconnect the Ignition Switch Connector

With both covers off, locate the ignition switch behind the lock cylinder. It has an electrical connector with top and bottom retention tabs.
Use a flat-blade screwdriver to press both tabs simultaneously. Pull the connector straight out. Don’t twist or angle it.
Visual Cue: Look for even pressure on both tabs. Broken connectors cause intermittent starts.
Remove the Old Ignition Switch
On most F-150s (2011–2019), the switch snaps into place with four plastic retention tabs (top, bottom, left, right).
Release Retention Tabs
Hold the switch body and use your thumbs to compress the top and bottom tabs at the same time. Wiggle slightly while pulling straight back. It should slide out smoothly.
Important: If it resists, stop. Forcing it breaks tabs. Realign your pressure and try again.
Some models require slight rotation or vertical alignment. Always note the orientation before removal.
Install the New Ignition Switch Correctly

A misaligned switch causes no-crank even with a brand-new part. Follow these steps precisely.
Align the Switch Vertically
Ensure the new switch is oriented parallel to the steering column. Match the internal actuator slot with the metal linkage rod. Misalignment prevents engagement.
Check: Tabs must align with housing slots. Compare with the old unit if unsure.
Insert and Lock the Switch
Press the switch straight in with even hand pressure on both sides. Compress the top and bottom tabs as you push. When fully seated, you’ll hear a distinct click.
Gently tug it. No movement means it’s locked.
Warning: Never hammer or force it. If it doesn’t click, remove and recheck alignment.
Reconnect the Electrical Plug
Plug the connector back in firmly. Press until you hear a solid click. Ensure both retention tabs snap into place.
Pro Tip: Apply dielectric grease to the connector before plugging in to prevent corrosion.
When to Replace the Lock Cylinder Instead
Don’t confuse the ignition switch (electrical) with the lock cylinder (mechanical). If your key won’t turn or binds, the lock cylinder is likely the issue.
Symptoms of Lock Cylinder Failure
These symptoms indicate lock cylinder problems rather than switch issues.
• Key won’t rotate past ACC
• Steering wheel lock binds
• Worn key causes sticking
• Internal breakage prevents turning
To remove the lock cylinder, insert the key and turn to RUN. Then insert a paperclip or small pick into the side release hole. Press the retaining pin and pull the cylinder out gently.
Recommendation: Replace with OEM if possible. Aftermarket units often fail within months.
Program Keys After Cylinder Replacement
If you replaced the lock cylinder, programming is required. The ignition switch alone does not require programming.
Use OBD-II Tool (Xtool, FORScan)
Plug the tool into the OBD-II port. Select Add Key, then Ford, then PATS. Insert a working key and turn to ON. Remove it, then insert the new key and turn to ON. Wait for the confirmation tone, which takes 10 to 30 seconds.
Note: Air Key Mode (on Xtool X100 Pad) allows programming without physical key insertion.
Two-Key Self-Learn Method (If Available)
This method only works if you have two already-programmed keys. Insert Key 1 and turn to ON for 3 seconds, then remove it. Insert Key 2 and turn to ON for 3 seconds, then remove it. Insert the new key and turn to ON. Programming completes automatically.
Limitation: This fails if only one key works. Use a programmer or locksmith in that case.
Reassemble the Steering Column
Now that the switch is installed and tested, reassemble the covers.
Reinstall Upper Trim
Align the three clips on the upper piece. Press down evenly until fully seated. Then insert and tighten the three 1/4-inch screws.
Attach Lower Cover
Position the lower shroud and secure with three 5.5 mm screws. Ensure no gaps or rattles.
Final Check: Cycle the key several times before tightening all screws. This catches issues early.
Test the Ignition System Fully
Never assume it works. Test every position.
Functional Test Sequence
Turn the key to ACC. Radio, HVAC, and dash lights should come on. Turn to RUN. Instrument cluster activates and the security light turns off after 3 seconds. Turn to START. The engine cranks immediately and fires up. Repeat this sequence 3 to 5 times to check consistency.
If it cranks but won’t start, the key isn’t programmed (PATS issue).
Clear Temporary Codes (Optional)
Disconnect the negative battery terminal for 30 seconds. This clears false codes like B1676 or U2019 that may appear post-replacement. Reconnect and retest.
Avoid Common Installation Mistakes
Even experienced DIYers make these errors. Don’t lose time fixing preventable issues.
Misaligned Switch Orientation
This is the most common cause of no crank after replacement. Always double-check vertical alignment, actuator rod engagement, and full tab engagement. Take a photo before removal for reference.
Using Low-Quality Aftermarket Switches
User reports show aftermarket switches failing within 6 to 12 months. OEM units (Ford-branded) last years, even in extreme heat.
Authenticity Check: Look for ventilation holes in packaging. Genuine Ford parts have them. Fakes don’t.
Skipping the Spare Key Test
Always test with a known-good key before disassembly. Many switch problems are just worn keys.
Maintenance Tips for Longevity
Extend the life of your new ignition system with simple habits.
Avoid Heavy Keychains
Extra weight on the key stresses the lock cylinder and actuator rod. Over time, this wears out the switch.
Recommendation: Carry only essential keys when driving.
Lubricate Sparingly
Use graphite-based spray (not oil) in the keyway once a year. Oil attracts dust and gums up internals.
Inspect Connectors Regularly
Check for corrosion or loose pins in the ignition switch connector. Clean with electrical contact cleaner if needed.
Tip: Apply dielectric grease during installation to prevent future moisture damage.
Final Verification and Next Steps
You’ve replaced the switch, reassembled the column, and tested ignition. Now ensure everything is set for long-term reliability.
Confirm No Warning Lights
If the airbag light is on, it’s likely from disturbing SRS connectors during work. Reset it with a scan tool. This doesn’t affect starting. Other lights (check engine, battery) should be off.
Keep a Spare Programmed Key
Always have at least one backup key programmed and stored safely. Losing all keys means towing to a dealer for reprogramming.
Investment Tip: Investing in an Xtool X100 Pad ($200) pays for itself after two key replacements.
Consider Replacing Both Components
If the lock cylinder is worn, the ignition switch likely has similar wear. Replacing both together prevents repeat jobs.
Frequently Asked Questions About Changing Ignition Switch on Ford F-150
How do I know if my Ford F-150 needs an ignition switch or a lock cylinder replacement?
If your key turns normally and dashboard lights illuminate but the starter doesn’t engage (silent crank), the ignition switch is likely at fault. If your key won’t turn or binds in the cylinder, the lock cylinder needs replacement.
Can I replace the ignition switch on my F-150 without special tools?
Yes. The ignition switch itself requires no programming and no specialized tools beyond basic hand tools. You need a 5.5 mm socket, a flat-blade screwdriver, and a plastic trim tool. Programming tools are only required if you replace the lock cylinder.
How long does it take to replace the ignition switch on a Ford F-150?
The job takes 30 to 60 minutes for most DIYers. Experienced mechanics can complete it in about 30 minutes. The most time-consuming part is removing and reinstalling the steering column covers.
Do I need to program the new ignition switch?
No. The ignition switch is an electrical component that doesn’t require programming. You only need to program keys if you replace the ignition lock cylinder (which contains the transponder reader).
What causes ignition switch failure on Ford F-150 trucks?
Common causes include wear from heavy keychains, age and mileage, heat exposure (especially in warm climates), and corrosion in the electrical connector. Using low-quality aftermarket parts also leads to premature failure.
Can I use an aftermarket ignition switch, or should I buy OEM?
OEM (Ford-branded) switches are strongly recommended. User reports consistently show aftermarket switches failing within 6 to 12 months, while OEM units often last the life of the vehicle. The extra cost is worth the reliability.
Key Takeaways for Changing Your Ford F-150 Ignition Switch
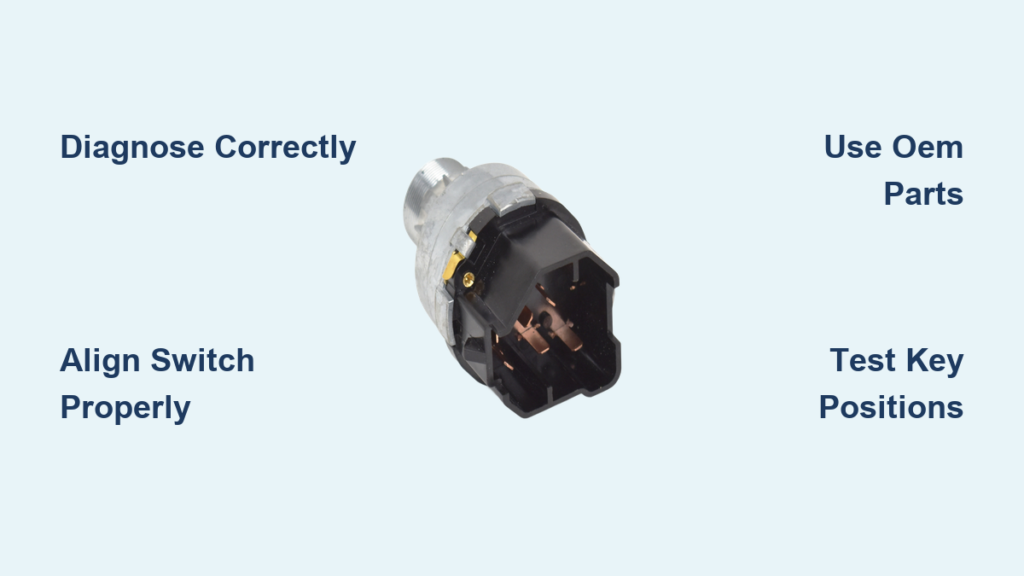
Replacing the ignition switch on a Ford F-150 is a straightforward DIY repair that saves significant money compared to dealership service. The most critical steps are proper diagnosis (ruling out battery, key, and PATS issues), careful alignment during installation, and using quality OEM parts.
Always test the ignition system through all positions (ACC, RUN, START) before fully reassembling the steering column. If you replaced the lock cylinder instead of (or in addition to) the switch, remember that key programming is required through an OBD-II tool or locksmith.
With this guide, you’ve saved $150 to $300 in labor and gained the confidence to handle future electrical repairs on your truck. Keep a spare programmed key on hand, avoid heavy keychains, and your new ignition switch should provide years of reliable service.


