
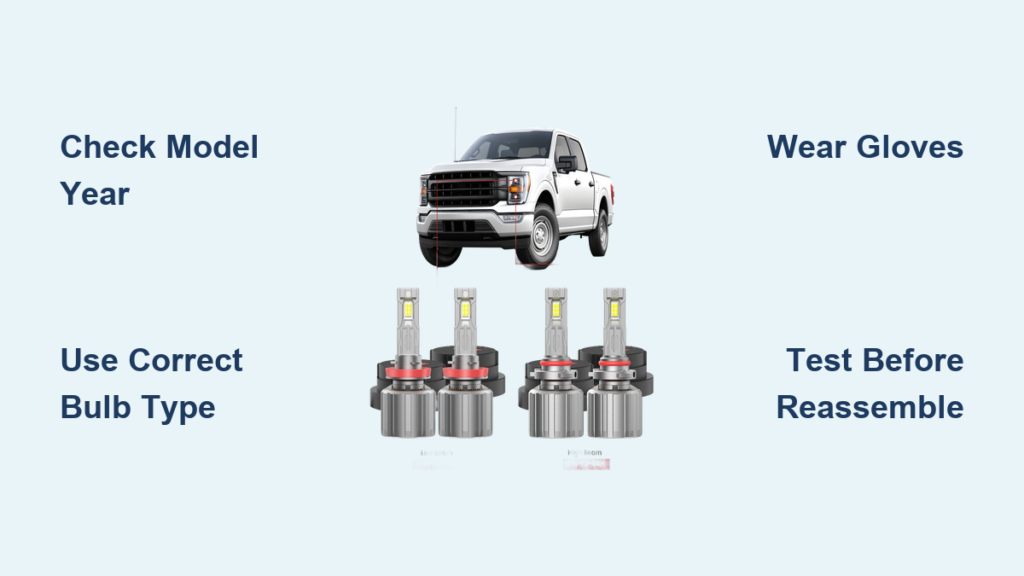
A dim or burnt-out headlight on your Ford F-150 isn’t just an inconvenience, it’s a safety hazard. Whether you’re driving at night, in rain, or through fog, properly functioning headlights are essential for visibility and legal compliance. The good news? Replacing an F-150 headlight bulb is a doable DIY job that takes under 30 minutes with the right guidance. But here’s the catch: the process varies drastically by model year. From removing the entire headlight assembly on 2009-2014 models to simple wheel-well access on 2015 and newer trucks, knowing your truck’s setup is critical. This guide breaks down exact steps, tools, bulb types, and pro tips for every generation so you can fix it right the first time.
Access Methods by F-150 Model Year
The biggest factor in how to change your F-150 headlight bulb is what year your truck is. Jumping in blind can lead to broken clips, stripped screws, or electrical damage. Ford redesigned the F-150 headlight system in 2015, making replacement much simpler for newer models. Below are the three main eras of F-150 headlight design, so follow the section that matches your truck.
2009-2014 F-150: Remove the Headlight Assembly
On these models, you cannot access the bulb from behind without removing the entire headlight unit. The system uses a single H13 dual-beam bulb for both low and high beams, so replacing it requires front-end disassembly.
Step 1: Remove the Three 10mm Bolts
Locate the headlight assembly and remove three 10mm bolts. Two bolts sit at the top edge of the housing, and one is near the front corner closest to the grille. These bolts anchor into plastic inserts, so don’t over-tighten during reassembly or they’ll strip. Use a socket wrench with extension for better leverage.
Step 2: Detach Push Clips and Dust Cover
Behind the headlight, you’ll find a rubber or plastic dust cover secured by a push pin. Press the center pin down with a flathead screwdriver, then pull the outer housing free. Set clips aside safely because these break easily. Store them in a small container so they don’t roll away.
Step 3: Pull Headlight Forward Carefully
Once bolts and clips are out, gently pull the headlight straight forward. It’s held by snap tabs on the fender side, so wiggle it slowly to avoid cracking. Keep the wiring connected and support the unit as you swing it outward. Don’t let the harness strain.
Step 4: Replace the H13 Bulb
Disconnect the electrical connector by pressing the locking tab. Grasp the bulb by its plastic base only because touching the glass causes hot spots and premature failure. Rotate counterclockwise about one-third turn to unlock, then pull the bulb straight out. Install the new H13 by aligning the three tabs, inserting, and turning clockwise until it clicks. Reconnect the harness securely.
Step 5: Reinstall the Headlight Unit
Slide the headlight back into place and align all mounting points. Hand-start the bolts first, then tighten evenly and gradually. Don’t torque one fully before others or you risk cracking the housing. Reattach the dust cover and push pin. Test the lights before final tightening to confirm everything works.
Pro Tip: Replace both bulbs at the same time. Even if one works, halogen bulbs degrade over time, and uneven brightness reduces visibility at night.
2015-2020 F-150: Wheel-Well Access

Starting in 2015, Ford redesigned the F-150 to allow rear access via the inner fender liner. There’s no need to remove the headlight assembly. Just pop a few clips and reach through the wheel well. This applies to halogen models only. LED or adaptive headlights may require different procedures.
Step 1: Turn Wheels for Clearance
For passenger-side work, turn the steering wheel fully to the right. For driver-side work, turn fully to the left. This moves the tire away from the fender liner, giving you room to peel it back and access the bulb from behind.
Step 2: Remove Fender Liner Fasteners
Remove three 7/32 inch (5.5mm) screws, one screw-in push pin, and one friction-fit push pin. For the friction-fit pin, use thin needle-nose pliers to gently wiggle it out. Don’t yank because these plastic pins snap easily. Store screws in a magnetic tray or small container.
Step 3: Peel Back Liner and Expose Housing
Fold the inner fender liner upward behind the tire. Use a bungee cord to hold it in place. You’ll now see the rear of the headlight housing with two rubber dust covers. One is for low beam, the other for high beam.
Step 4: Remove H11 Low Beam or 9005 High Beam
Pull the rubber cover straight off by grabbing at the 12 and 6 o’clock positions. Twist the socket counterclockwise to unlock, then pull the bulb and socket out together. For the high beam, space is tight, so disconnect the harness after removing the bulb to avoid damaging the socket.
Step 5: Install New Bulb Correctly
Wear clean gloves or use a lint-free cloth. Handle only by the plastic base and never touch the glass. For H11 low beam, align the notch or flat edge with the housing slot. Insert and twist clockwise until it clicks into place.
Critical Warning: Never touch the bulb glass. Oil from your skin creates hot spots when the bulb heats up, leading to cracking, flickering, or early burnout.
Step 6: Reconnect and Seal
Plug the harness in firmly and listen for a click. Reattach the rubber dust cover by pressing the center first, then working outward. OEM covers seal better than stiff aftermarket ones, so inspect yours for cracks.
Step 7: Reassemble Without Overtightening
Return the fender liner to position. Reinstall fasteners in reverse order: press-in pin first, then screw-in pin, then three screws top to bottom. Snug is enough because over-torquing strips plastic threads.
Step 8: Test Before Closing Up
Turn on headlights to verify low beam works. Pull the stalk for high beam. If it doesn’t work, check rotation and locking, confirm the harness is fully seated, or swap bulbs to test for dead-on-arrival issues.
Time Saver: Some 5.0L models have enough clearance to flex the liner without removing any hardware. Try this first to save time.
2021 and Newer F-150: Same Access, Tighter Fit
The 2021 and newer F-150 keeps the wheel-well access method, but engine bays are tighter, especially on high-trim models with larger wheels like 20-inch rims. The procedure is nearly identical to 2015-2020, but visibility is worse and patience is required.
Step 1: Fold Liner and Remove Rubber Grommet
Turn the steering wheel to full lock. Lift the fender liner up and behind the tire. Locate the large rubber grommet covering the socket and pull it straight out. No tools needed for this step.
Step 2: Swap Bulbs Using a Phone for Visibility
With limited visibility, use your phone’s camera or a small mirror to watch the socket as you twist. This prevents misalignment and saves 10 minutes of frustration. The process is the same: twist counterclockwise to remove, clockwise to install.
Step 3: Reinstall Grommet Fully
After replacing the bulb, press the rubber plug back in until it’s flush and sealed. This prevents moisture and debris from entering the housing and causing fogging or corrosion.
Step 4: Confirm Both Beams Work
Test low and high beams immediately. If one fails, double-check socket rotation, electrical connection, and bulb compatibility. It’s easier to fix now than to reassemble twice.
User Note: On my 2022 Lariat, I barely fit my hand in there. A mirror saved me 10 minutes and a lot of cussing.
F-150 Headlight Bulb Types by Year
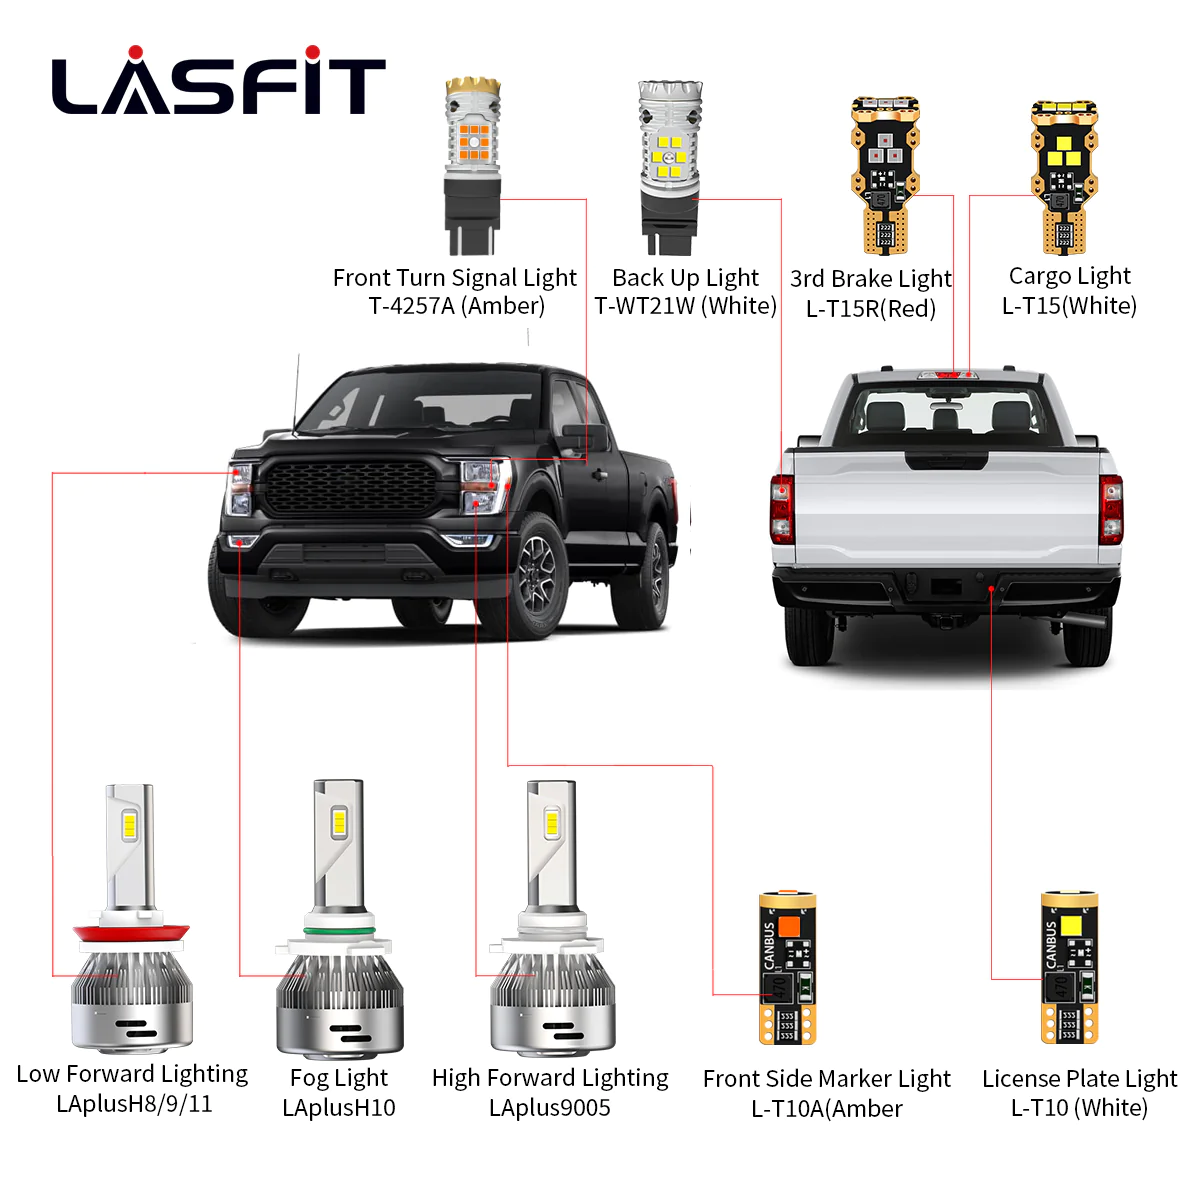
Using the wrong bulb is the number one reason for failed replacements. Match your model year exactly to avoid compatibility issues.
2009-2014: H13 Dual-Beam Bulb
This generation uses a single H13 (also called 908) bulb for both low and high beams. It’s a dual-beam design where one filament switches for high beam function. Wattage is typically 55W for low and 65W for high. Always confirm with your owner’s manual or the old bulb label.
2015-2020 and 2021+: H11 and 9005
These models use two separate bulbs per side. The low beam is an H11 bulb at 55W, and the high beam is a 9005 (HB3) at 65W. Some sources list 95W for high beam, but OEM specification is 65W. Verify by checking your old bulb or consulting the owner’s manual.
Warning: Do not install LED bulbs in halogen housings unless specifically rated for it. This can cause glare, misfocus, or error messages on your dashboard. Only use DOT-approved LED bulbs with CANBUS compatibility if upgrading.
Tools Needed for F-150 Headlight Replacement
Having the right tools prevents frustration and broken parts. Here’s what you need.
For 2009-2014 models, you’ll need a 10mm socket wrench or ratchet, a flathead screwdriver for push clips, and clean gloves or a lint-free cloth. For 2015-2020 and newer models, gather a 7/32 inch (5.5mm) screwdriver or socket, thin needle-nose pliers for push pins, a bungee cord to hold the fender liner, and clean rubber gloves. A magnetic tray or small container keeps screws from rolling away. A flashlight or phone light helps with visibility in tight spaces.
Common Mistakes to Avoid
Even experienced DIYers mess up simple steps. Avoid these pitfalls to ensure success.
Never Touch Bulb Glass
Skin oils transfer to the quartz glass, creating hot spots when the bulb heats up. This leads to cracking, flickering, or early burnout. Always wear nitrile or rubber gloves when handling halogen bulbs. If you touch the glass by accident, wipe it clean with isopropyl alcohol and a lint-free cloth before installation.
Replace Both Bulbs Simultaneously
One bulb burns out, but the other is likely 50% dimmer and yellower due to age. Replacing only one creates uneven lighting that reduces night vision and safety. Save time by doing both sides at once.
Don’t Force Anything
If a clip won’t budge or a bulb won’t twist, recheck alignment and look for obstructions. Forcing plastic parts leads to breakage and expensive replacements. Use a mirror or light to see what you’re doing.
Check Beam Alignment After Reassembly
Misaligned beams can blind oncoming drivers or leave dark spots on the road. Park on level ground 25 feet from a wall, mark the center of each beam, and adjust using the screws on the rear of the housing. The ideal aim is slightly downward and inward toward the road center.
Upgrading to LED or HID Bulbs

Many F-150 owners want brighter light and longer bulb life. Here’s what to consider before upgrading.
LED Bulbs: Brighter but with Risks
LED bulbs offer 2-3 times brighter output and 25,000-plus hour lifespan. They’re also energy efficient. However, they may trigger bulb-out warnings and need CANBUS decoders. Some are not DOT-compliant, which can cause issues during safety inspections. If you upgrade, choose DOT-approved LED bulbs with CANBUS compatibility from reputable brands like Sylvania or Philips.
HID Bulbs: Professional Install Recommended
HID kits produce intense white and blue light but require 25,000V to ignite. That’s dangerous if mishandled. Residual charge remains after power-off, so DIY installation isn’t recommended unless you’re experienced. HID kits in halogen housings often fail safety inspections and can blind other drivers.
Expert Recommendation: Stick with quality halogen bulbs for reliability, or have LED conversions done professionally if you want major brightness upgrades.
Final Checks and Maintenance
Seal Against Moisture
During replacement, inspect rubber dust covers for cracks, housing seals for brittleness, and ventilation tubes for blockages. Moisture causes fogging, corrosion, and premature bulb failure. Replace any damaged seals before reassembly.
Work One Side at a Time
Avoid mixing up screws, clips, or bulbs. Replace one headlight, test it, then move to the other side. This keeps everything organized and prevents errors.
Use Trusted Resources
O’Reilly Auto Parts offers free bulb matching and advice. F150Forum.com and Reddit r/F150 have real user photos and tips for model-specific help. Search with your exact year, like “F-150 headlight bulb 2018,” for targeted guidance.
User Verdict: Took me 12 minutes with gloves and a screwdriver. No special tools. That’s a common experience for 2015 and newer owners.
Frequently Asked Questions About F-150 Headlight Bulb Replacement
What bulb does a 2015 F-150 use for low beam?
The 2015 F-150 uses an H11 bulb for low beam and a 9005 (HB3) bulb for high beam. Both are standard halogen bulbs available at auto parts stores.
Can I change my F-150 headlight bulb without removing the tire?
For 2015-2020 models, you can sometimes access the bulb by flexing the fender liner without removing the tire, especially on 5.0L models with more clearance. However, turning the wheel and peeling back the liner usually provides better access.
Why does my new headlight bulb keep burning out?
Touching the bulb glass with bare hands causes oil contamination that creates hot spots and premature failure. Always wear gloves. Also check that the socket is clean and the bulb is properly seated.
Do I need to replace both headlight bulbs at once?
Yes, replacing both bulbs is recommended. Halogen bulbs degrade over time, so even if one works, the other is dimmer. Replacing both ensures even brightness and saves a second trip to the parts store.
Can I upgrade to LED bulbs in my halogen F-150?
You can, but only use LED bulbs specifically designed for halogen reflectors. Use DOT-approved options with CANBUS compatibility to avoid error messages and glare. Non-compliant LED conversions may fail inspections.
Key Takeaways for Changing Your F-150 Headlight Bulb
Changing an F-150 headlight bulb is fast, cheap, and empowering when done right. Match your model year to the correct procedure. Use wheel-well access for 2015 and newer trucks, or remove the headlight assembly for 2009-2014 models. Always wear gloves, never touch the bulb glass, and test the lights before full reassembly. Replace both bulbs for even brightness, and check beam alignment after installation. With the right approach, you can complete this fix in under 30 minutes and enjoy improved visibility and safety without a dealership visit.


