

You turn the dial to max heat, but cold air blasts through your vents while you shiver in the cab. This is one of the most common and frustrating issues F-150 owners face, especially in winter. The good news is the fix is usually straightforward once you know where to look.
This guide covers every possible cause of your F-150 not blowing hot air, from simple coolant top-offs to blend door actuator replacement. You’ll learn exactly how to diagnose the problem, what parts to buy, and which repairs you can do yourself.
Confirm Engine Reaches Normal Operating Temperature
Before checking any HVAC components, verify your engine is actually getting hot enough to produce heat. This is the first step because a cold engine cannot produce warm air regardless of what you do inside the cab.
Check Dashboard Temperature Gauge
Your temperature gauge should sit near the center of the display after the engine warms up. If it reads low or fluctuates, the engine never reaches operating temperature, which means no heat for you.
Use Infrared Thermometer for Precision
Point an infrared thermometer at the thermostat housing near the upper radiator hose. After 10 to 15 minutes of idling, the reading should be between 195°F and 220°F. Anything below 180°F means coolant isn’t hot enough to heat the cabin.
Most F-150 thermostats open at 195°F, so this temperature is critical for heat production. If your engine runs cool, suspect a stuck-open thermostat, failed coolant temperature sensor, or low coolant level.
Test Heater Hose Temperatures at Firewall
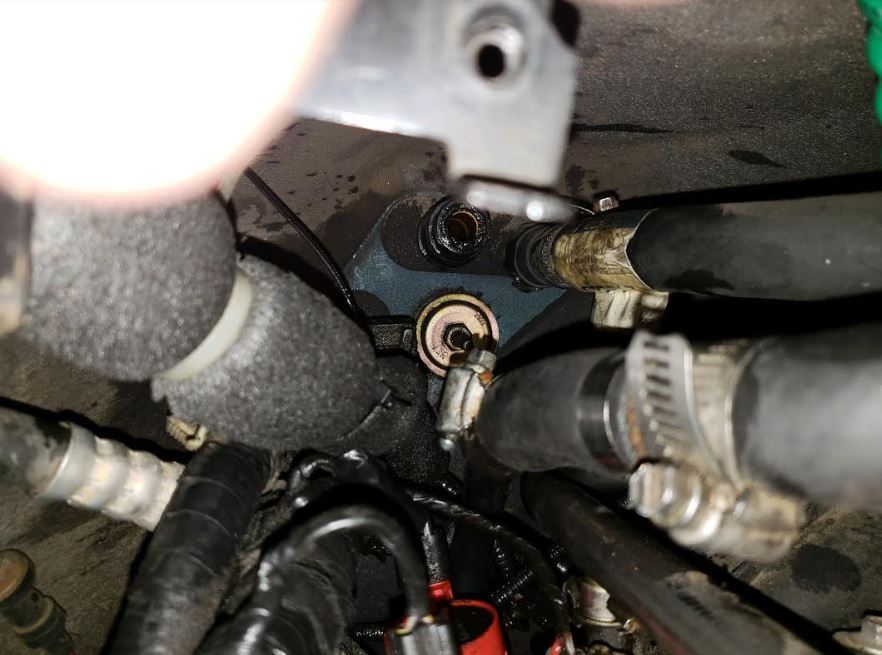
This is the most important diagnostic step because it tells you exactly where the problem lies. The solution is either on the engine side of the firewall or the cabin side.
Locate the Heater Hoses
Find the two 5/8-inch heater hoses entering the cabin near the brake booster. The inlet hose carries hot coolant from the engine to the heater core, and the outlet hose returns coolant to the engine.
Interpret Temperature Results
After 10 minutes of warm-up, feel both hoses using gloves or an infrared thermometer. The results tell you exactly where to focus your repair efforts.
Both hoses hot means coolant is flowing through the heater core properly, so the problem is inside the cab. Inlet hot but outlet cold indicates a blockage or air lock in the cooling system. Both hoses cold means no coolant is circulating at all, pointing to low coolant, a bad thermostat, or a failed water pump.
Top Off Coolant and Bleed Air Pockets
Even a small coolant deficit can prevent your heater from working. Air pockets trapped in the system also block hot coolant from reaching the heater core.
Check Coolant Level
Do this when the engine is cold. The level should be between the MIN and MAX marks on the reservoir. Being 1/2 inch below MIN can cause air locks and no heat.
Bleed Air Using the Incline Method
Park your truck with the front elevated on ramps or a curb. Remove the reservoir cap and run the engine at 2,000 RPM for 10 minutes. Squeeze the upper radiator hose repeatedly to release trapped bubbles, then top off coolant as needed.
For stubborn air locks, use a vacuum cooling system filler tool. This pulls all air out before refilling, which is more effective than manual bleeding.
Flush Heater Core for Blockages
A clogged heater core is common, especially if you’ve neglected coolant changes or used the wrong coolant type. Flushing can restore flow without replacement.
Disconnect Hoses at Firewall
Clamp the hoses to prevent coolant spills, then disconnect both 5/8-inch hoses from the firewall. Have a bucket ready to catch residual fluid.
Flush in Both Directions
Run water through the inlet hose until it runs clear from the outlet, then reverse flush from outlet to inlet. The reverse flush is more effective at dislodging stubborn debris.
If the flushed water is milky or rusty, perform a full cooling system flush including the radiator and engine block. Use only aluminum-safe radiator flush products.
Diagnose Blend Door Actuator Failure
The blend door actuator is the number one cause of no heat in F-150s, particularly in 2004 to 2014 models. This component controls whether air flows over the hot heater core or bypasses it.
How the Actuator Works
The temperature blend door actuator rotates a door inside the HVAC plenum. When you set the temperature to hot, the door opens to let air flow over the hot heater core. When it fails, the door stays in the cold position.
Signs of Actuator Failure
No heat even on the max heat setting is the primary symptom. Another telltale sign is no sound when changing temperature settings. On dual-zone systems, you might get cold air on one side while the other side works.
Test Actuator Operation
Turn the ignition on and switch the climate control from cold to hot. Listen near the glove box for a faint whirring or clicking sound. No sound indicates a failed actuator or power issue.
If you hear nothing, remove the actuator and use pliers to rotate the blend door shaft about 90 degrees to the full-hot position. Turn on the blower. If hot air now blows, the actuator is definitely faulty.
Replace Faulty Blend Door Actuator
Replacing the actuator fixes the issue in most cases. Aftermarket units work well and cost significantly less than OEM parts.
Part Cost and Options
Aftermarket actuators cost $25 to $80, while OEM Motorcraft units run $75 to $150. For dual-zone systems, you’ll need to replace both actuators if the dash is already open.
Tools Required
You need a Phillips screwdriver, 7mm and 8mm sockets, a flashlight, and optionally a trim removal tool.
Step-by-Step Replacement
Remove the glove box by unclipping it and lowering it down. Unplug the electrical connector from the actuator. Remove the two or three mounting screws and pull out the old actuator. Install the new unit, making sure the gear aligns with the door shaft. Reconnect the electrical connector and test the system.
The rear mounting screw is often the hardest part, sometimes taking 90 minutes alone. Budget about 2.5 hours for the entire job.
Check Vacuum System on Pre-2010 Models
F-150s built before 2010 use vacuum motors rather than electric actuators to control HVAC airflow doors. Vacuum leaks cause different symptoms than actuator failure.
Symptoms of Vacuum Leaks
Listen for hissing sounds under the dash. You might also notice air doesn’t switch between modes like defrost, vent, and floor. Temperature changes may be delayed or not work at all.
Inspect Vacuum Lines
Follow the vacuum lines from the firewall to the HVAC box. Look for cracks, disconnections, or hoses that feel soft or swollen. Replace damaged sections with silicone vacuum hose for better durability.
Scan for HVAC Trouble Codes
A failed blend door actuator often sets a diagnostic trouble code even if no warning light appears on your dashboard. Basic OBD2 readers won’t catch these codes.
Use Advanced Scanner
Use a FORScan-compatible tool or professional-grade scanner to read HVAC-specific codes. Look for blend door position out of range, actuator stuck, or climate control module errors.
Some climate control modules need recalibration after actuator replacement. Your scanner can reset the position learned values.
Heater Core Replacement (Last Resort)

Only replace the heater core if flushing fails and your inlet and outlet hose temperatures don’t match. This is a major job on most F-150s.
Labor by Model Year
For 1987 to 1996 models, expect 4 to 6 hours of labor with access through the glove box. For 1997 to 2007 models, plan for 6 to 8 hours with partial dash removal. For 2008 and newer models, the job takes 8 to 12 hours or more and requires full dashboard removal.
DIY Risk Warning
Heater core replacement has a high risk of damaging dash components, wiring, or the HVAC housing. Coolant spills are common. Use OEM-style cores with molded ends and seals, not universal crimped types.
Check Recall for 2015-2019 Models
Ford issued a recall for 2015-2019 F-150s due to heater core clogs from coolant deposits, especially in cold climates.
What’s Covered
The recall covers free inspection, flush, heater core replacement if needed, and coolant system cleaning. This service is available only at Ford dealerships.
How to Check Your VIN
Visit the Ford Owner Portal and enter your VIN to check for open recalls. If you’re eligible, schedule a free repair appointment.
Prevent Future No-Heat Issues
Regular maintenance prevents most heating problems from recurring.
Flush Cooling System Every 100k Miles
Include back-flushing the heater core when you flush the cooling system. Use Motorcraft FL-86 DEX-COOL or an equivalent approved coolant. Never mix coolant types, as this causes gel formation and clogs.
Replace Thermostat Proactively
Replace the thermostat during coolant service if it’s over 10 years old. Use an OEM 195°F unit for proper operating temperature.
Inspect Vacuum Lines Early
On pre-2010 models, inspect vacuum lines during oil changes or winter prep. Replace with silicone hose for longer life.
Frequently Asked Questions About F-150 Not Blowing Hot Air
Why is my F-150 blowing cold air even on max heat?
The most common cause is a failed blend door actuator. Test by listening for a motor sound when changing temperature settings. If you hear nothing, the actuator needs replacement.
Can low coolant cause no heat?
Yes. Even being slightly low can cause air locks that prevent hot coolant from reaching the heater core. Check the reservoir level when the engine is cold and top off if needed.
How do I know if my heater core is clogged?
Check both heater hoses at the firewall after the engine warms up. If the inlet hose is hot but the outlet hose is cool or cold, the heater core is restricted and needs flushing or replacement.
Is there a recall for F-150 heater problems?
Yes. 2015-2019 F-150s are covered under a Ford recall for heater core clogs due to coolant deposits. Check your VIN at a Ford dealership for free repair.
Can I fix this myself or need a shop?
Most fixes are DIY-friendly, including thermostat replacement, coolant top-off, heater core flush, and blend door actuator replacement. Heater core replacement on 2008+ models is best left to professionals due to the extensive dash removal required.
Key Takeaways for Fixing F-150 Not Blowing Hot Air
Most F-150 heating problems fall into two categories: coolant system issues or blend door actuator failure. Start by testing the heater hoses at the firewall. Both hoses hot means the problem is inside the cab, likely the actuator. One cold hose means the cooling system needs attention.
Always check recall status for 2015-2019 models before paying for repairs. The blend door actuator is the most common fix and costs $25 to $80 for the part. With proper diagnosis, you can restore heat fast and avoid wasting money on unnecessary parts.


